STEP 1
Download FortiClient VPN 7 for macOS 10.15, 11 or 12.
Download FortiClient VPN 6.4 for macOS 10.14 and older.
See the Minimum requirements for Macs.
Note: SFU Managed Device should already have the FortiClient VPN app installed. If not, it is available for installation on SFU's Software Centre app on the device. Skip to Step 9 if the VPN client is already installed.
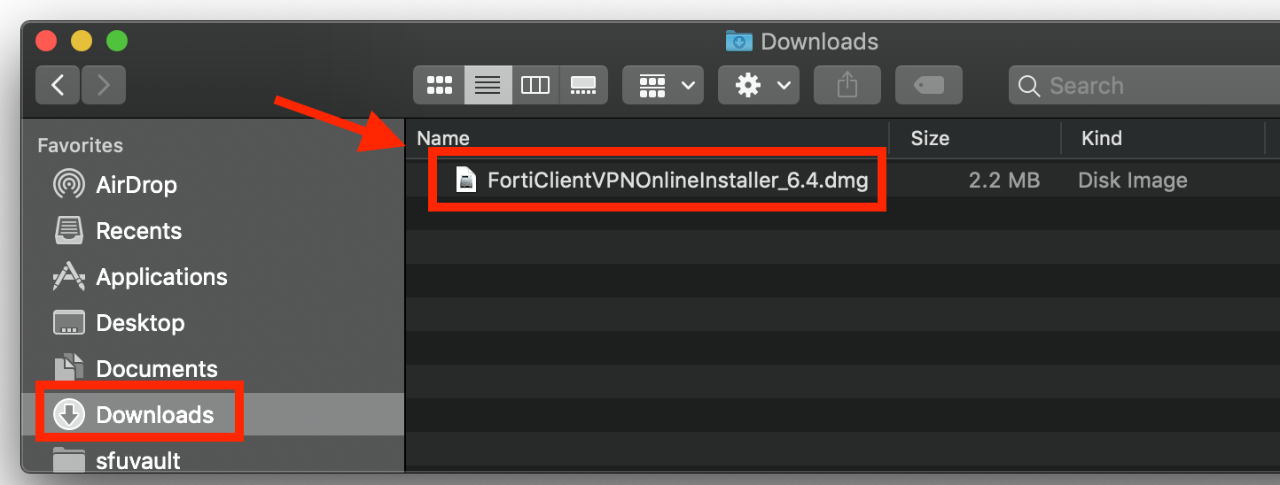
STEP 2
Run the Installer from the downloaded location by double clicking on it.
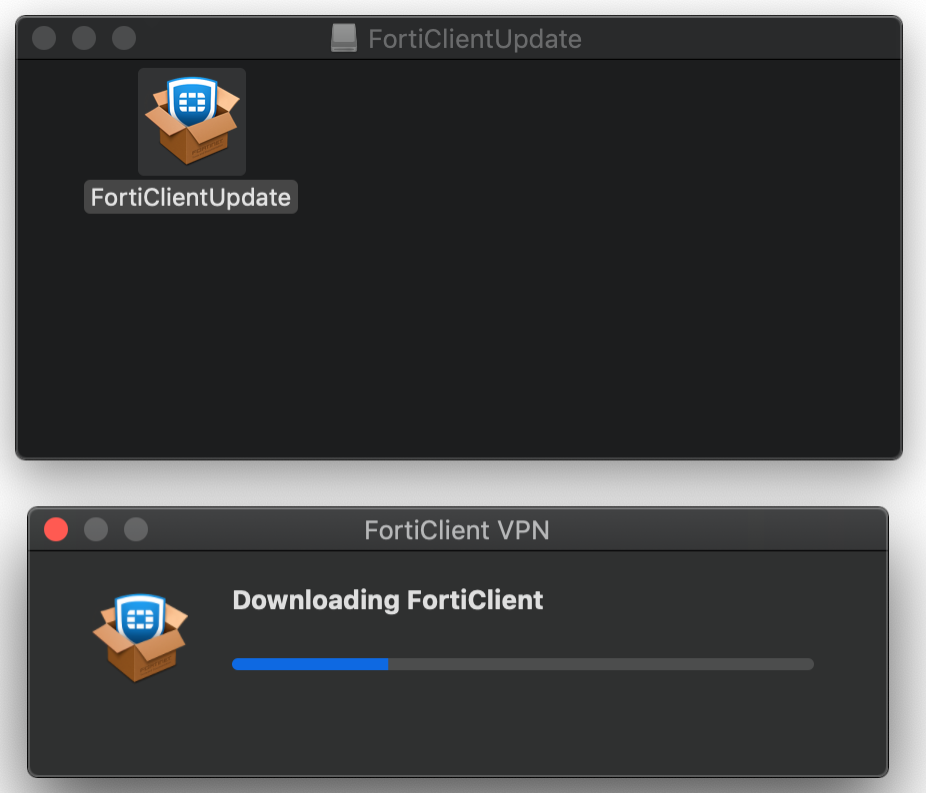
STEP 3
Double click on FortiClientUpdate to start downloading the full installer.
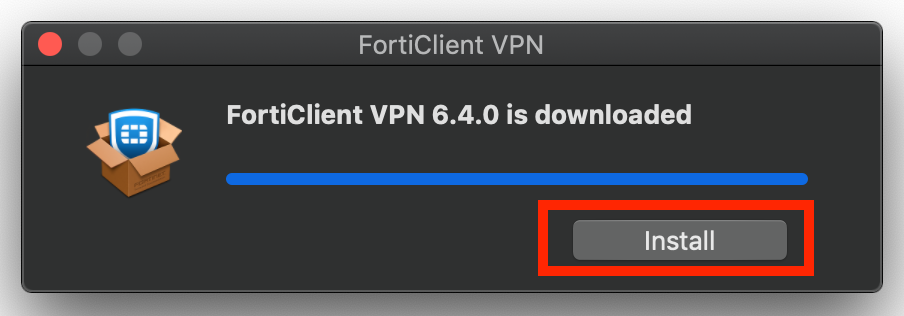
STEP 4
Click Install to continue.
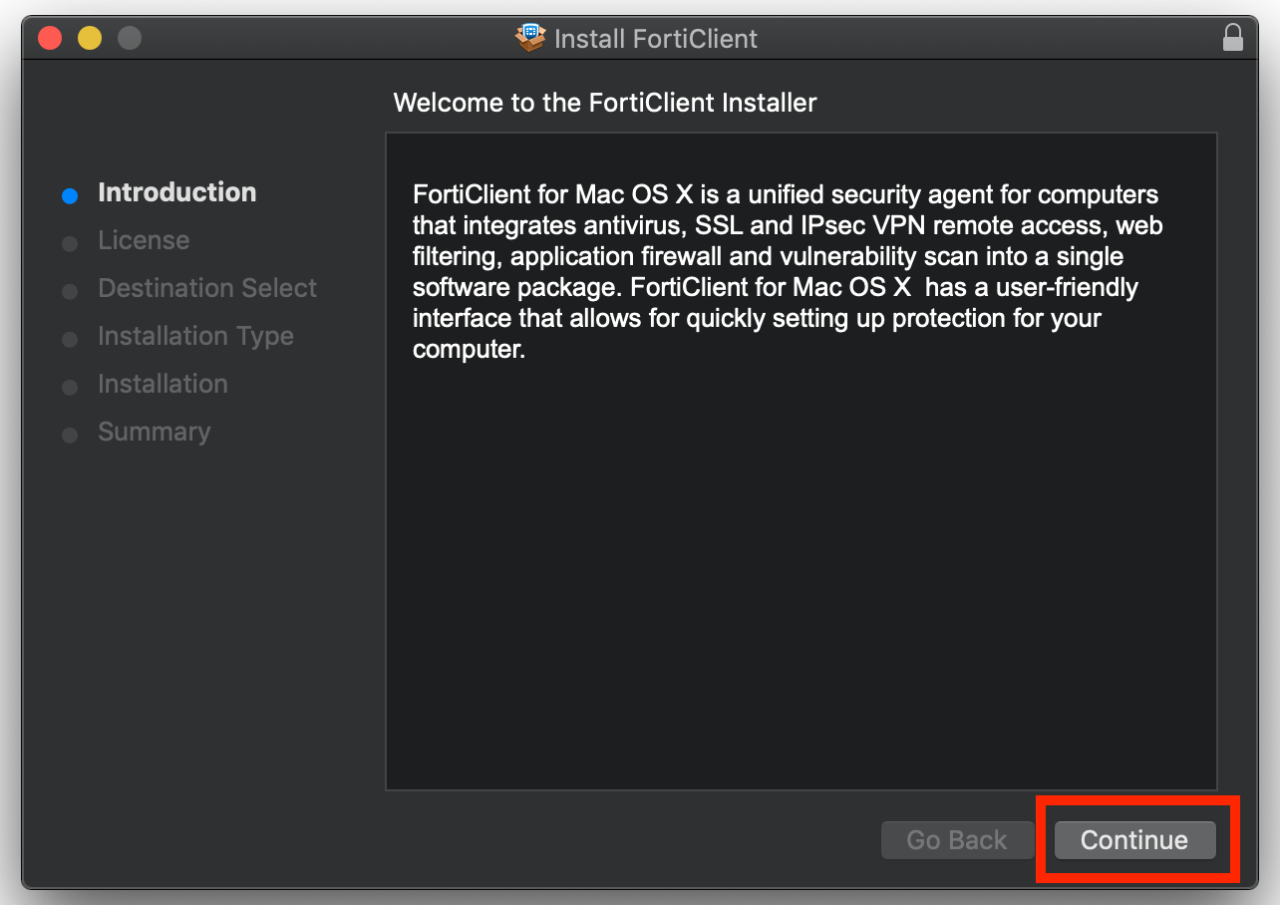
STEP 5
Click Continue.
STEP 6
Click Agree.

STEP 7
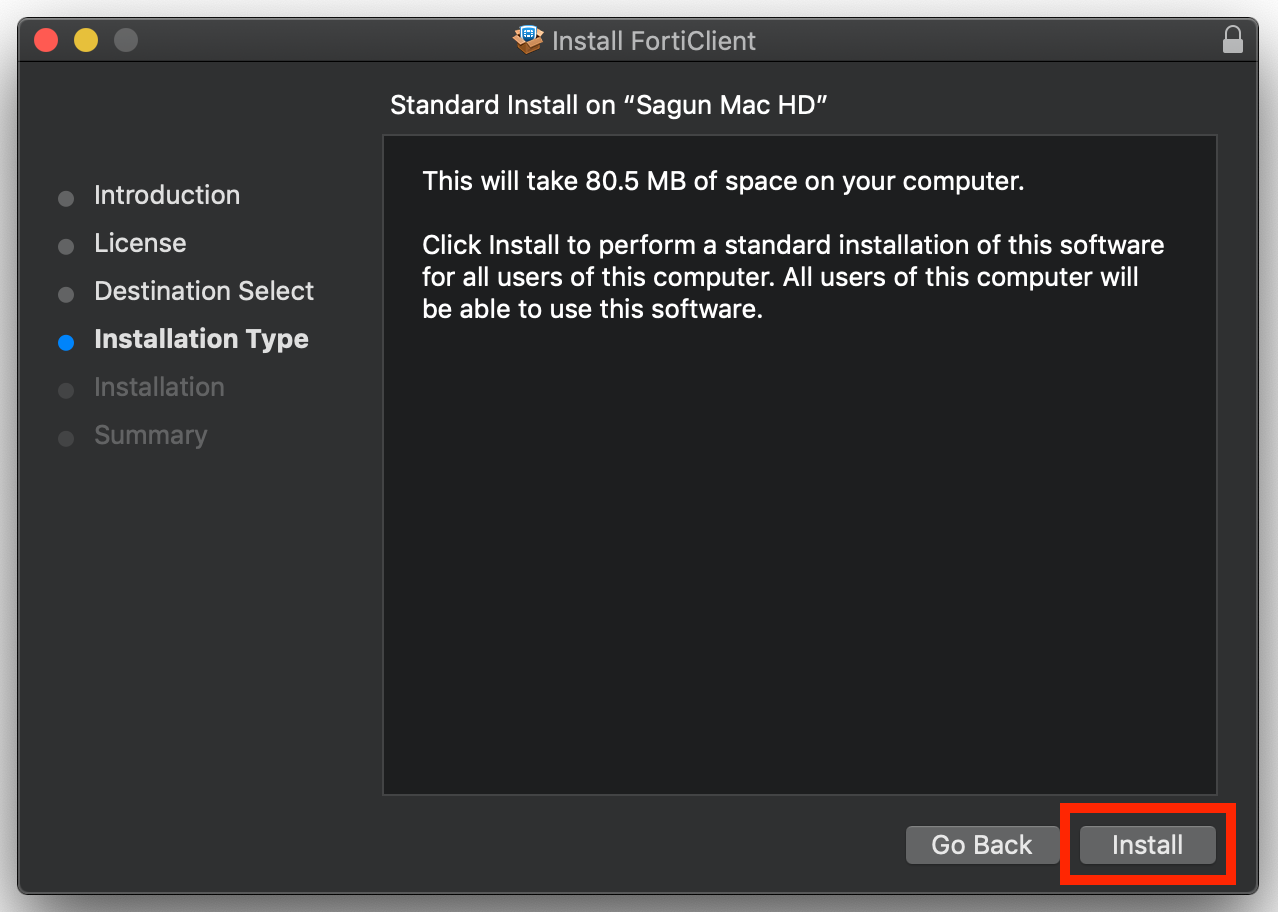
Click Install.
STEP 8
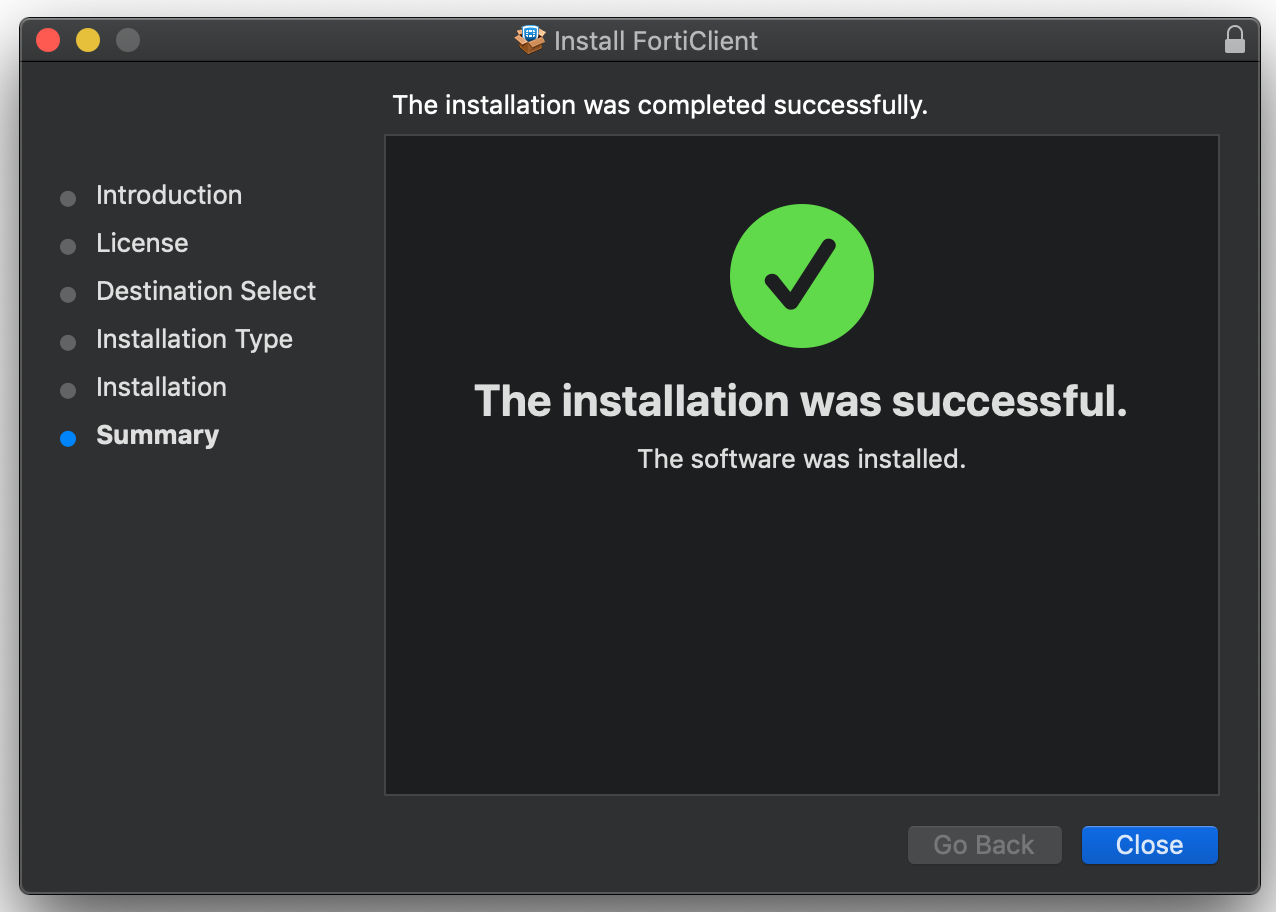
Click Close.
STEP 9
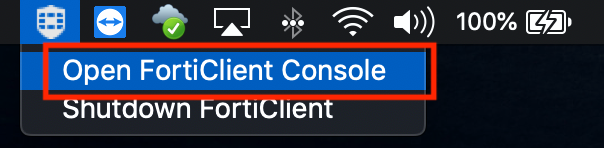
In the Menu bar, click FortiClient icon and then Open FortiClient Console.
STEP 10
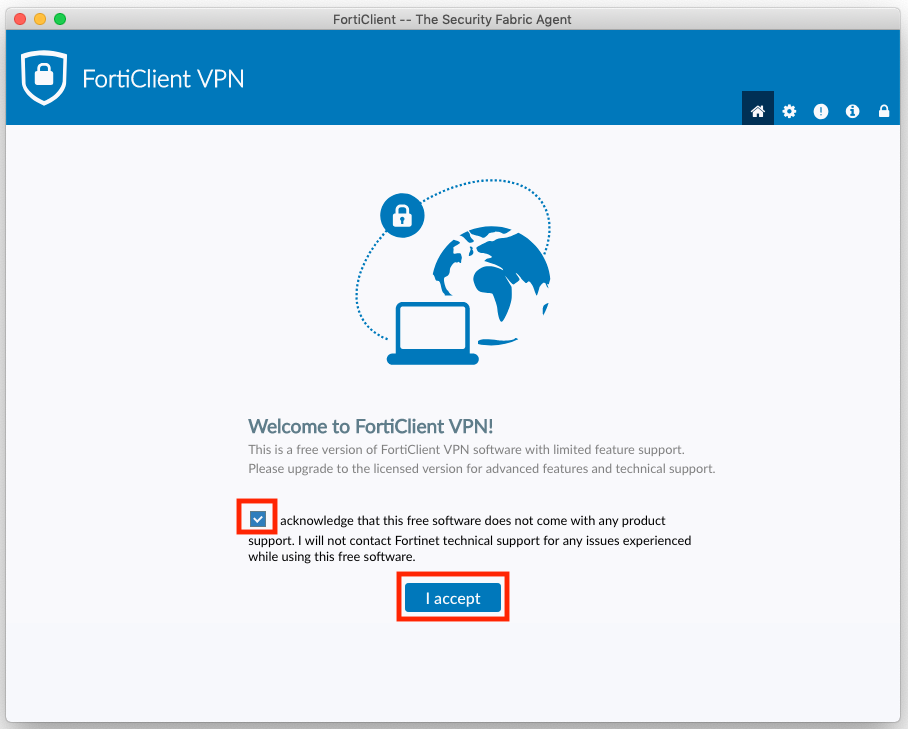
Select "I acknowledged..." and then click I accept.
STEP 11
Click Configure VPN.

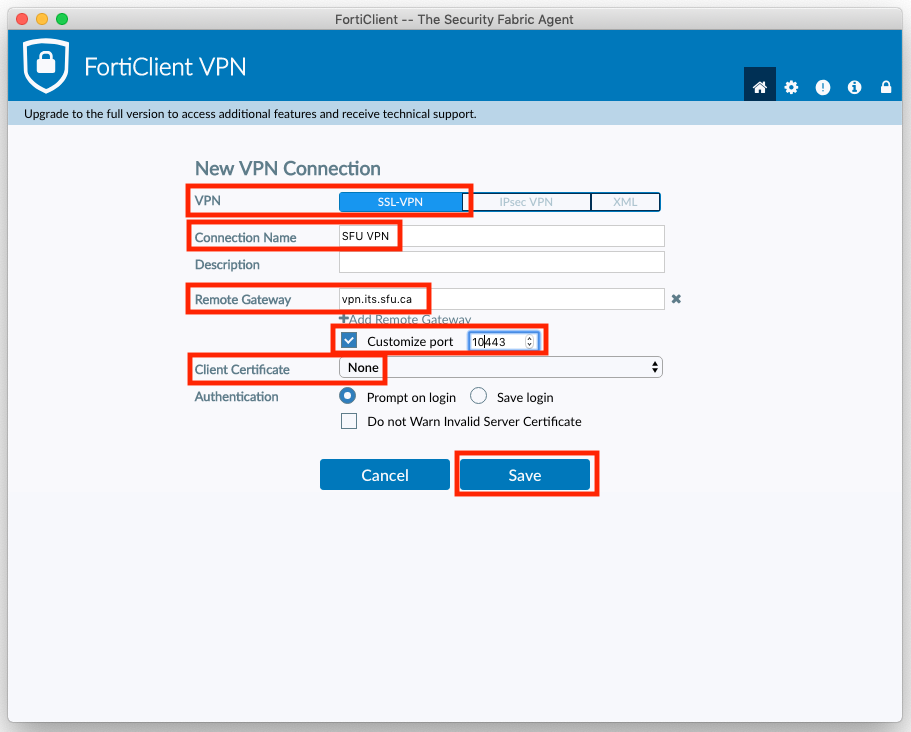
STEP 12
Configure using settings below and hit Save.
| VPN Type: |
SSL-VPN |
| Connection Name: |
SFU VPN |
| Remote Gateway: |
vpn.its.sfu.ca |
| Port: |
10443 |
| Client Certificate: |
None |
Note: Ensure that "Customize Port" is selected.
STEP 13
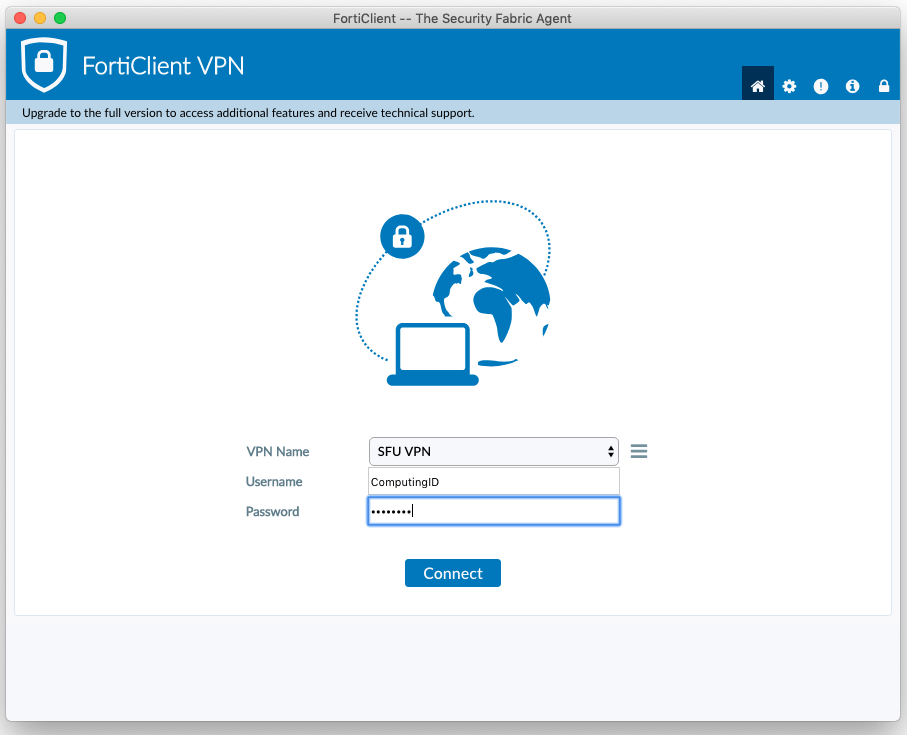
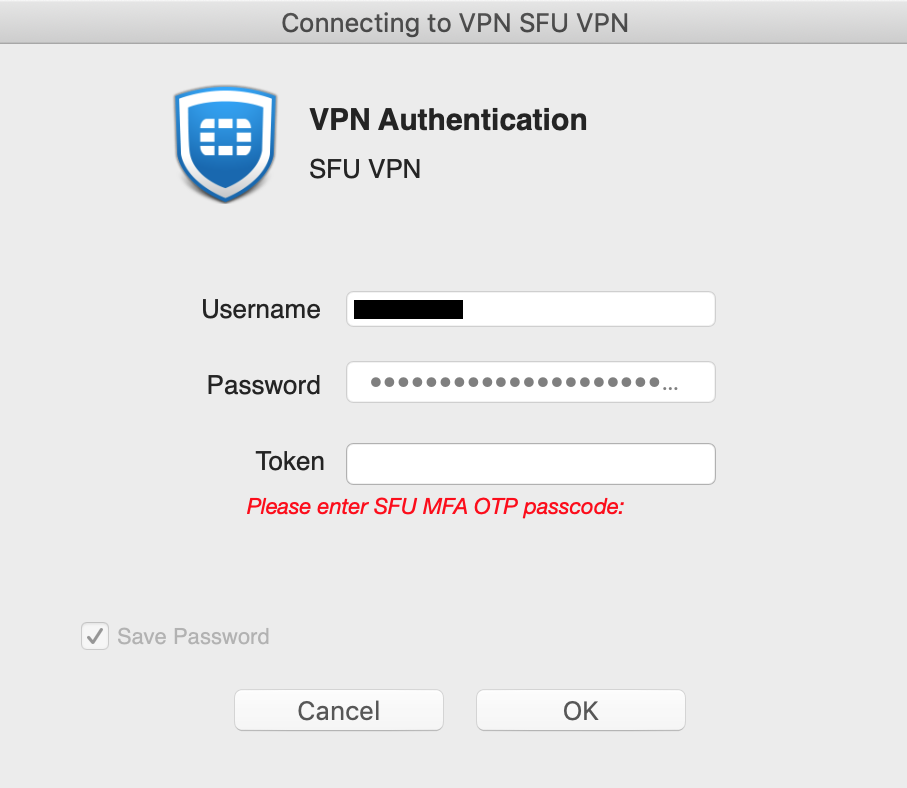
Enter your SFU Computing ID and password then click Connect.
STEP 14
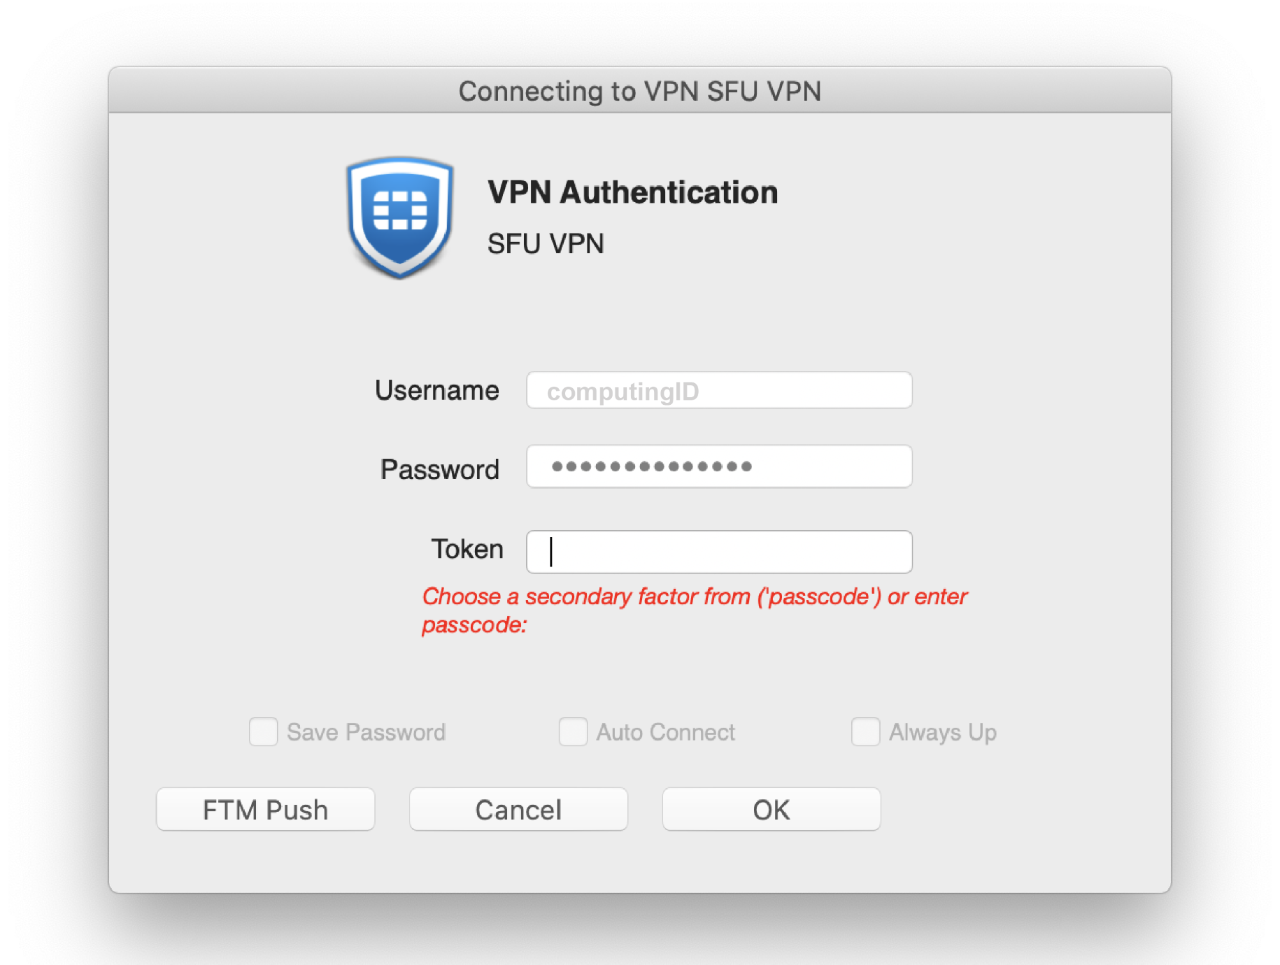
A final prompt for your SFU Multi-Factor Authentication (MFA) code will appear. Grab your MFA phone app or hardware token and enter your MFA code in the box next to Token, then press OK.
STEP 15
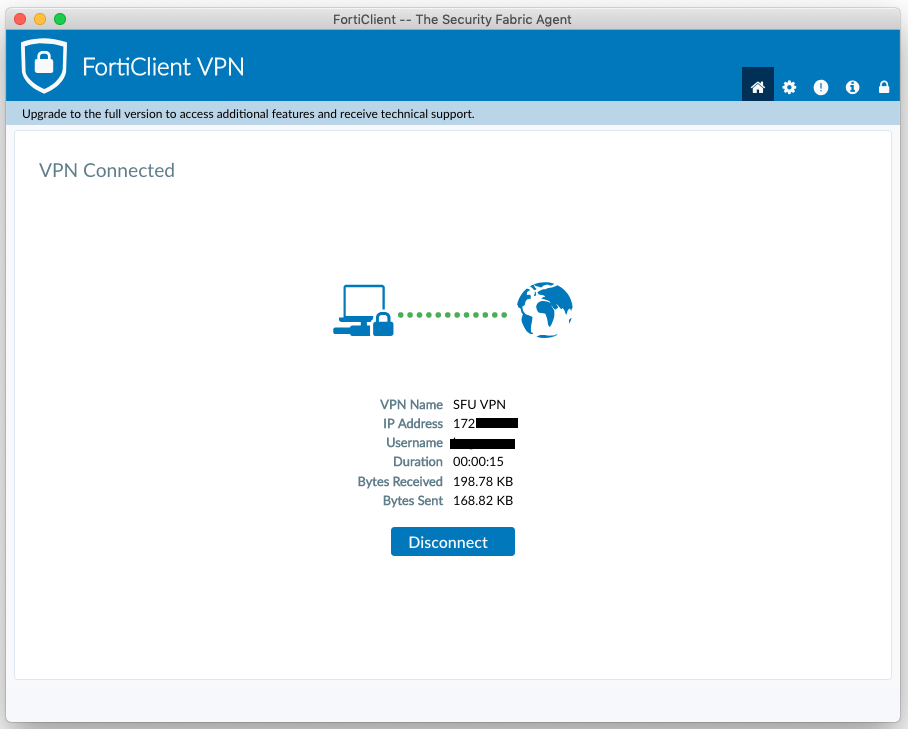
You are now connected to the SFU Network when you see this.
STEP 16
Make sure to you are connected to the VPN every time it's needed. The VPN disconnects when your computer is idle or sleeps. Unlike Wi-Fi, it does not re-connect automatically.
Log in to SFU VPN using the 6-digit MFA code displayed on your MFA app or hardware token.

You can tell you are connected to SFU VPN, when this dropdown menu shows "Disconnect SFU VPN".