
- Get help
- Services
- Announcements & alerts
- Service outages
- Security alerts
- Major initiatives
- Reintroducing IT ServiceHub: Your One-Stop IT Support Platform
- Supporting SFU's Digital Transformation with Exchange Online
- Important changes to SFU email practices
- Transforming the SFU experience through digital improvements - Key Initiatives in Progress
- Jovanna Sauro wins SFU Personal Achievement Award
- Improve your cellular coverage by enabling WiFi Calling
- New committee guides transformative changes at SFU
- Expanded identity options for students within SFU applications
- SFU works toward keeping devices out of landfills
- A journey to improved WiFi
- Help us, help you, connect to better WiFi
- IT Services' new support system: ServiceHub
- Information Security Essential Courses
- IT Services leadership announcement
- University Wide Password Change Initiative
- April 2021 technical issue
- Telephone System Core Infrastructure Upgrade
- Decommissioning fraser.sfu.ca
- About
- Information security
INSTALL THE FORTINET VPN APP
MFA IS REQUIRED TO ACCESS SFU VPN
Your SFU account must be secured with SFU Multi-Factor Authentication to use SFU VPN.
Choose your operating system (OS) and follow the instructions to install:
SFU VPN how-to guides
Unmanaged Windows on Personal Devices
Follow the instructions below.
SFU Owned Managed Windows Devices
If you are using an SFU Managed Windows device then the FortiClient VPN app should already be installed. If missing, it is available via SFU's Software Centre app on your device.
Skip to step 6 for configuration instructions.
Upgrading from a previous version?
If you are upgrading, uninstall the current version of FortiClient VPN.
- In the Windows System Tray, right-click the FortiTray icon, then select Shutdown FortiClient.
- Once FortiClient is shutdown, uninstall FortiClient using the Windows Add/Remove Programs application.
Step 2
Locate the file after you have downloaded it from the link above and double click to launch.
Step 3
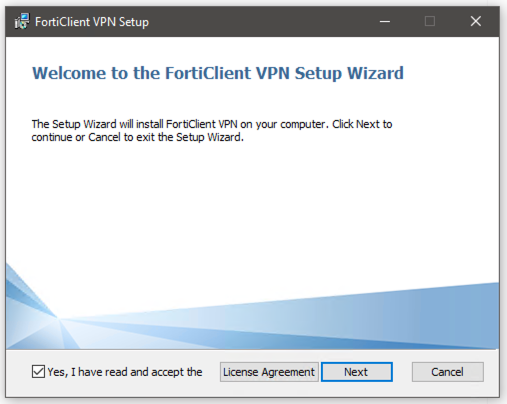
Accept the “License Agreement” and click Next.
Step 4
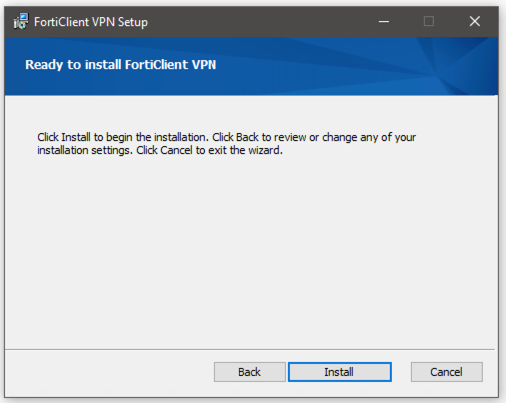
Then click Install.
Step 5
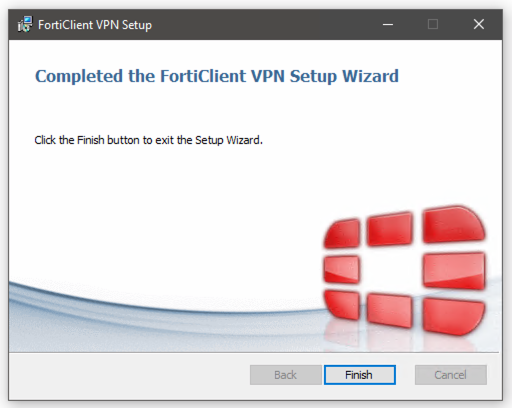
After the installation is complete you will see the “Finish screen” click on Finish.
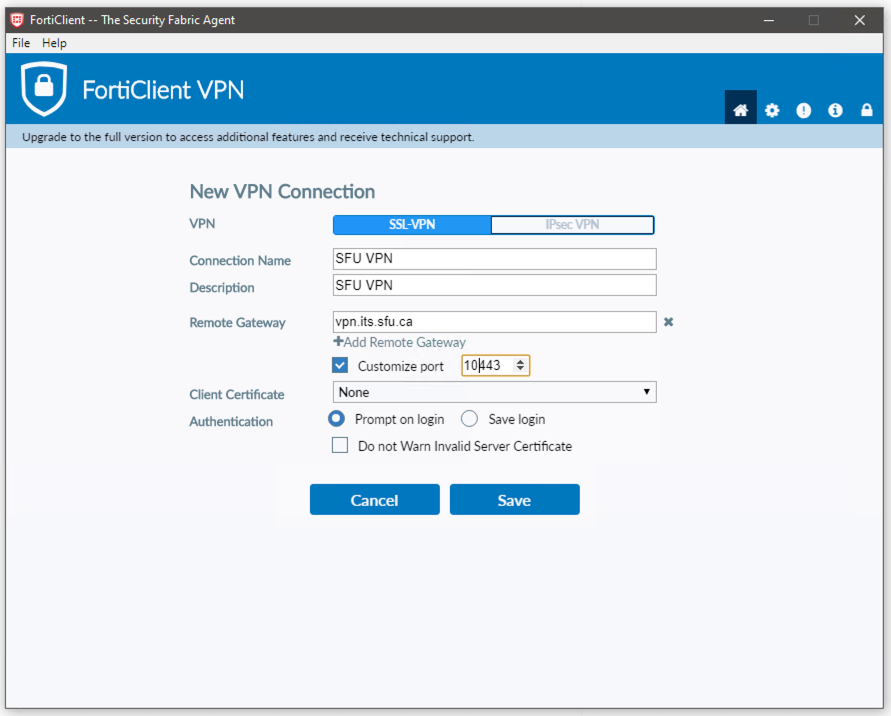
Step 7
Configure the VPN client using the settings below and hit Save.
| VPN Type: | SSL-VPN |
| Connection Name: | SFU VPN |
| Remote Gateway: | vpn.its.sfu.ca |
| Port: | 10443 |
| Client Certificate: | None |
IMPORTANT: ENSURE THAT "CUSTOMIZE PORT" IS SELECTED.
Step 8
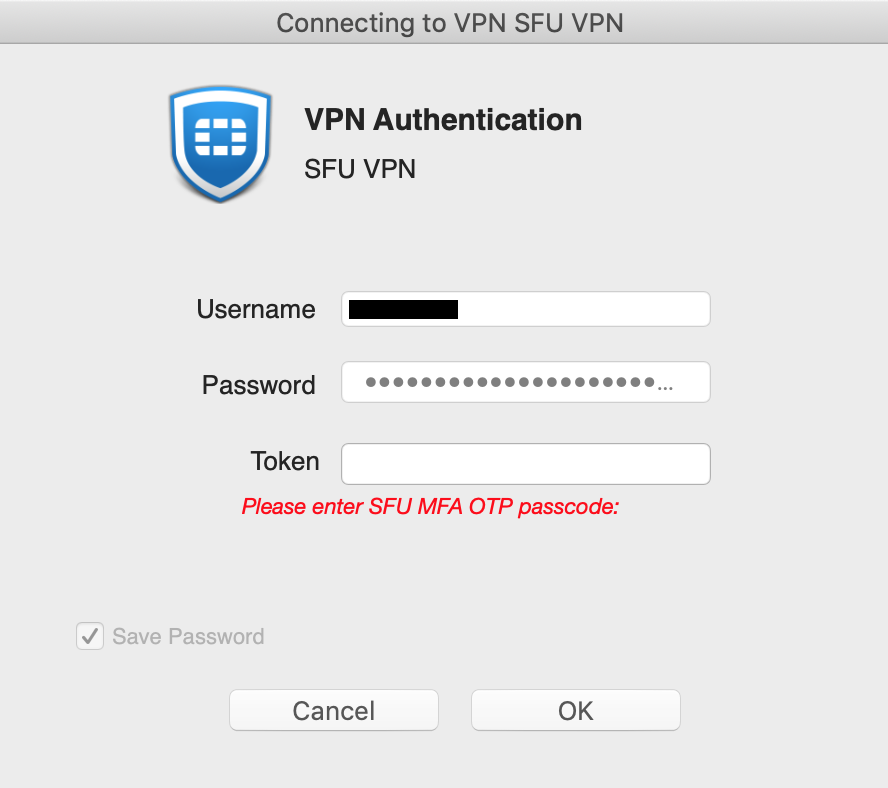
Enter your Computing ID and password, then click Connect.

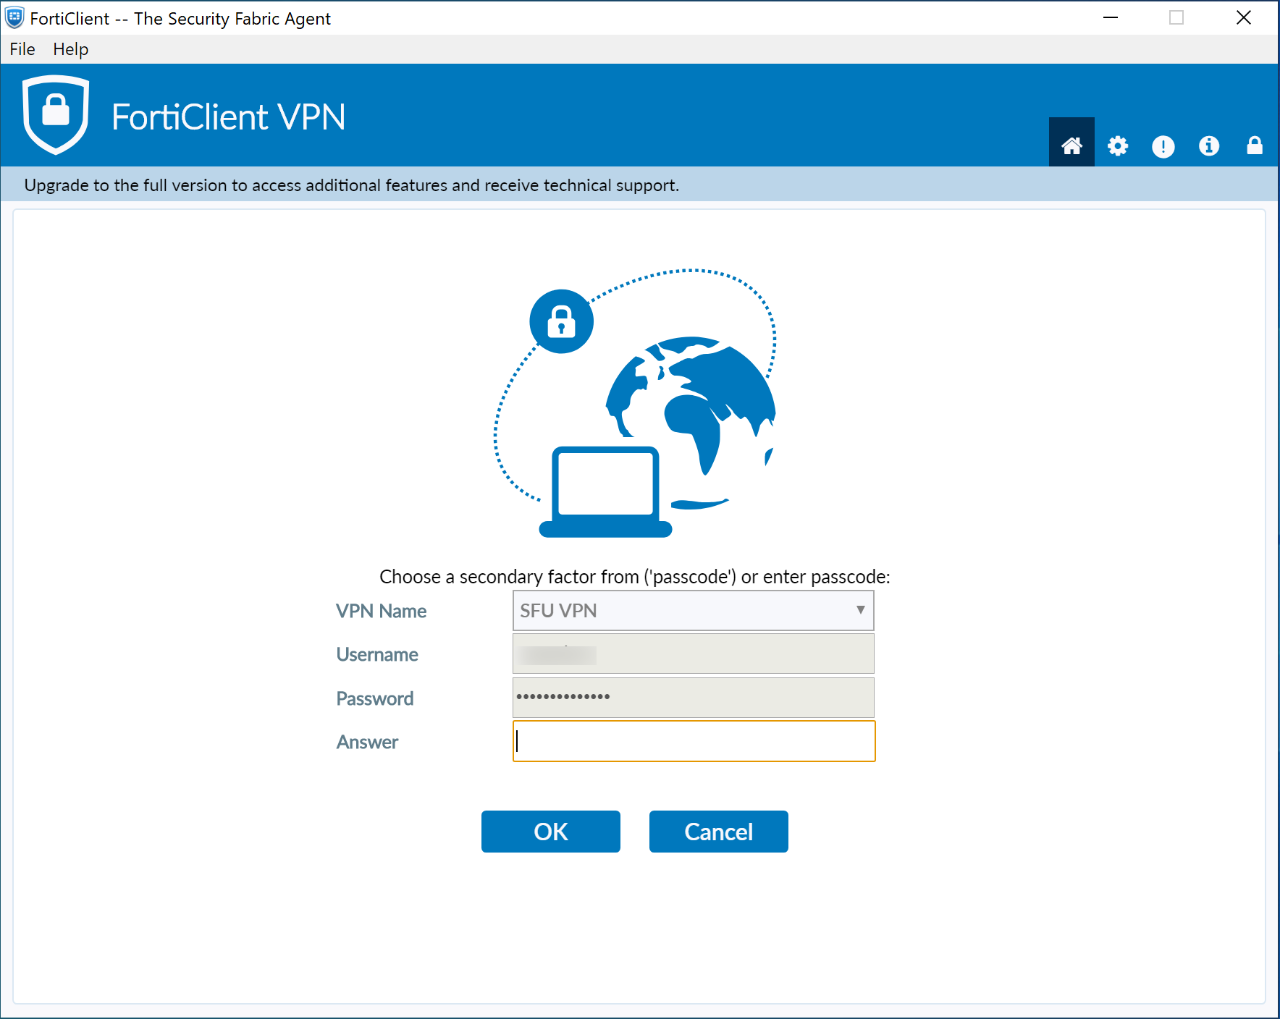
Step 9
A final prompt for your SFU Multi-Factor Authentication (MFA) code will appear. Grab your MFA phone app or hardware token and enter your MFA code in the box next to Answer, then press OK.
Reminder: Your SFU account must be secured with SFU's Multi-Factor Authentication to use SFU VPN. If you haven't enrolled in Multi-Factor Authentication, then complete our setup steps.
Step 10
Make sure to you are connected to the VPN everytime it's needed. The VPN disconnects when your computer is idle or sleeps. Unlike Wi-Fi, it does not re-connect automatically.
Log in to SFU VPN using the 6-digit MFA code displayed on your MFA app or hardware token.
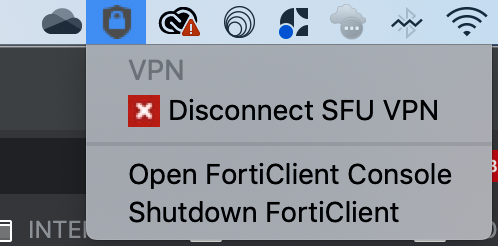
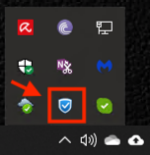
You can tell you are connected to SFU VPN, when this dropdown menu shows "Disconnect SFU VPN".