
- About Us
- People
- Undergrad
- Graduate
- Research
- News & Events
- Outreach
- Equity
- _how-to
- Congratulations to our Class of 2021
- Archive
- AKCSE
- Atlas Tier 1 Data Centre


Making Magnets
Making Magnets ~40 Minutes
Objectives:
To determine whether magnetism is transferable
To explain basic concepts of magnetism
To encourage explorations and predictions
Outcomes:
-demonstrate and describe the effects of magnets on different materials (grade 1)
Materials: Strong permanent magnet; iron nail; paper clips
Doing it:
A1. Short introduction (5 minutes).
A2. Exploration Time: Allow time for the students to play with the magnets and paper clips (5 minutes).
A3. POE: Ask the students to draw a Predict Observe Explain chart in their science notebooks. Explain what will be attempted in the experiment. and ask for volunteer predictions(15 minutes)
B1. Drop the iron nail on the ground to make sure it isn't magnetized. The sharp impact shakes up the atoms, decreasing magnetization. Will it pick up a paper clip? Hold a magnet near one end of the nail and try to pick a paper clip up with the other end. Will it pick up a paper clip now? Take the magnet away from the nail. What happens?
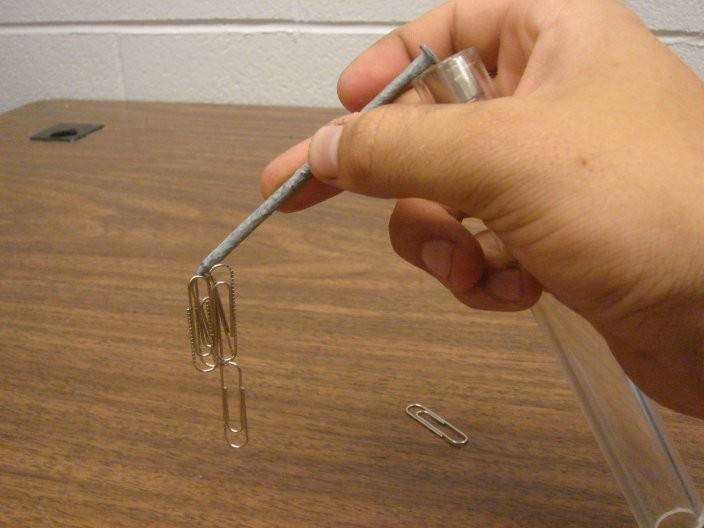
B2. Stroke the entire length of the nail, in one direction only, with one pole of the magnet. Lift the magnet clear at the end of each stroke before beginning another. How many strokes does it take to magnetize a nail? The magnetic power of the nail should increase with the number of strokes you give it. Experiment with the new nail magnet. How many paper clips will it pick up? Does it pickup everything the original magnet picks up? How long does this new magnet last?
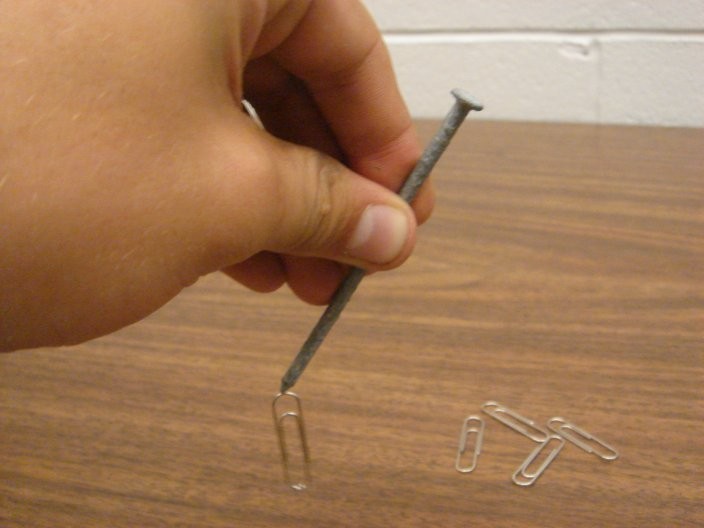
B3. Test whether magnetism can be transferred to the paper clip and the nail. Determine whether the new magnet is permanent by again testing it five minutes later. (You many begin the explain portion during this five minute wait). (10 minutes)
C1. Address the explain part of the POE using the explanation below. (10 minutes)
C2. Clean up
Explanation:
All magnetism comes from a moving electric charge. In addition to the
electrostatic force (the attraction of negative charges to positive
ones) there is an electrodynamic force: magnetism. Our modern view of
magnetic materials relies heavily on our understanding of atoms. In an
atom, electrons move about a nucleus. This means a moving charge, and
that means a tiny little magnet. The atoms are usually randomly
oriented, facing in every which direction, so there is no net magnetism
in an object. When another magnet is brought nearby, these atoms align
and become temporarily magnetic. Some objects, like iron or steel, can
become permanently magnetic because their atoms form groups called
domains which can align and stay aligned. But why are some objects not
attracted to a magnet at all? Well, when electrons go around the atom,
they prefer to go around in pairs. One way to think about this is that
one electron is going around clockwise, while its pair is going about
counter clockwise. This means the charges moving in opposite directions,
so the magnetism is always canceling it out.
Experimental Feedback
Making magnets Feedback
From Derrick O’Keefe and Rob Tardif, tested on a grade 6 class, March 2006
This lesson allows the students to learn about magnetism in a constructive way. We suggest that an exploration component be added, and that a POE is used to add structure to the lesson. We also added a short role-play as a hook to the lesson. We really enjoyed the lesson and believe that it can be used to teach magnetism to middle school students.
Updated in May 2007
Created by Brock Watson May 25 2007