Organizing Messages
Outlook Web App
This section details the basics of organizing your mail in the Outlook Web App (OWA).
Using a Desktop Application?
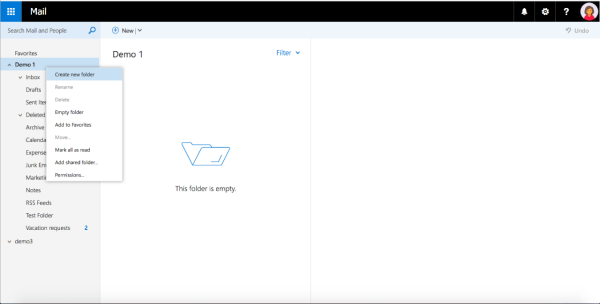
2. This will add a dialogue box at the bottom of your folder list where you can name your new folder.
3. Hit Enter and that will create the folder at the bottom of your folder list.
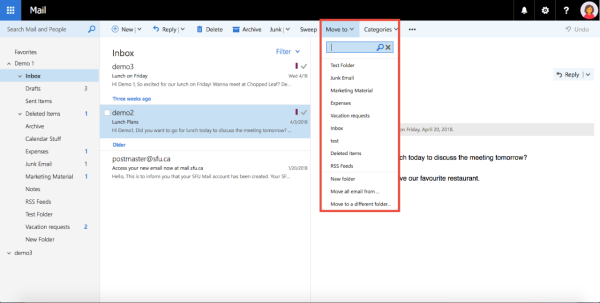
2. You can also move a message into a folder by clicking the Move to button. This will bring up a drop-down menu containing your folder list, where you can then select the folder you would like to move the message to.
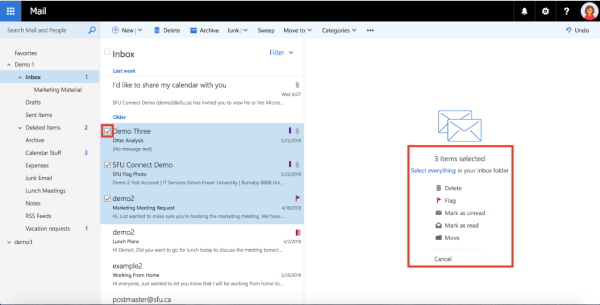
3. To move multiple messages into a folder at the same time, use the checkboxes on the left-hand side of the message in the message list. Once you have selected multiple messages, you will see different options provided to you in the reading pane for how to handle those messages. Follow the steps outlined above to move those messages into the desired folder.
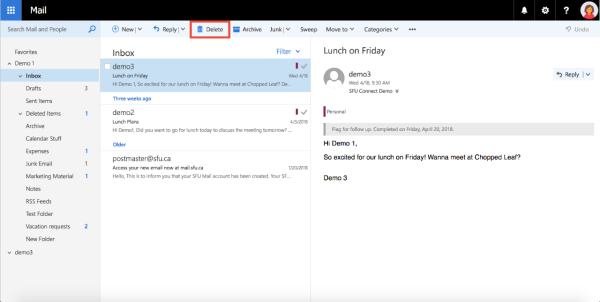
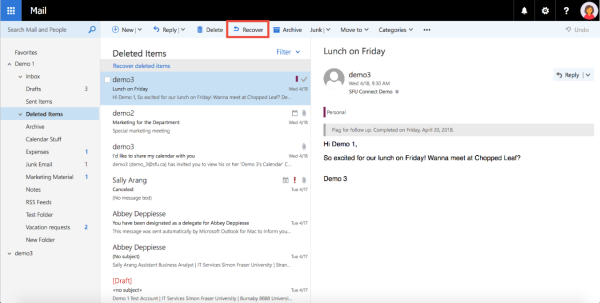
2. This will move the message to your Deleted Items folder. Should you need to recover a message from your Deleted Items folder, click the Recover button to move it back to the Inbox. You can also drag and drop the message back into your Inbox.
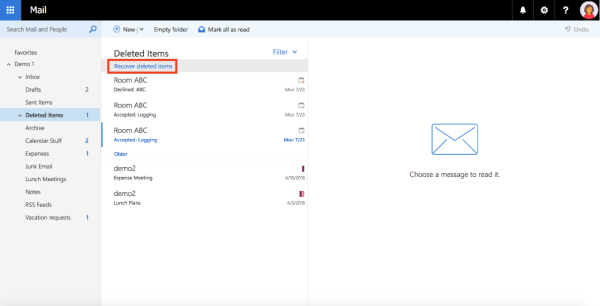
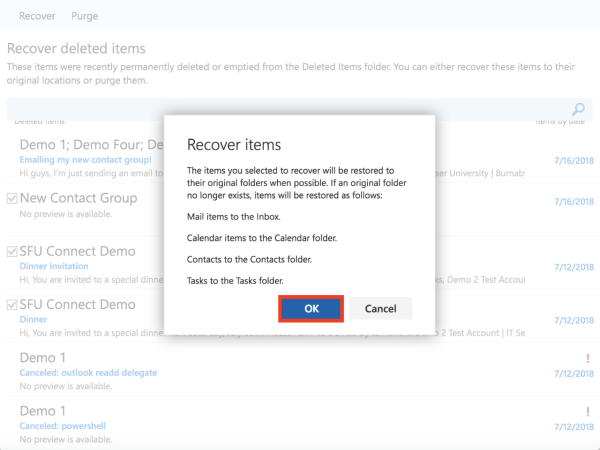
1. Should you need to recover items that you deleted from your Deleted Items folder (items that no longer exist in the deleted items folder), click the Recover deleted items at the top of the message list.
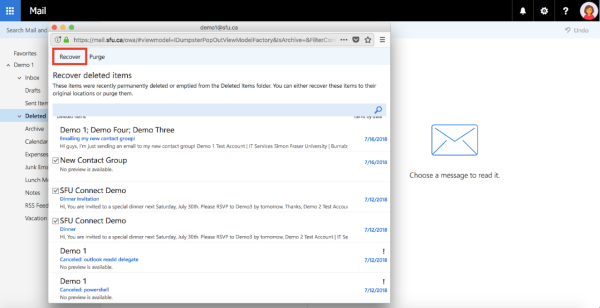
2. This will open a list of items that you have permanently deleted from your Deleted Items folder. You can search this list should you need to find particular items or messages. Once you have found the item(s) that you wish to recover, click it to select it, or use the checkboxes to select multiple messages.
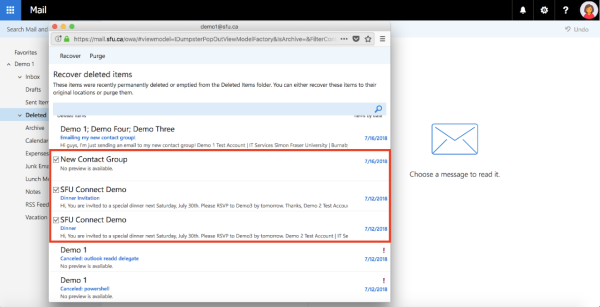
3. Click Recover in the top-left hand corner of the window to recover the selected items.
4. A pop-up will appear informing you that the items will be moved back to their original location. Click OK to finish recovering the items.
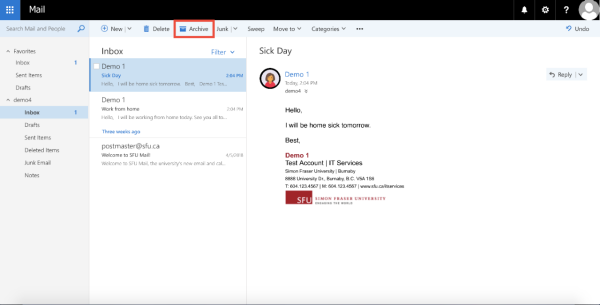
2. If this is your first time using the Archive feature, you will need to setup a folder to Archive your messages into. A dialogue box will appear asking you whether you would like to create a new folder named 'Archive', or select a folder from your list of folders to archive messages into. Select one of the options, and then click OK.
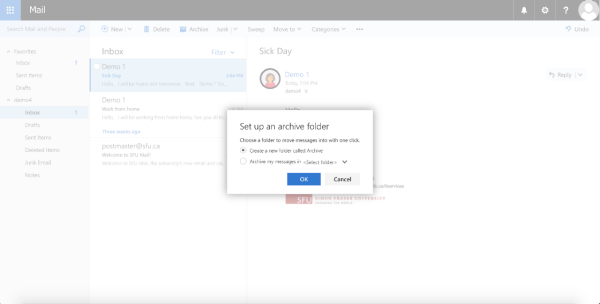
3. If you selected the option to create a new 'Archive' folder, that folder will appear in your message list with the message that you just archived. If you archived the message into a pre-existing folder, that message will now appear in that folder.

Flagging Messages
Messages can be flagged for follow-up, as an easy way to identify messages that you may need to action on later. This feature also integrates with the Tasks module in SFU Mail.
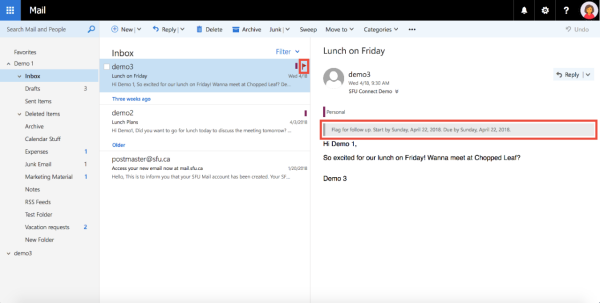
1. Select the message that you would like to flag in your message list, and click the three dots in the ribbon. Then, click Flag.
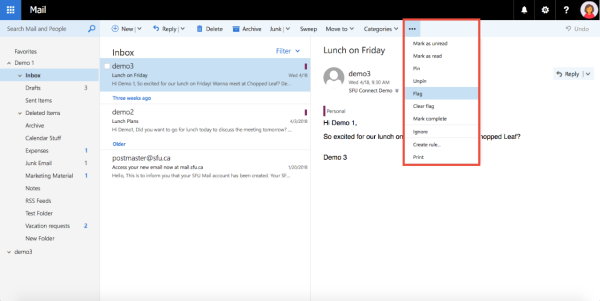
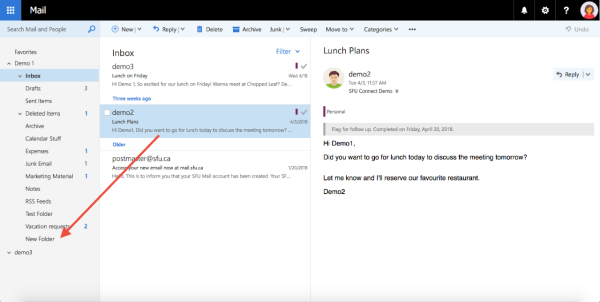
2. Once you have flagged a message, a red flag icon will appear on the right side of the message on the message list, and it will have a note in the reading pane that indicates that the message has been flagged for follow up.
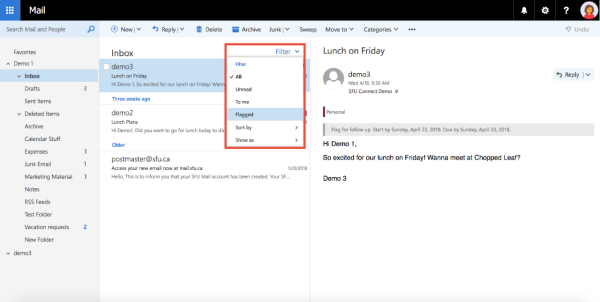
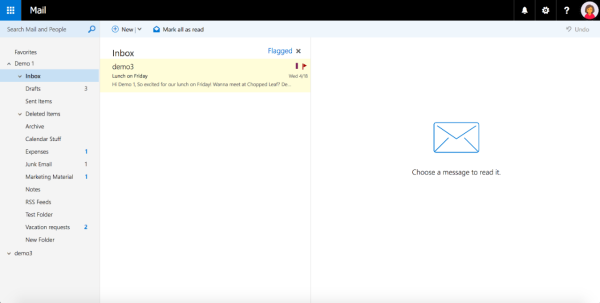
3. You can then filter your Inbox by Flagged messages, which will show you all the messages you have flagged in one view.
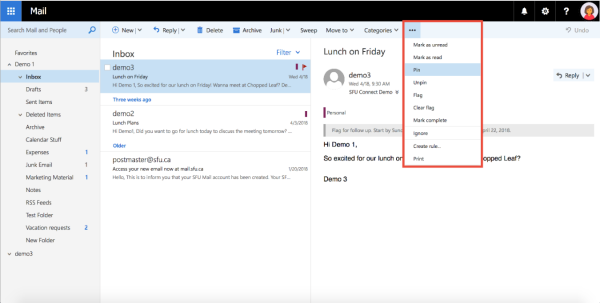
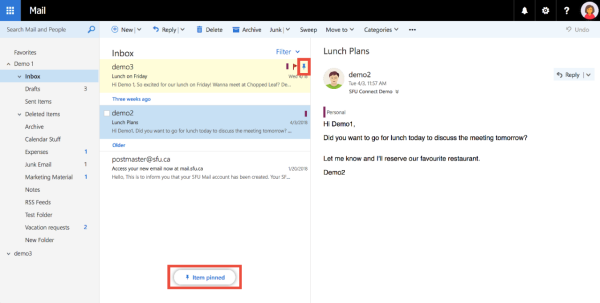
2. Once you have pinned a message, a message will appear at the bottom of your mail window noting that the item has been pinned, and there will be a small blue pin icon on the right side of the message in the message list.