| 1. You'll need also need to know the OPS number of the printer you
wish to use. It's on a tag on the front of the machine. |
 |
| 2. Open Control Panel. |
 |
| 3. Click Programs and Features. |
 |
| 4. Click Turn Windows features on or off. |
 |
5. Click on the "+" sign beside Print and Document
Services, to expand the category as shown.
|
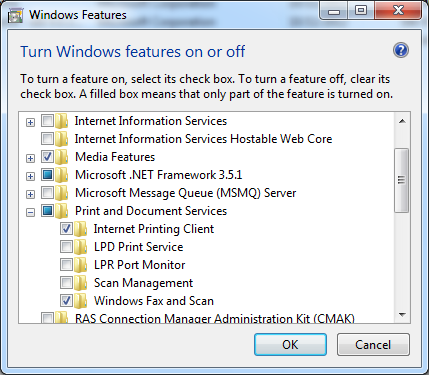 |
| 6. Place a check mark beside LPD Print Service
and LPR Port Monitor as shown.
Click OK. |
 |
| 7. Have patience. |
 |
| 8. When done, you'll be returned to Programs and
Features.
Click on All Control Panel Items. |
 |
| 9. Click on Devices and Printers. |
 |
| 10. Click Add a printer.
|
 |
| 11. Click Add a local printer.
(Yes, I know it's a network printer; blame Microsoft for their .. interesting
.. use of the English language.)
|
 |
| 12. Click Create a new port:.
Then, from the drop down list, select LPR Port.
Click Next.
|
 |
| 13. In the top filed, type in exactly as shown
papercut4.mps.sfu.ca
In the second field, type in the OPS number I warned you about in step
2. Note that you must include the letters OPS
Click OK. |
 |
| 14a. Here it gets a wee bit tricky. If you are sure that Windows
7 has the right driver for your make and model of printer, you can select
it from the list, as shown here.
Windows will guide you a bit, then proceed to step 15. |
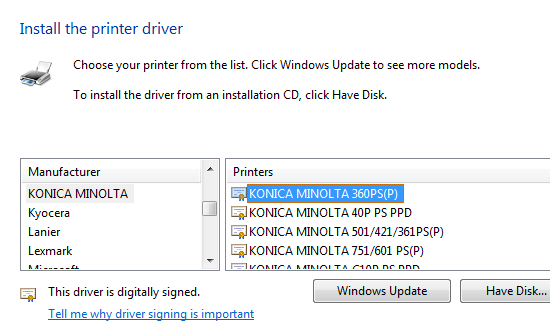 |
| 14b. If you were smart and downloaded the most recent driver
from the manufacturer's web site, click Have Disk.
Then locate the software you downloaded. |
 |
| 14c. When you've located your driver, click OK. |
 |
| 15. This is an opportunity to double-check that you're installing the
correct driver.
If it looks right, click Next. |
 |
| 16. You now get a chance to pick a name for the printer.
Use almost anything that makes sense to you.
Click Next. |
 |
| 17. More patience called for. |
 |
| 18. Done. Click Finish.
Don't print a test page unless you're sure all the rest of Papercut
is set up correctly. |
 |
| 19. Ta-da! |
 |
EOF;
HTML::endBox();
HTML::displayFooter();
?>