Goals
- Working with PImage
- Declaring
- Loading
- Displaying
- Working with Pixels
- Reading
- Color
- 2D -> 1D Arrays
- Writing
Declaring a PImage
There is a special type in processing that deals with images for us. Images come in different file formats (.jpg, .gif, .png) but processing simplifies all this so we can treat all these image types equally. The class that deals with images is called PImage. Let's take a look at how to create one.
PImage img; declares a new PImage reference variable called img
Loading an Image
To load an image and assign it to a PImage reference variable we will use a special method in processing called loadImage(file path). We must first place an image in a data folder inside our sketch. If we have the image "cat.jpg" inside our data folder let's see how we would load that image.
PImage img;
void setup() {
img = loadImage("cat.jpg");
}
We load the image "cat.jpg" inside the data folder by calling the loadImage method with the name of the
image. Notice how we chose to load our image in the setup method of our sketch? This is the preferred
method. Loading our image outside may cause errors and loading our image in our draw loop will cause a
slow program, since the image will be loading each frame.
Displaying an Image
Now that our image has been loaded successfully, how do we go about putting it on screen? There is another special method in processing that handles this for us. Let's take a look.
The way to display an image is:
image(PImage variable, x, y, width, height);
So for our image reference variable, img, if we want to place our image at the top left corner
stretched to the window width and height, we could do the following:
image(img, 0, 0, width, height);
Example
Pixels
So we can load and display an image, but what if we want to read the pixels in the image and do something with the data? Well there is a method that belongs to the PImage class called get. Let's take a look at how this works.
img.get(100, 100);
This will return the color of the pixel at location (100, 100);
An image is simply a 2 dimensional array of pixels (a grid), so by using the get method and specifying an x and y location, we can grab the color of that pixel in the image. Watch your boundaries though, you will get an error using an x and y that are larger than the image width and height.
Color
What is a color? Well believe it or not, it's another special datatype in processing. A color is simply a wrapper for red, green, blue values. Let's see how it works.
color myRed = color(255, 64, 0);
We declared and initialized the color variable myRed to be pure red with a little bit of green which
should give it an orangish tint.
Since a PImage returns a variable of type color in processing, it's important to know how to work with this variable.
red(myRed); is 255
green(myRed); is 64
blue(myRed); is 0
Using the commands red, green, blue, we can decompose the color object and look at each channel
of color separately.
Example
2D -> 1D Arrays
So we know that an image is a 2D array of pixels. However there is another way to look at an image. If we can wrap our heads around converting a 2D array into a 1D array, we can use the pixels[] array of the PImage class in order to access our pixel colors. Why would we want to do this? Because it's actually a lot faster than using get.
The following statements are equivalant:
img.get(20, 30);
img.pixels[30 * img.width + 20]
The general formula is:
img.pixels[y * img.width + x]
You might need to call the loadPixels() method of the PImage reference variable before using the pixels array.
Why it Works
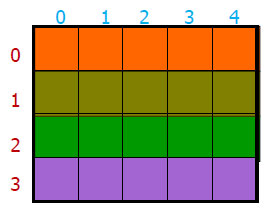
Imagine a 2D array like this is laid out row by row into a 1D array. What would that look like?
Notice how each row is placed inside the 1D array. We lay out the 2D array one by one inside the 1D array.

Each time we add a row, we must set the starting index for that row
to be equal to the width of a row multiplied by the y index of the row in the 2D array.
In order to achieve this offset for the row index, we use the formula:
y * image.width + x
when accessing a 1D array of pixels.
Changing Pixels - Set
There are two ways to change pixels in processing, the first is using the set method of the PImage class.
img.set(20, 30, color(255, 0, 0)); will set the pixel at 20, 30 to red
Changing Pixels - Pixels[]
If we are going to make a bunch of pixel changes, let's say in a loop, it is much faster to change the pixels array, and then do one update to the images pixels via the updatePixels() method. Take a look.
img.pixels[30 * img.width + 20] = color(255, 0, 0);
img.updatePixels(); this applies the change to the pixel at 20, 30
This piece of code sets the pixel at 20, 30 to red.