Introduction
The goal of this page is to provide some information and insight on why this management migration and storage move is taking place, to help educate on what to expect once migrated, and what will be required from you. The management framework IRMACS will moving to is called Managed Mac which is currently on revision 2 (MMv2). For more information on MMv2 please see this page.
Changes
Before:
-
Server: Gridstore (an old IBM AIX box, which is showing its age)
-
Network Mounts: NFSv3
-
Home: NFS Network Homes
-
Directory Server: IRMACS Open Directory (IRMACS ID)
After:
-
Server: ITS-FS2 (new NetApp with a lot more storage)
-
Network Mounts: CIFS
-
Home: Local Homes (yes, that means on your machine’s local hard drive)
-
Directory Server: Campus Active Directory (SFU ID)
Server
The move away from Gridstore is necessary as it’s nearing the end of its life and is provided by WestGrid. The new NetApp has more storage and is provided by the Information Technology Infrastructure (ITI) group at SFU. Since late last year, IRMACS has been syncing all of the data on Gridstore to the new file server. This means when you and your group are cut-over, no data will be lost.
Network Mounts
Gridstore is only capable of exporting NFSv3 shares and does not support Access Control Lists (ACL). Without ACL support, providing a true shared folder is difficult (think project folders). As you may have guessed, ITS-FS2 is capable of exporting CIFS shares which do support ACLs. ACLs allows for more granular control over folder permissions and are easier to manage. Part of this migration will be moving your group’s project folder if one is present.
Home
You may have not known but all homes have actually been located on Gridstore. Meaning you weren’t really storing anything on the computer you were using. With this type of configuration you didn’t need to worry about backing up data and you could log into any computer and have it be exactly the same as anywhere else within IRMACS. Which sounds great but, as you may have experienced, this convenience came at a cost:
-
Not all programs work nicely with network homes (ex: iThink, Adobe products, VPN software)
-
If the network was down you weren’t able to log in or access your data from anywhere.
-
Any interruption of the network would cause the Operating System to stall (beachball, anyone?).
By moving to local homes there are automatically performance benefits gained, and you will be able to log in even if the network is down (assuming you’ve logged into that computer before). To accommodate the fact that your home is no longer backed up, you will be given a personal network folder (think Dropbox) to place files you want backed up. This share will be accessible to you from anywhere, either via CIFS, SFTP, or SSH. Using your personal or project network folder will be the only way to work on your data if you move around. And to make switching computers easier, your application preferences will be synced when you log out. So your applications should behave the same on most computers (ex: your Dock should have the same icons in it, your Internet bookmarks should be there, etc…).
|
|
After the migration your home will be new, meaning it will be empty. Your Dock icons and any specific application preferences you had set up will also need to be redone. This is unfortunate but un-avoidable. Your old home data will be available to you in your personal network folder (see Post-Migration section). |
Directory Server
Previously you needed an IRMACS ID to log into any IRMACS resource, and this was separate from your SFU ID. In order to streamline a lot of processes, IRMACS will now require you to use your SFU ID instead. This will be easier to manage and hopefully for you to remember (one credentials vs two).
Migration
|
|
If you are using an IRMACS Managed Mac please read all the sections. If your group manages your own machines you can skip to the FAQ. |
Pre-Migration
|
|
Please ensure you do not have any data you want outisde of your home (~/) directory (ex: in /Volumes/Scratch partition). Your computer will be re-imaged meaning all data on the HDD will be wiped. Please move any data you want to your home directory or to an external device. |
You may want to export any custom settings you have for certain applications so that you may re-import them post-migration. For example, exporting your browser bookmarks:
Migration Steps
In order for a successful migration, the following needs to happen:
-
All members of your group must be made aware of this change
-
Everyone needs to be logged out
-
Perform a final sync of all home directories and your group’s project folder (if one is present)
-
Re-image your group’s workstations if necessary (groups on the unmanaged VLAN do not need this step)
Post-Migration
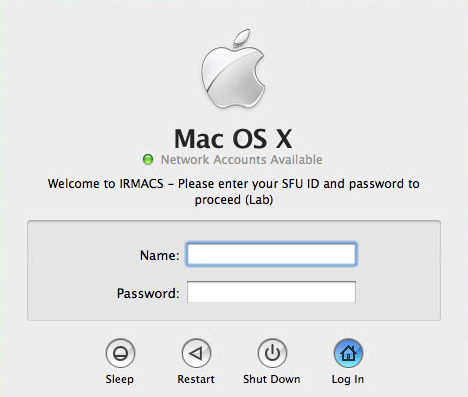
Once you have been migrated, your login window should look like the above. There are 3 things to note:
-
To login, the Directory Service light must be green. If you’re 10.7+ there will be no light displayed if you can login (a red one will appear if you can’t)
-
The ending portion of the Login Window text will let you know what type of machine this computer is set up to be. In the picture below, you can see that this machine is configured for Lab usage. The only other configuration you’ll come across are Presenter machines in the meeting rooms. The only major difference between these two configurations is that your application preferences don’t follow you
-
Remember to use your SFU ID and password to login
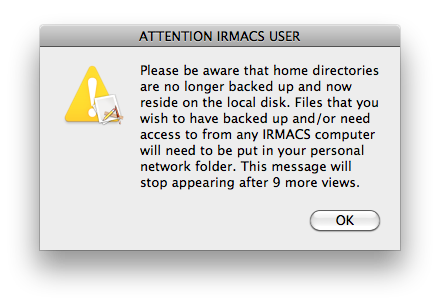
When you login you will be greeted with the above message. This is just a friendly reminder that your homes are no longer backed up, and that you should use your personal folder. You’ll also be presented with another message if you place over 20 MB worth of files on the local hard disk. Please do not ignore these messages and follow their advice, use your personal folder (or project folder) for important files. As you can see, they will tell you when they will stop appearing, but their count is specific to each machine (i.e. will appear to be reset if you move to another computer).
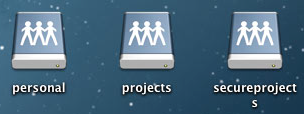
You should see the above icons on your Desktop, these are network shares that will get mounted every time you login on any computer. Their names should be pretty self-explanitory. Your personal network folder will be called username-irmacs and can be found in the personal share. Only you will be able to create files and folders inside your personal network folder, and its content are not browsable by anyone else. You’ll also notice that your old Gridstore home has been synced into your personal network folder into the folder called Old_Gridstore_Home. So for example, if you had a file on your old Gridstore Desktop aptly named myfile.txt, you should be able to find it at username-irmacs/Old_Gridstore_Home/Desktop/myfile.txt.
If your group previously had a project folder on Gridstore, an exact copy of the folder can be found in the projects share. Only you and your team will be able to access it. The same applies to the secureprojects share.
As mentioned in the last section, all existing files will be recent as a sync is performed before cut-over.
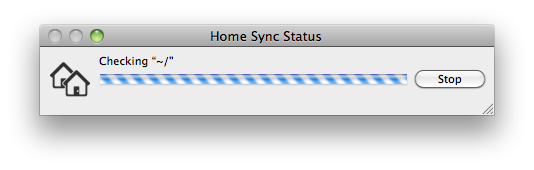
You’ll notice this window when you log in and out. It is merely syncing your preferences to a server (syncs down on login and up on logout). For the most part you won’t need to worry about this unless there is an error…
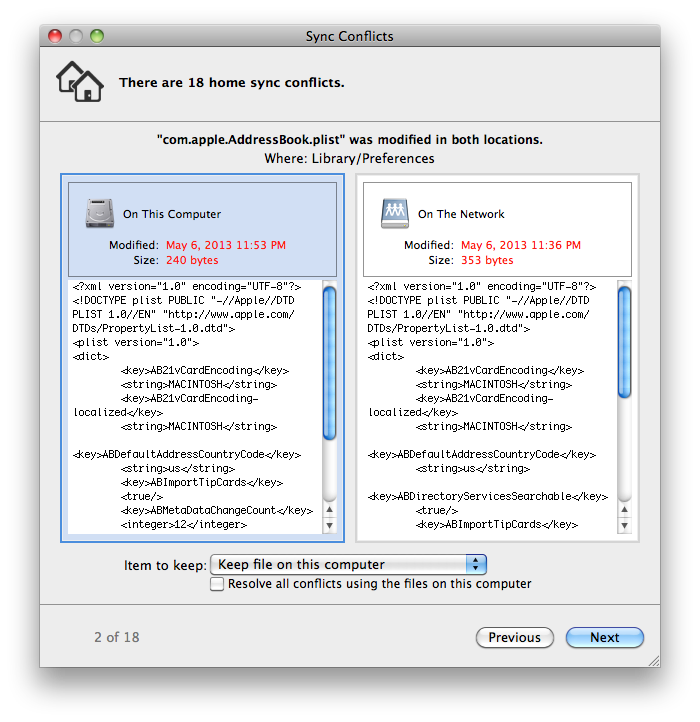
Upon logout there may be conflicts when syncing your preferences and they will need to be resolved manually by you. These conflicts occur when both the local and network copy of a file have changed. The picture above is similar to what you may come across. The best way to resolve these conflicts is to either choose the latest copy or the one that is biggest, you will have to use your best judgement depending on the file. Don’t worry if you accidently choose the wrong one, they’re only preferences and can easily be reset. You can see from the picture above that I’ve chosen the one with the latest modification date, and that I have 18 total conflicts to deal with.
|
|
Do not do the following
|
Managing Software
Going forward OS updates and software managing will be done through the Managed Software Update.app located in /Applications/Utilities (⌘+Shift+U).
|
|
This application will run any update (OS or application) automatically at the login window so make sure you log out every day! OS updates will only be installed at the login window. |
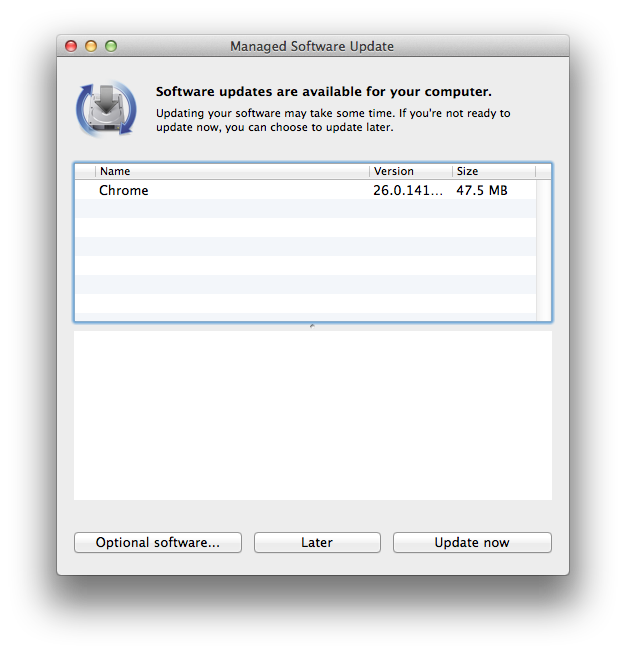
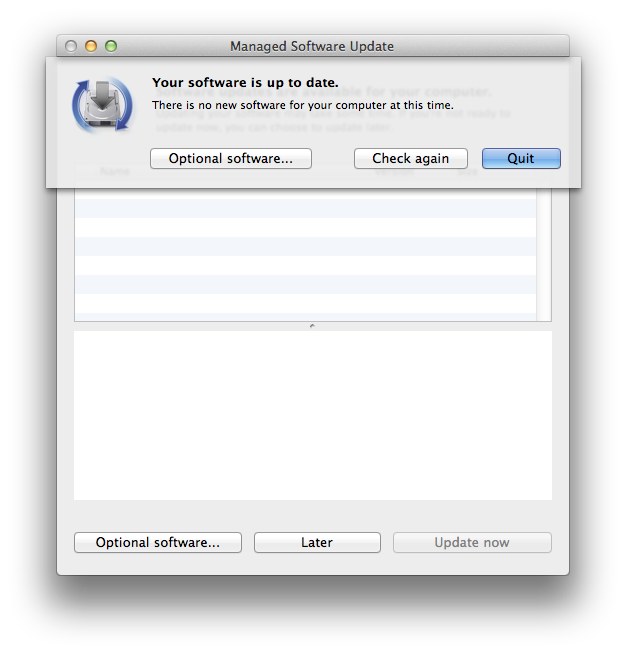
From time to time you may see a window like the one above telling you there is an update for a particular application. You can either choose to install it now or defer it. There may be times when an update is forced, usually when there is a critical patch. When you click Update now you will be presented with the choice of Logout and update or Update without logging out. You can normally choose the latter but there may be times when a logout, or even a restart, is forced. Below is the list of applications that will be available on any Managed Mac within IRMACS:
-
Maple
-
MacTeX
-
R
-
MATLAB 2012a
-
Xcode
-
Firefox
-
Chrome
-
Office 2011
-
Adobe Flash
-
Cyberduck
-
Flip4Mac
-
Google Earth
-
Silverlight
-
Skype
-
VLC
-
TextWrangler
-
The Unarchiver
-
Google Voice & Video
-
Remote Desktop Connection
-
SFU Menu
-
SFU Fonts
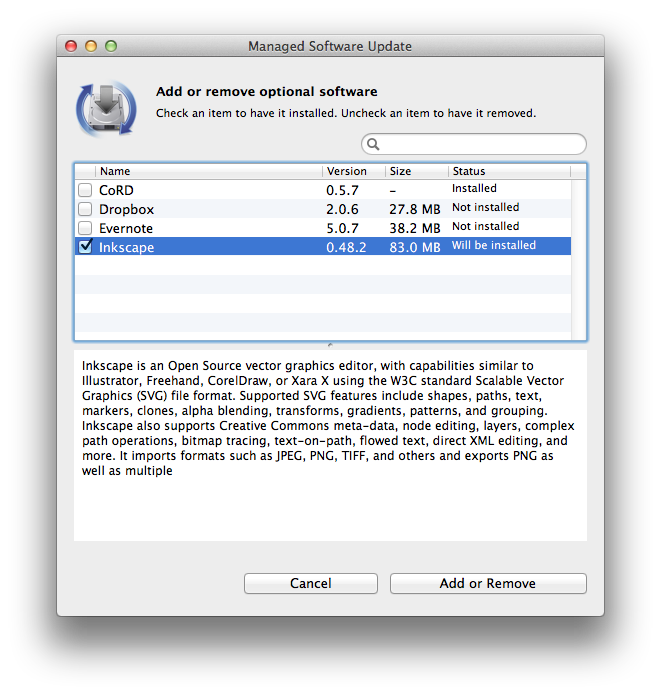
Along with managed applications there are also a variety of optional applications that you can elect to install. To see the list, run the Managed Software Update.app, and click on Optional software… (if it’s not there then there is no optional software for you to install). You will then be presented with a list of software. Choose what you want by checking it off and clicking Add or Remove when you are done. Optional applications that are already installed will be removed if you check them off and click Add or Remove. You can tell what will happen by looking at the status column in the list. If you have any suggestions for free optional software please email it to help@irmacs.sfu.ca (no licensed software).
Best Practices
-
Always try to work in either your personal or project folder. If you find an application isn’t behaving correctly while its manipulating data over the network, try moving the files to your hard disk, and copy them back when you are done.
-
Always log out when you’re leaving for the day.
-
Do not ignore preference sync conflicts and never choose to keep both files.
FAQ
-
Where will all of my old files be?
In your personal network folder inside a folder called Old_Gridstore_Home.
-
I want xyz installed.
If you’re on a Managed Mac please see if it’s in the optional software list by running the Managed Software Update.app located in /Applications/Utilities. If it’s there, great! If not, please send an email to help@irmacs.sfu.ca.
-
How do I access my personal or project network folder remotely?
You can either mount the shares, or access them via SSH and/or SFTP:
-
Mac (within SFU):
-
Click Finder→Go→Connect to Server (⌘+K with the Finder focused)
-
Type: cifs://its-fs2.sfu.ca
-
If asked for your credentials, enter username@sfu.ca and your SFU ID password
-
Select the share you would like to mount (ex: personal, project, secureprojects)
-
-
Windows (within SFU):
-
Open an explorer window (windows+E)
-
Type: \\its-fs2.sfu.ca
-
If asked for your credentials, enter username@sfu.ca and your SFU ID password
-
Browse to the share you want
-
-
SSH (from anywhere):
-
Open a terminal window
-
Type ssh username@zapp.irmacs.sfu.ca and enter your SFU ID password when asked
-
Browse to your ~/mnt folder and navigate to the share you want
-
-
SFTP (from anywhere):
-
Use an appropiate SFTP client (ex: Cyberduck for Mac or WinSCP for windows)
-
Create a connection to zapp.irmacs.sfu.ca using port 22
-
Type in your SFU ID and password
-
Connect and browse to your ~/mnt folder and navigate to the share you want
-
-
-
How can I access my personal or project files on a meeting room computer?
Put it in your personal or project network folder and then login as yourself on the computer. You should then be able to browse to them like your normally would.
-
What credentials should I use to access the cluster?
The cluster will still require you use to your IRMACS ID. This is only temporary and the cluster will eventually be configured to use SFU IDs. An email will be sent out when this switch has occured.
-
I’m unable to mount any shares on ITS-FS2 through SFU wireless.
This is normal. SFU ITS does not allow remote mounts through certain wireless networks. You will need to either use SSH or SFTP to access your files.
-
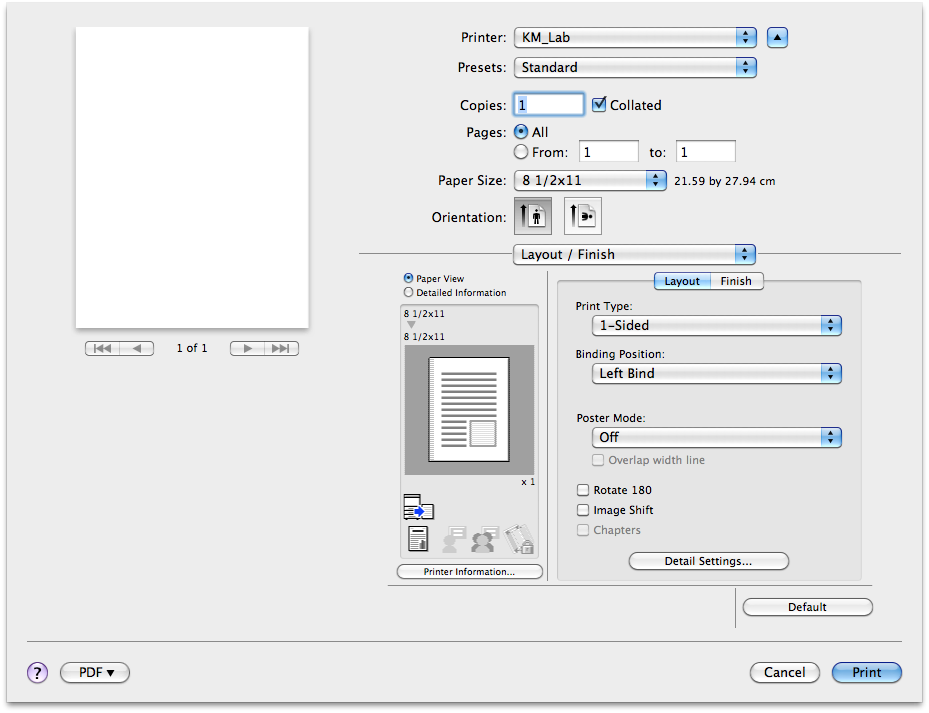
Where does the KM_Lab printer print to?
It prints to the Konica Minolta machine located in 10933.
-
How do I print single-sided?
By default printers are setup to print double-sided to conserve paper. If you need to print single-side you’ll need to choose it through the print options.