Introduction
This is a guide for people who use Microsoft Word to write papers in linguistics. It includes some discussion of general features of Word (such as templates and styles) and some features common to academic writing (such as cross-references and typography), but the focus is on issues of specific interest to linguists (such as special characters and interlinear glossing). Some familiarity with Word is assumed.
This version of Word for Linguists applies to Word 2013. Most features discussed here also apply to earlier versions, as well as to Word 365. However, menu layouts change from version to version. If you can’t find something, check other menus or look in the help system.
Lingword.dotx (or Lingword.dot for older versions of Word) is a template you can download that contains macros which automate some of the procedures described in this document. More information on how to use it under Templates, below, and in the .dotx document itself.
Some general tips
Word is highly customizable. If there's anything you don't like about the way the program works, it is very likely possible to change it. And if there's a feature you want but can't find, it's almost certainly there, somewhere. Unfortunately the documentation provided with current versions of Word is quite inadequate; the online documentation is better, but it can be hard to find the information you want if you don't know the terminology used by the program. For anyone who wants information about the program beyond what's covered here, and for more detailed information about some of the features I do discuss, I'd recommend buying a good third-party book. A useful place online to get answers to Word (and other Microsoft Office) questions is Woody's Lounge. It's a forum -- first use the search feature to see if your question has already been answered, and if not, post the question on the forum. There are lots of knowledgeable people there.
A good strategy to use in getting to know Word (and other modern software) is to explore the menus thoroughly, and experiment until you know what everything does. Even out of the box and uncustomized, Word provides many different ways to invoke its commands. All common operations can be invoked three or four different ways: via a drop-down menu, a pop-up (right-click) menu, a keystroke combination, and a mouse-click combination. When giving instructions in this document, I indicate the methods I most commonly use. Different users have different preferences, however, so you're encouraged to use the help system to explore your alternatives. If you're a keyboard fan, you're especially encouraged to visit the help topic called “keyboard shortcuts”.
Acknowledgments
This page is inspired by one created by Susanna Cumming at UC Santa Barbara, and the LingWord template is hers (LingWord.dot for older versions of Word). Unfortunately, the page disappeared a few years ago. This version was recreated by Maite Taboada and Mara Katz. Other excellent resources for linguists exist:
- Word for linguistics, by E-Ching Ng.
- LaTeX style files for linguistics. We highly recommend using gb4e if you use LaTeX.
Send any comments or suggestions to Maite Taboada.
Annotation and Collaboration Tools
As a linguist, you will probably be working with other people on a document. Word includes tools for annotation that are more legible and easier to email than scribbling in the margins of an essay. Comments added using these tools can “point” directly to items in the text, and can be automatically incorporated into the document or removed altogether. These tools are accessible from the Review toolbar in Windows 2013.
Comments
To add a comment, highlight a block of text with the cursor, then click "New Comment" in the Review toolbar. A bubble will appear in the right margin in which you can type your comment. This bubble is linked to the text you highlighted, so you can respond directly to a part of the text.
Track Changes
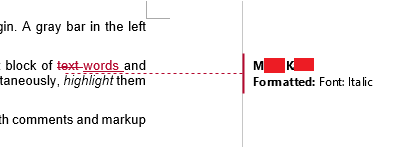
Turning on “Track Changes” in the Review toolbar allows writers to keep track of changes made to other people’s work (or by other people on their work.) Additions appear in colored, underlined text; deletions appear crossed out; and formatting changes appear in bubbles in the right margin. A gray bar in the left margin shows where changes have been made.
To accept or reject a change made by another writer, right-click on the relevant block of text and click Accept or Reject in the popup menu. To accept or reject many changes simultaneously, highlight them all with your cursor, right-click, and then click Accept or Reject.
In Word 2013, a document with comments or markup in it will automatically print with comments and markup visible.
Basic Typographical Principles
The following is advice for writers unused to using computer word processors, especially those accustomed to using typewriters. You do not have to follow this advice, but it represents current standard practice.
Proportional Fonts
There are, in general, two types of fonts: fixed-width and proportional. In a fixed-width font like Courier New, which was designed to resemble a typewriter font, every character takes up the same amount of horizontal space. In a proportional font like Arial, the characters are different widths. This is easier to read and is considered more professional. Use a proportional font unless you have a reason to use a fixed-width font.
When using a proportional font, it is unnecessary to type two spaces after a period as you would on a typewriter. In fact, in a proportional font, two spaces looks like too much space, and it is best practice to only use one space after a period.
Serifs
Fonts come in two styles: serif and sans-serif. A serif font like Times New Roman has extra lines at the ends of strokes. Serif fonts are easier to read on paper, but can appear fuzzy on a computer screen because of its low resolution compared to the human eye. Because of this, it is better to use a sans-serif font like Arial or Calibri for on-screen presentation, and serif fonts like Times New Roman or Cambria for documents you plan to print. (Note that Calibri and Cambria are the default font settings in Word 2013.
While we’re on the topic of serifs, it is wise to avoid typing in Comic Sans. Comic Sans is a sans-serif font, but it is generally considered a silly one. If you use Comic Sans in your professional work, your audience will laugh at you. If you’d like to learn more about the history of fonts, and why Comic Sans is disliked, you can watch "A Defense of Comic Sans" by Vsauce on Youtube.
Emphasis
Use italics or bold text to convey emphasis. Avoid underlining because it makes text hard to read. Do not use ALL CAPS either, as this will be interpreted as shouting. If you want a title or gloss to appear in all capital letters, use the small caps feature instead. This feature can be accessed from the Home toolbar in Word 2013 by clicking the arrow at the bottom right corner of the Font box and checking the Small Caps checkbox that appears in the popup. (Don't forget to return to that popup and uncheck the box when you're done.)
Paragraphs
Make indenting a feature of your paragraphs instead of using tabs to indent. You can set an indent quickly using the ruler at the top of the page (make sure that "Ruler" is checked in the View toolbar.) Click and drag the top half of the hourglass shape to the desired indent location. For a hanging indent, as in MLA and APA-formatted works cited pages, drag the bottom half instead.
Use paragraph spacing instead of blank lines to separate paragraphs. Paragraph spacing can be changed in the Home toolbar by clicking the Line and Paragraph Spacing button. A single-spaced paragraph should have space above it and no indent; a double-spaced paragraph should have indenting and no space between paragraphs. The default spacing for Word 2013 is 1.15 spacing, probably because its creators found it easier to read.
Punctuation
Among the leftovers from typewriter usage are the use of straight quotes instead of curly quotes and double dashes instead of em-dashes. Word 2013 will format curly quotes and em-dashes automatically. The LingWord template includes a macro that toggles this setting.
Fonts, characters, and the keyboard
As a linguist, you’re going to need to use a lot of special characters that aren’t in English orthography. Here is some background information on how to get those characters in Microsoft Word.
Terminology
A font is made up of glyphs (letters and/or symbols) mapped onto character positions. The fonts you have available may depend on your computer and the application you’re using. The Unicode website has links to fonts that linguists may find useful.
A character set is a standard mapping between letters and character positions. Most fonts use one of a small number of character sets, but there are some fonts with nonstandard mappings, such as Sil IPA and Wingdings.
A keyboard layout is a conventionalized association between keyboard keys and character positions. The character you get when you press a key depends on both the character set of the font and your current keyboard layout. You can change your keyboard layout in Windows’ multilingual settings.
The following table shows some mappings when you have the default keyboard active in two different fonts. Note that there are many fewer keys on your keyboard than characters in most fonts — even if you double the number by including the shift key — so some characters don't have an associated keystroke.
Character sets
The following character sets are the ones most commonly found in Windows fonts.
- ASCII is among the oldest character sets. It has 127 character positions, the first 32 of which are control codes. The remaining 95 characters each correspond to a key on the standard American English keyboard. 33 is the space, 48-57 are numbers, 65-90 are upper-case letters, 97-122 are lower-case letters, and the rest are punctuation and symbols. This set is shared across computing platforms; other sets, with the exception of Unicode (at least theoretically), are operating-system specific.
- Windows ANSI has 224 characters and was first used in Windows 3.1. It contains all of ASCII plus 126 characters common in Western European languages such as accented vowels, as well as some typographical symbols like curly quotes and bullets.
- Extended Windows ANSI has 652 characters and was first used in Windows 95. It adds accented characters for Turkish, Cyrillic, and Greek, as well as Baltic and Central European languages.
- Unicode is intended as a universal character set, and has been supported at least in part by Windows since Windows 95. Unicode version 8, released in June 2015, contains hundreds of thousands of characters from almost every writing system used on this planet, including symbol sets such as Wingdings, emoji, and most importantly for linguists, the International Phonetic Alphabet. More information on Unicode can be found at the Unicode Consortium’s website. Youtube educator Tom Scott has also produced videos on the history of Unicode and how new characters (specifically emoji) are added to the character set.
Accessing special characters
Linguists traditionally used several different ANSI fonts to get all the characters they needed. Since there are now large Unicode fonts freely available, it is probably preferable to use a single Unicode font instead. (Be aware, however, that not all computers or applications may have good Unicode support. If a character is missing from your application’s character set, it will appear in your document as an empty box.)
The easiest way to find a special character and insert it is to go to the Insert toolbar in Word and click Symbol. If the symbol you want is not on the Recently Used list that appears immediately, click More Symbols. In the popup box, select a font from the dropdown menu on the left. Normal Text inserts a symbol in the font you’ve been typing in. Choose a character subset from the dropdown menu on the right to navigate through the list to the character you want. Double-click on a character to insert it.
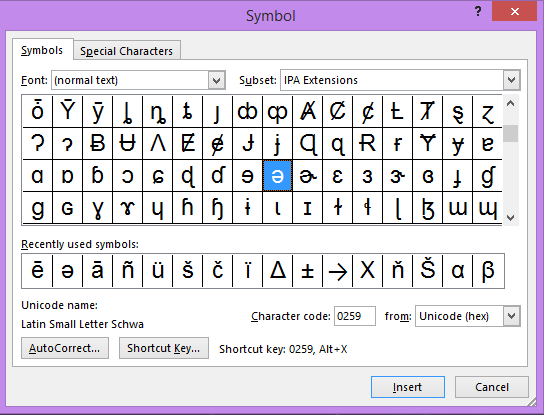
From this popup, you can assign an autocorrect entry or a shortcut key combination to any character you plan to use frequently. Don’t rely on the shortcut keys displayed at the bottom of the popup to give you the right character.
Footnotes and Endnotes
Footnotes are nice for your readers, so it’s good to use them for term papers, circulating drafts etc., but some journals want endnotes. In Word 2013, both can now be added from the References toolbar.
To view all your notes at once, click Show Notes.
To convert footnotes to endnotes and vice versa, click the arrow in the lower right corner of the Footnotes block of the References toolbar. This opens a popup from which you can format footnotes/endnotes. Click the Convert button in the top section to switch between the two.
To change the appearance of footnotes and endnotes, you can just modify the appropriate built-in styles.
It's also tricky to get endnotes in the proper place in your paper, i.e. after the text and before the references. Here's a useful method:
- In the popup you used to convert your footnotes to endnotes, click the dropdown menu next to Endnotes in the top section and select End of Section. While you’re there, make sure the numbering is formatted the way you want it. Click OK.
- In the text where you want the notes to go, type a heading, e.g. “Notes”. If you want a page break before the notes, it should go before this heading.
- Position the cursor at the beginning of the next line.
- In the Page Layout toolbar, click the Breaks icon and select Continuous.
- To remove the endnote separator:
- In the View toolbar, select Draft view.
- In the References toolbar, click View Notes. An Endnote toolbar should appear. Select “Endnote Separator” in the dropdown menu, then select the separator line and delete it.
- Return to Print Layout view and continue as normal
Interlinear Glossing
A special typographical challenge that linguists face is the formatting of our beloved example sentences with interlinear glossing. The problem is to make the words in the original example line up with the gloss, whether the example word or the gloss word is longer. I will present three solutions to this problem, from worst to best. (See Numbering for how to insert example numbers.)
1. Use a fixed-width font and spaces
(1) Ini sebuah contoh
This
a example
"This is an example."
This was the only solution on typewriters and many early word processors. Now that other options exist, this solution is unaesthetic and requires a lot of unnecessary fiddling with spacing every time you edit the example.
2. Use tabs
This solution works with proportional fonts and involves doing the following:
- separate the words on both lines with tabs
- select both lines (so the tab settings will apply to both)
- add tab stops on the ruler and adjust them to line the words up properly
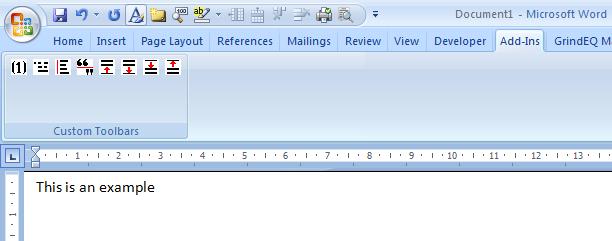
To show tabs, click the button in the top right corner of the Paragraph block in the Home toolbar that looks like a backwards P. This makes hidden formatting symbols like tabs visible. The L-shaped marks on the toolbar in the example below correspond to tab stops, and you can drag them to the correct position.

Again, this requires a lot of fiddling with tabs.
3. Use tables
Recent versions of Word have a table feature called "Autofit" which automatically fits table columns to the size of their contents. This means that the process of adjusting the width of the columns to the widest text is entirely automated.
To use this feature in Word 2013, click inside the table, then select the Layout toolbar. The Cell Size block contains an Autofit button. Click on it and select "Autofit Contents." Automating this process gets rid of all the time-consuming fiddling.
Other benefits of the table method:
- Since a table cell is also a paragraph, paragraph styles can be used to format elements within the example, or to format an example differently from the surrounding text. The older methods required the use of character styles, which are more unwieldy.
- It's much easier to add additional rows if you need to add gloss lines, indicate constituency, etc.
- Breaking up a long example at the end of a line is easier, since you can select a block of cells to cut and paste them.
A caveat: Tables right next to each other in a Word document will merge and mess up the Autofit. Make sure to keep a blank line between your examples. If tables merge, click in the first row of the second example and select Split Table in the Layout toolbar.
Some style advice:
- Cells in an example table should not have borders. Once you have typed in all your examples, highlight the whole table with your cursor, then click the Design toolbar. At the right-hand end of the toolbar is a Borders button. Click that and select No Borders.
- If you want to add a column for the example number or other marginalia such as asterisks, click in the leftmost column, then on the Layout toolbar, and select Insert Left. This new column should be a fixed width; you can change this width by adjusting the position of the gray boxes on the top ruler.
There are two methods of creating tables for your examples; choose whichever you prefer. One is to insert a table into your document and then type words into cells, adding rows and columns as you need them. The other is as follows:
- Type the example and the gloss, separating the words with spaces, and using an extra space for any item that doesn't correspond to a word in the other line (for instance the example number).
- Select both lines of the example.
- In the Insert menu, select Table and then Convert Text to Table. In the popup, enter the number of rows and columns you want your table to have. Under "Autofit", choose "AutoFit to Contents"; under "Separate text at", choose "Other:", and type a space in the box after "Other:". (If you prefer you can type tabs to separate the words in the example, and choose “Tabs” here.) Click “OK”.
The TableExample macro in the LingWord template automates this process.
Navigation and Outlining
In a long document, getting to the part you want to work on can be time-consuming. Fortunately Word offers features that make getting around in your document very convenient, provided you use the standard heading styles for your section headings.
The Document Map
In Word 2013, the document map can be accessed through the View toolbar by checking the Navigation Pane box. It shows up on the left side of the edit window and lists all the sections, subsections, etc. within the document. You can jump to any section by clicking its heading and expand or collaps any heading by clicking the triangle next to it. The document map cannot be edited or rearranged.
Outline View
Like the document map, the Outline View shows the structure of your document and allows navigation. However, it is an editing mode; changes you make in Outline View are changes to the document. Outline View can be accessed from the View toolbar by clicking the Outline button. It shows your document with indentation reflecting heading depth.
When you enter Outline View, an Outlining toolbar appears with commands specific to this view:
- Left and right arrows promote and demote blocks of text to different heading levels
- Up and down arrows move blocks of text within the document structure
- Plus and minus buttons expand and collapse sections
- The Show Level menu allows you to choose how many levels of headings are displayed.
You can also move, add, and edit text directly in this view. To return to the normal viewing window, click Close Outline View.
Numbering and Cross-referencing
One of the most common things linguists do when writing papers is add and rearrange sections, examples, figures etc. This can lead to endless renumbering headaches, especially when these items are referred to in the text, e.g. "As I show in example (6)..." Word has a range of tools to make all this easy and automatic. Note that using these tools might be harder than simply typing a number in the first instance, but in the long run it pays off.
The kinds of numbered things discussed here are distinct from both paragraph numbering (such as you would use for a list) and line numbering. Both of those types of numbering are automatic and handy for short, local number sequences, but they give you less control and should not be used for numbering things which are a) not adjacent and b) might need to be cross-referenced.
Headings
It's always a good idea to use built-in heading and subheading styles. They make a lot of things easier:
- You can number sections and subsections automatically. To do this, click on the Multilevel List icon in the Home toolbar and select the sixth option (1. Heading 1, 1.1 Heading 2, etc). This is the option preferred by linguists.
- You can use Outline View to look at and rearrange the structure of your document easily.
- You can use the Document Map to navigate your document (see Navigation and Outlining).
- You can automatically cross-reference your headings in the text. If you move or renumber a section, the references will update themselves. In the Captions block of the References toolbar, click Cross-reference and choose what you want to refer to (heading, example, table, etc) and what part of the title you want to copy over.
Example numbering
You can number any series of items automatically using what Word calls a "Sequence Field". This is particularly useful for example numbers. Follow these steps to insert an example number:
- In the Insert menu, click Quick Parts and select Field.
- In the Categories dropdown menu, choose Numbering and then click SEQ in the list below.
- The Field Codes box now says SEQ. It’s a good idea to edit this to add a reminder that this sequence represents examples. I recommend "SEQ EX."
- The Options popup allows you to customize the formatting of the example numbers, to select "switches" which control how the numbers are displayed (for instance, to reset the series or repeat the last number), and to add bookmarks (for cross-referencing).
- Click OK and the SEQ field will appear in your document.
To see the field itself (i.e. {SEQ EX}) instead of the number it represents, right-click the number in the document and choose "Toggle Field Codes".
If you insert another SEQ field earlier in the document, the number that displays will appear to be incorrect. That's because the display is updated only when you request it. You can see the correct number by right-clicking and typing F9 or choosing "Update Field". To update all fields in the document, select the whole text (Ctrl-A) and "Update Field".
The LingWord template contains a macro ("ExampleNumber") that will automatically generate an example number with surrounding punctuation and update the field.
Cross-referencing examples
You will probably want to cross-reference your example numbers in the text of your papers: e.g. "As exemplified in (23) above..." (In fact, it's good practice to make sure you have something to say about every example in your paper, since each one should have a reason to be there.) Since SEQ fields can change their values, you need a way to automatically update the cross-references when that happens. To this end you can use something called a "bookmark". Bookmarks allow you to refer to text in one part of a document from another part — including the displayed value of a field reference. To add a bookmark to an example number, follow these steps:
- Select the example number, including any punctuation (such as parentheses) that you want to include in the cross-reference.
- In the Insert toolbar, select Bookmark.
- Type a name for the example. It has to be unique, and it should be something which refers to the content of the example rather than its position, since that might change. I usually pick some text from the example.
- Click Add. This creates a bookmark.
To cross-reference your example:
- In the Reference toolbar, select Cross-reference.
- Under Reference Type, select Bookmark
- Under Insert Reference To, select Bookmark Text
- Under For Which Bookmark, select the name of the bookmark you want to refer to.
- Uncheck Insert as Hyperlink
- Click Insert and then Close.
Note that the cross-reference you just inserted is also a field. It will update when you update all the fields in the document.
Captions
To number tables and figures, select the object, right-click, and select Add Caption. Choose a label, decide whether you want the caption above or below the item, and type the caption in the edit box.
To cross-reference the figure, use the same Cross-reference icon as you did for fields. Under Reference type choose Figure, Table or whatever you used as a label. You now have several useful choices under Insert reference to — the label and number (e.g. Figure 1), the caption itself, etc.
Structure of a Word Document
Documents in Word have a hierarchical structure.
Different types of properties apply to different units in the hierarchy:
- Section. By default a document is a single section, but settings for margins, headers and footers, footnotes, and columns apply to whole sections, so you need a section break if you want to change any of these for only part of a document. You make a new section using the Break menu in the Page Layout toolbar and selecting one of the four types of "section breaks" (the choices have to do with whether you want the new section to start on a new page, and if so, where). There is no direct way to format a section; once you have a section, though, if you change "section-sensitive" formatting (e.g. page layout options) you will have the choice of applying the changes to just the current section.
- Paragraph. Most of the formatting you use in Word applies at the paragraph level: indents, line spacing, default font properties, bullets etc. You can apply many aspects of paragraph formatting all at once to a paragraph using paragraph styles, discussed below.
- Character. Some formatting attributes apply at the level of individual characters, such as the bold font in the first word of this paragraph. You can apply a set of character attributes together using character styles.
Word also recognizes words and sentences — for instance, if you double-click in the text you will select a word, and if you control-click, you will select a sentence. However, these units can’t have formatting automatically associated with them.
In addition to these parts of the main document, there are other special kinds of text which Word refers to as other "stories". These include footnotes, comments, headers and footers, and the like. These items are stored separately from the main text and require special commands to access and edit.
Finally, customizations such as style definitions, macros and toolbars may either be stored in the document or in the document's associated template.
Styles
"Styles" are collections of format specifications which can be applied all together to a paragraph or a group of characters. The advantage of using styles to apply formatting is that you can easily change the formatting of all paragraphs of a certain type (e.g. examples, section headings or footnotes) simply by redefining the style. A linguistics paper usually goes through a number of stages: as a term paper, as a draft you circulate for comments, as a conference handout, as a journal submission, as camera-ready copy for a volume. Each of these stages has its own format requirements. Using styles right from the beginning for all formatting can save a huge amount of time over a paper’s lifespan.
There are two kinds of styles: "built-in" and "user-defined". Built-in styles include "Normal", heading styles, styles for footnotes etc.; these styles are associated with special parts of the document that Word knows about. User-defined styles are those you make up yourself. The Word version of the document you are reading used several styles: the built-in styles Normal, Title, Subtitle, Caption, Heading1, and Heading2, and the user-defined styles BulletList and SubList. (For the HTML version, these styles were translated to Cascading Style Sheet styles, which are equivalent in concept.)
Styles also come in "Paragraph" and "Character" flavors. "Character styles" apply to character strings (i.e. selected text) instead of to whole paragraphs. They are especially useful for foreign words and phrases, since you can turn spell-checking off for words in a particular style, and change whether you want them italicized or not: see "Language" below. Paragraph styles are the most useful styles; we'll be concerned with them in the rest of this section.
Word 2002/2003 change the way you interact with styles from earlier versions. The "Styles and Formatting" task pane and the "Reveal Formatting" task pane make it much easier to see what formats your document uses.
Style Tree
Styles in Word are defined hierarchically (with “Normal” always the root of the tree).
If you change an attribute of a style higher in the hierarchy, you also change the styles dependent on it, unless that attribute is different in the dependent style. In the example above, if you change the line spacing of "Normal" to "Double", the line spacing of all the other styles will also change to "Double". But if you change the font of "Normal" to "Courier New", only "Indented" will change, since the other styles already have "Font" set to "Arial".
Viewing styles in a document
The styles available for use in a document can be seen in the Styles block of the Home toolbar. To apply a style to a selected paragraph, click on a style in that block. More style options can be made visible by clicking the dropdown arrow.
One useful feature of the Style block is that it allows you to select all instances of a particular style, for example to make creating handouts easier. Right-click on a style and click "Select All n Instances." You can then interact with them as if they were one block of text.
Creating a new style
Select a block of text that's already in the style you want to base your new style on (usually Normal). Modify the paragraph formatting using toolbars and menus until it looks the way you want it.
In the Styles dropdown, click "Create a Style." Type in a name for your new style and click OK. The new style will be added to your style list.
Modifying a Style
There are two ways to modify a style. The first is to change a block of text using menus and toolbars, then right-click on the style you want to modify and select "Update to match selection." That will redefine the style based on the formatting of the selected block.
However, a few formatting options can't be set in this fashion. For those, you'll need the big style dialog. To see it, right-click the style you want to modify and choose Modify. You'll see the dialog below. Common formatting options are available through the buttons in this dialog; many others, including borders, bullets etc. can be accessed through the Format button in the bottom left corner.
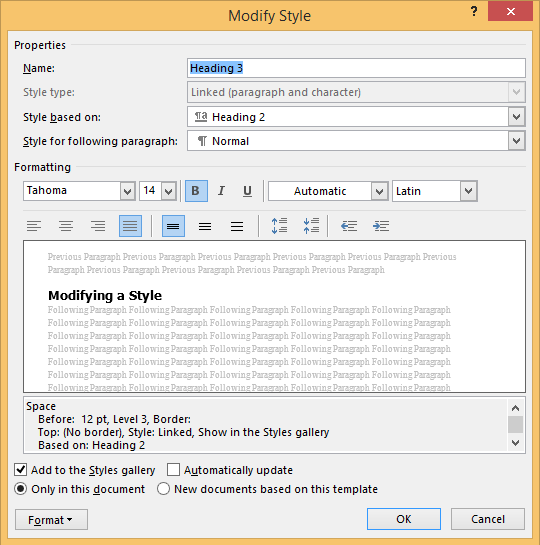
This dialog also contains several other useful (but often-overlooked) options.
- Based On lets you specify the position of the style in the tree, i.e. what style you want it to inherit most of its characteristics from. The description area shows the differences between the current style and the one it's based on.
- Style for Following Paragraph lets you specify what style will be used after you hit a carriage return. By default this is the same as the current style, but there are some cases where you want it to be different. For instance, after a heading, you probably want normal text rather than another heading; after the style you use for a linguistic example, you probably want the style you use for the gloss line. You can save a lot of time by setting this property.
- New Documents Based on This Template lets you add the style to the document's template; if you don't check this, the style will only be defined for the current document.
- If you check Automatically Update, your style definition will change every time you change the format of a paragraph that uses the style. I'd advise leaving this unchecked.
At the bottom of the list you get by clicking the Format button, there's a Shortcut Key option. This lets you assign a key combination to your style.
Formatting options of interest to linguists
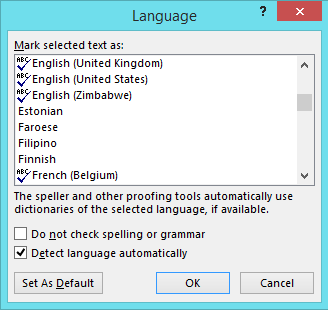
Language
You can tell the spell- and grammar-checker what language a selection is in, or have it ignore text in a language that isn't supported. This means that the spell-checker actually becomes usable for linguistics papers with lots of examples in different languages!
For one-time use, click on the language name at the bottom of the screen next to the page and word counts and select a new language from the list in the popup.
For one-time use, click on the language name at the bottom of the screen next to the page and word counts and select a new language from the list in the popup.
To make a language specification part of a style, open the Modify Style popup, click Format, and select Language from the menu. The same Language popup will appear, from which you can set a language for a style.
For a language that isn't supported (you'll see an icon next to supported languages), check the "Do not check spelling or grammar" box. Word 2013 comes with proofing tools for English, French, and Spanish; proofing tools for other languages can be downloaded here. The following languages are available for free:
Afrikaans, Albanian, Armenian, Assamese, Azeri (Latin), Bangla, Basque, Bengali, Bosnian (Latin), Bengali, Catalan, Chinese (simplified), Chinese (traditional), Croatian, Czech, Danish, Dutch, English, Estonian, Finnish, French, Galician, Georgian, German, Greek, Gujarati, Hausa, Hebrew, Hindi, Hungarian, Icelandic, Igbo, Indonesian, Irish, isiXhosa, isiZulu, Italian, Japanese, Kannada, Kazakh, Kinyarwanda, Kiswahili, Konkani, Korean, Kyrgyz, Latvian, Lithuanian, Luxembourgish, Macedonian, Malay (Brunei, Darussalam), Malay (Malaysia), Malayalam, Maltese, Maori, Marathi, Nepali, Norwegian (Bokmal), Norwegian (Nynorsk), Oriya, Pashto, Persian, Polish, Portuguese (Brazil), Portuguese (Portugal), Punjabi, Romanian, Romansh, Russian, Scottish Gaelic, Serbian (Cyrillic), Serbian (Cyrillic-Bosnia & Herzegovina), Serbian (Latin), Sesotho sa Leboa, Setswana, Sinhala, Slovak, Slovenian, Spanish, Swedish, Tamil, Tatar, Telugu, Thai, Turkish, Ukranian, Urdu, Uzbek (Latin), Vietnamese, Welsh, Wolof, Yoruba
Note that selecting one of these languages automatically takes you to a download page in that language.
If you Google "multilingual proofing tools", you'll also find third-party options.
Controlling page breaks
These formatting options are in the Paragraph formatting popup. For one-time use, click on the arrow in the bottom right corner of the Paragraph block in the Home toolbar and select the Line and Page Breaks tab. To apply them to a style, click Format in the Modify popup and select Paragraph and the correct tab.
"Keep lines together" prevents a paragraph from being split across pages; "Keep with next" keeps the current paragraph on the same page as the following one. Using this on all but the last line of your examples keeps them from being split up; it is also good for keeping headings together with their bodies, figures with their captions, etc.
Indents and spacing
These options are on the Indents and Spacing tab of the Paragraph popup (the same popup that contains Line and Page Break formatting).
To produce an indented paragraph, you should use a style with the "indent" setting rather than typing a tab. To produce space between paragraphs you should use the "spacing before" and "spacing after" settings rather than typing an extra carriage return. Why? Because if you have to change the format of your paper for an editor (or fussy committee member), you can then do it by changing the style definition, rather than by searching and replacing those extra tabs and carriage returns. See Basic Typographical Principles.
More on Unicode
As mentioned before, the most challenging aspect of making the switch to Unicode is finding the character you want among the tens of thousands available. In addition to the resources mentioned on the previous page, there are some useful tools to be found on the Unicode website.
Unicode characters are encoded with 16 data bits, and for this reason they are generally numbered using hexadecimal numbers (base 16). Hexadecimal numbers use the digits 0-9 and the letters A-F (representing the numbers 10-15). For some purposes you may have to convert the hexadecimal Unicode number to its decimal equivalent.
A guide to finding particular Unicode characters can be found here. This page also gives you access to the process for submitting characters if the character you want isn't yet included in Unicode.
Fonts
Two Unicode fonts that are commonly available on Windows computers are Lucida Sans Unicode (1,775 characters, including IPA) and Arial Unicode MS (over 50,000 characters, including East Asian logographs; ships with Office 2000 and up).
Code2000, a shareware Unicode font with over 34,000 characters, is available for free download ($5 if you keep it) by James Kass here. The quality is a little iffy (he's apparently not a font design professional), but it does have serifs for those who don't like the sans-serif version.
Code charts
From the Unicode website, you can download .pdf documents corresponding to "code charts" of Unicode subsets. Unlike the names list, these show the glyphs (characters) as well as their names.
- List of available code charts
- IPA code chart (PDF)
- An interactive IPA chart from which you can select characters to copy and paste into your document can be found here.
Names list
The Unicode names list is available for searching both online and as a large text file. So, if you can guess what a particular character might be called, you can find the character number by searching this text file. Here is the online version; this version has links to the code charts which show what the glyphs look like.
Inserting Unicode characters in various applications
Inserting Unicode characters is a bit more complex. The following is copied from the Unicode FAQ.
Q: How can I input any Unicode character if I know its hexadecimal code?
A: Some platforms have methods of hexadecimal entry; others have only decimal entry.
On Windows, there is a decimal input method: hold down the alt key while typing decimal digits on the numeric keypad. The ALT+decimal method requires the code from the encoding of the command prompt. To enter Unicode decimal values, you have to prefix the number with a 0 (zero). E.g. ALT+0163 is the pound sign ("£"), in decimal.
There is a hex-to-Unicode entry method that works with WordPad 2000, Office 2000 edit boxes, RichEdit controls in general, and in Microsoft Word 2002. To use it, type a character´s hexadecimal code (in ASCII), making corrections if needed, and then type Alt+x after it; in some program versions, however, such as MS Word (German), you must rather type Alt+c after it. The hexadecimal code is replaced by the corresponding Unicode character. The Alt+x (or Alt+c, respectively) can be a toggle (as in the Microsoft Office XP). That is, type it once to convert the hex code to a character and type it again to convert the character back to a hex code. If the hex code is preceded by one or more hexadecimal digits, you will need to "select" the code so that the preceding hexadecimal characters aren't included in the code. The code can range up to the value 0x10FFFF (which is the highest character in the 17 planes of Unicode).
Recent versions of Windows also ship with the "NeiMa" input method for the Simplified Chinese language; this IME support the input of Unicode characters via their scalar value expressed as four hexadecimal digits (and it therefore limited to BMP characters). However, using this input method may have the undesirable side-effect of tagging your text as "Simplified Chinese", even if you use non-Chinese characters.
On the Macintosh with OS X, after activating the Hex input method, simply hold down the option key when typing the codes. After each fourth one, you get the character inserted in the document, and in newer software, the "Last Resort" font will be used if there is no regular font available for the character.
On Mac OS X 10.2 or later, there is a Unicode character palette, which lets you click on and insert any Unicode character.
Note that this means that in current versions of Word, you can type Unicode characters in such places as the "find" field of a search-and-replace dialog using the Ctrl-x method described above.
Templates
A template is a Word document that stores the data you need to create documents of a similar type. When you customize Word by defining styles, modifying the toolbar or creating macros, you're most likely customizing a template. Thus, you can have different styles, toolbars and macros available for papers, handouts, letters, and memos. Templates can also include document text, such as the address and salutation in a letter, or your name, affiliation and a date field at the top of a handout.
Structurally, a template is a document just like any other — that is, the file format and the kinds of data it contains are exactly like a normal Word document. A document that is created from a template essentially starts with a copy of the template, so (by default) changes you make subsequently to the document don't affect the template, and vice versa. There are ways to override this default behavior, however.
By default, templates are stored in a subdirectory of the Word program directory. I usually put mine somewhere else, since I want to make sure they get backed up regularly. Backing up your templates is the only way to save your macros, styles and toolbars, so it's highly recommended.
To change the directory where templates are stored (note that these instructions may be different depending on your system/Word version):
- Click File, then Options.
- In the popup, select the Save tab.
- Change the file path after "Default personal templates location."
Creating and modifying a template
To create a template, just start a normal document. It becomes a template when you save it with the extension ".dot" or ".dotx" instead of ".doc" or ".docx". I usually create a template by creating a document of the type I want (e.g. a memo), getting everything formatted the way I want it (defining appropriate styles for the various parts), and saving it. Then I delete the body text and use Save As to save it as a template.
You can edit a template by opening it in Word; specify the file extension ".dot" or ".dotx" to see only template files. Then you can simply edit it like any other document. NB: editing a template does not automatically change styles etc. in documents that have already been created with the template (see below).
The default template: Normal.dot(x)
Even if you never specify a template when you create a document, your document is still attached to a template called "Normal.dot" or "Normal.dotx". This file is stored in your default template directory. If you delete it, it will reappear (it is recreated with default settings by the program). It's useful to know about, since if you want to copy settings such as styles and macros to another computer, or back them up, you can do it by backing up this file.
Normal.dot is a global template, which means that the customizations it contains will be available to all documents, no matter what template they're attached to. Other templates can also be made global (see below). If you do a lot of customization, it's probably a good idea to save your work to a different global template: because of Word's habit of recreating Normal.dot if it can't find it, your customized version can easily get accidentally overwritten.
Using a template
To create a new document using anything but "Normal.dot", you must create the new file from the File menu. (Unless you’ve customized things, other methods of starting a file — e.g. clicking the "New" button or typing Ctrl-N — simply open a file with the default template, rather than giving you a choice.) You get a choice of premade templates as well as a "Personal" list of templates you have created. You can modify the lists by rearranging the subdirectories of your templates directory.
When you use a template in this fashion, you are essentially creating a copy of the template file. This means that subsequent changes to the template will not automatically be reflected in the document. Some changes made to the document, however, can be saved to the template. See Customization for details.
To change the template a document is associated with:
- Click File → Options → Add-ins. In the popup, set the Manage dropdown menu (at the bottom) to Templates and click Go.
- In the new popup, check the box for Automatically Update Document Styles. Then click Attach, navigate to where you saved the template, and open it.
- Click OK. Your template is now set.
You can also use this dialog box to make a template "global". That means that its styles, macros etc. will be available to all templates. Click the Add button under Global Templates and Add-ins to add it to the list of global templates. Then check the box by the template to make its data available to all documents.
It is also possible to move styles, toolbars, macros etc. between templates. Click the Organizer button in the Templates popup. You will see two list boxes, with a file name under each one. Use the Close and Open buttons to make sure one of the file names is the document you want to copy from, and the other is the document you want to copy to (it doesn’t matter which is which). There are tabs for styles, toolbars, and macros. Select the items you want to copy in one list box and click the arrow to copy them to the other.
The LingWord template
The LingWord template (LingWord.dot for older versions of Word) is a template specifically designed to automate some of the processes that a linguist would need. It automatically aligns original text and its gloss, and numbers examples. It supplies a toolbar and a set of macros to do that.
In order to install a template and a toolbar, please refer to instructions online (just search for the right terms on how to install for your specific operating system and Word version).
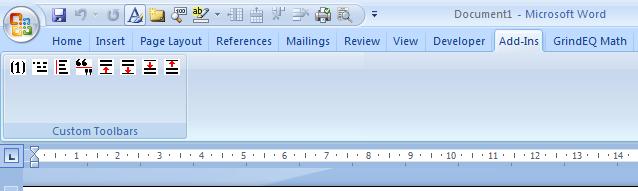
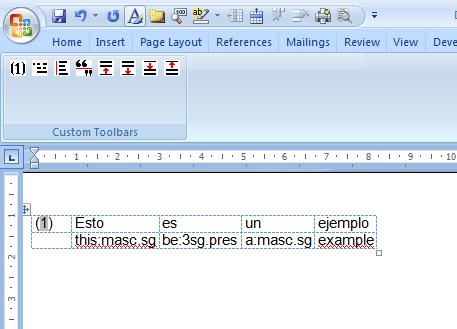
Once installed, you should have a toolbar that looks like this:
Numbering examples automatically
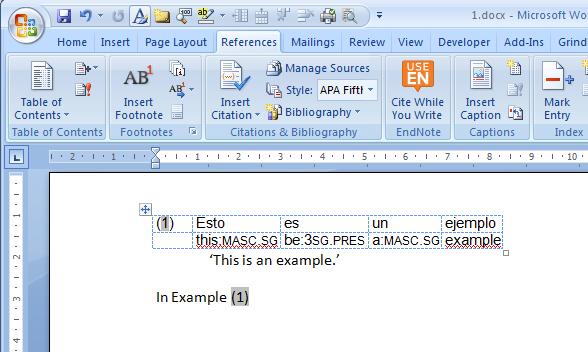
In order to number an example, simply place the cursor exactly where you'd like the example number to appear (to the left of the example), and press the first button in the Toolbar.
Then, you'll have the following. Note the shading on the example number. This is a very useful Word feature. I activate Field Shading in Options. This lets me know if any parts of my document are automatically created. It works for example numbers, table and figure captions, section numbers, and bibliographic references, if you use a reference management system.

Aligning glosses
First, write out the original text in one line, and the gloss on the next line, being careful that the words are separated by spaces in the same place in the original and the gloss.
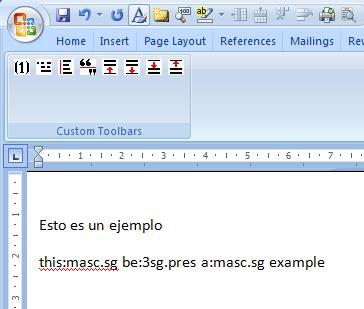
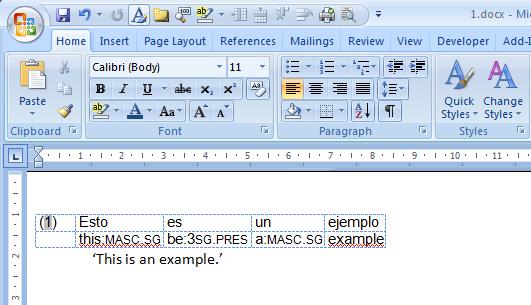
Next, place the cursor at the beginning of the gloss line. This is important: the cursor should be on the gloss line, not the original line, and at the beginning. With the cursor there, press the second button in the toolbar. You'll get an option box. You can change the settings there, but simply pressing "OK" will give you this You may get a warning about creating a style. Say yes for now; you can modify that style if you wish.
The button that you just pressed calls a macro that creates a table, makes it adjustable to width, and creates an example number. All with one click!
You can now edit the gloss, maybe changing grammatical information to small caps, and add a translation.
Cross-referencing examples
Once you have automatic example numbers, you can use them to create automatic cross references in your text. This involves two steps: creating a bookmark, and referencing it. Check also the cross-referencing information under Numbering and Cross-referencing, above.
To create a bookmark, select the text you would like to display in your example number. This could be just the number ("1"), or the number plus parentheses ("(1)"). The advantange of having the number only is that then you can append stuff to it, for instance, letters for sub-examples ("1a"). The disadvantage is that you have to type the parentheses every time you refer to it.
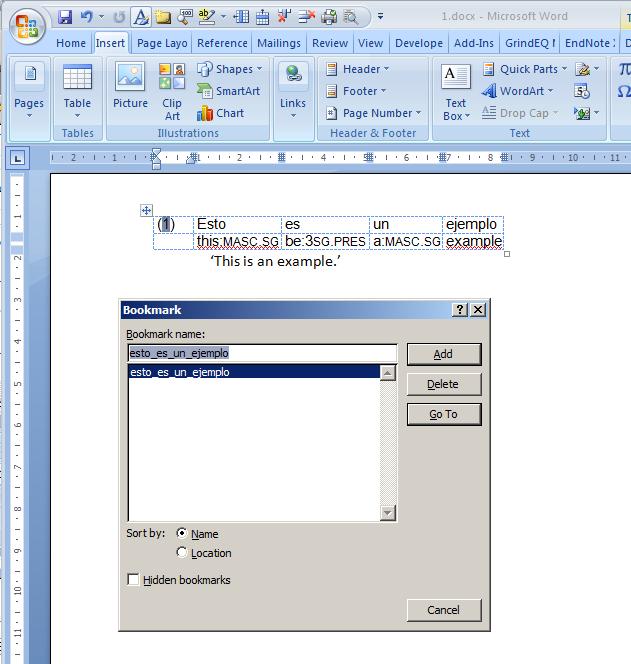
To create a bookmark, select the example number only, and go to Insert ->Bookmark in the usual Word menu (exact menu and wording may vary depending on versions). This allows you to create a bookmark with whatever text you want. My suggestion is to use the first four words of your example.
The LingWord template does the bookmark automatically for you, from the first four words (with parentheses). So if you follow the method above, you will find:
The second part involves cross-referencing your example in the text. To do that, place the cursor where you want the cross-reference to appear. Go to References -> Cross-Reference, and select Bookmark from the drop-down menu. Click "Insert".
Incidentally, you use the same method to insert references to table and figure captions, and to document sections that have been automatically labelled.
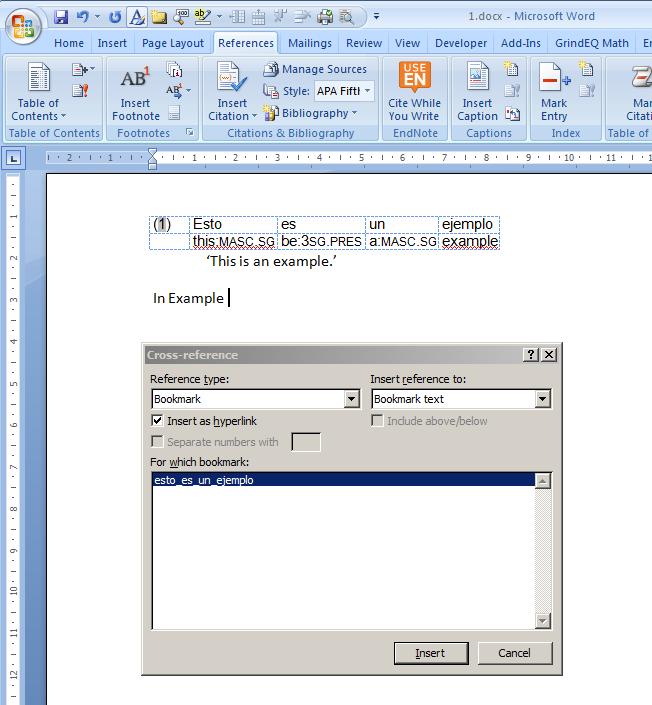
Then you'll get the text of the bookmark in the body of your text. Notice again the shading. This tells me that the reference is automatic.
The beauty of this method is that, if at any point you insert new examples, delete them, or change their order, the numbering will be automatically adjusted. Sometimes you have to right-click and select "Update Field".
These are just some of the tricks that you can automate with the LingWord template. The other buttons in the toolbar allow you to increase or decrease space above and before a line, and to change between straight and smart quotes in the document. More information and step-by-step instructions are available in the template document itself. Use the template document for older versions of Word