In SFU Animation, a team of four and I worked on an animation project together. The objective was to create a 30-second animation by creating 3D models and animating them in Maya, a 3D modelling program. Our team decided to create an animation based on the arcade game, Pac-man. Instead of using pac-man characters however, we used a ghost and reaper. An important task for our project was creating the models for the animation. I was responsible for creating the arcade scene model.
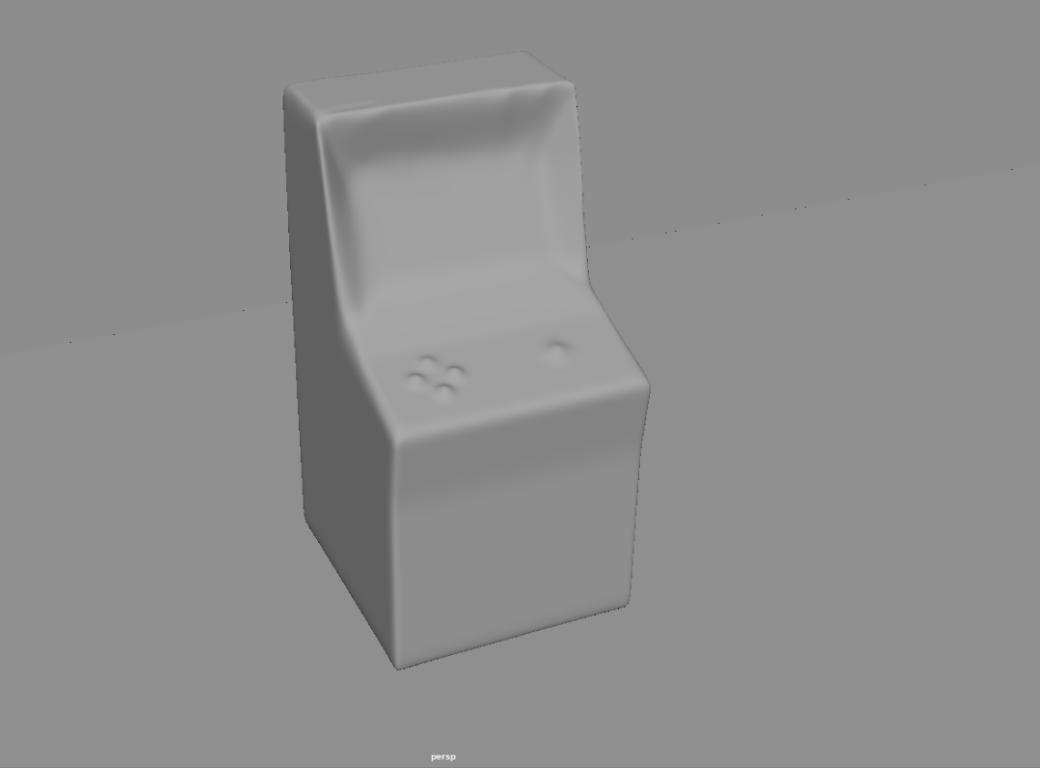
In 3D modelling, artists use tools that can manipulate a basic shape into a complex one. The first step to creating an arcade machine was by creating a 3D cube. I used tools such as the extract face tool, move tool, and add divisions tools. Using these tools, I dragged parts of the shape to form an arcade machine-like shape.
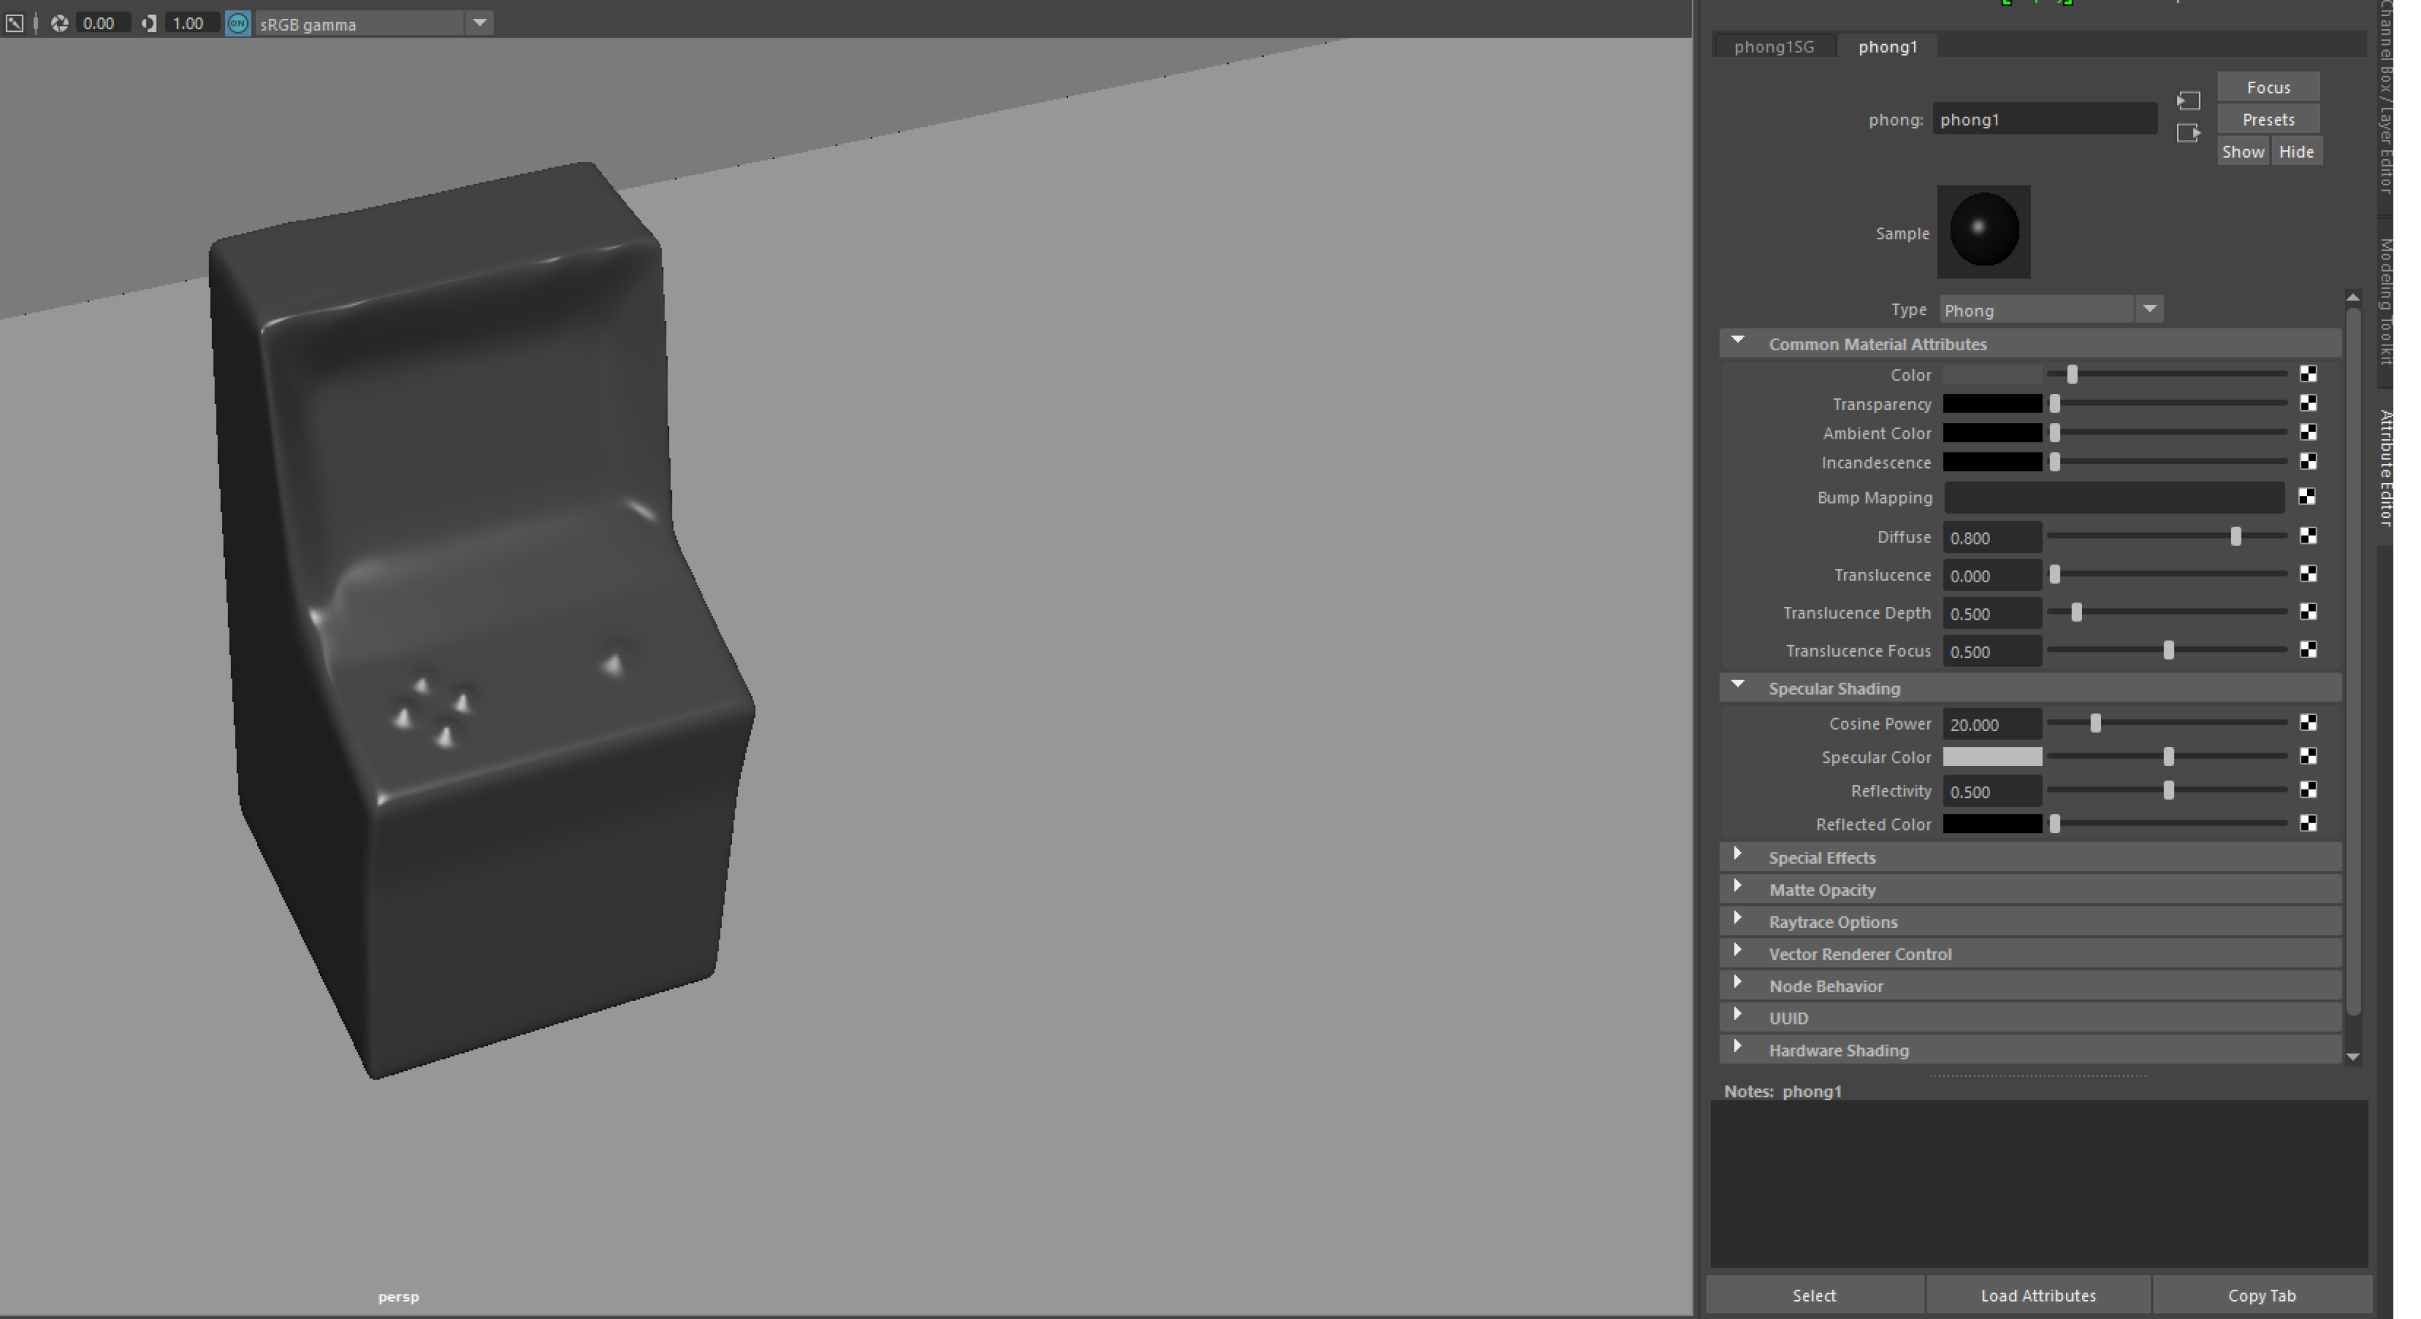
Next, I applied textures and bump maps. A texture is the material property of an object. The menu on the right which allows the user to adjust the properties of the texture. For example, I can change the colour of the object, or how much light is reflected off the object. In the animation render,For an arcade machine, I used a reflective plastic-like material, named Phong. I used this material because it resembles the plastic and glossy surface of an arcade machine. This glossy and reflective surface can be seen in the render; the patterns of the carpet is reflected onto the machine. This gives the animation some realism, and a 3D-feel. If all 3D models had the same texture, the animation would feel lifeless and unrealistic.
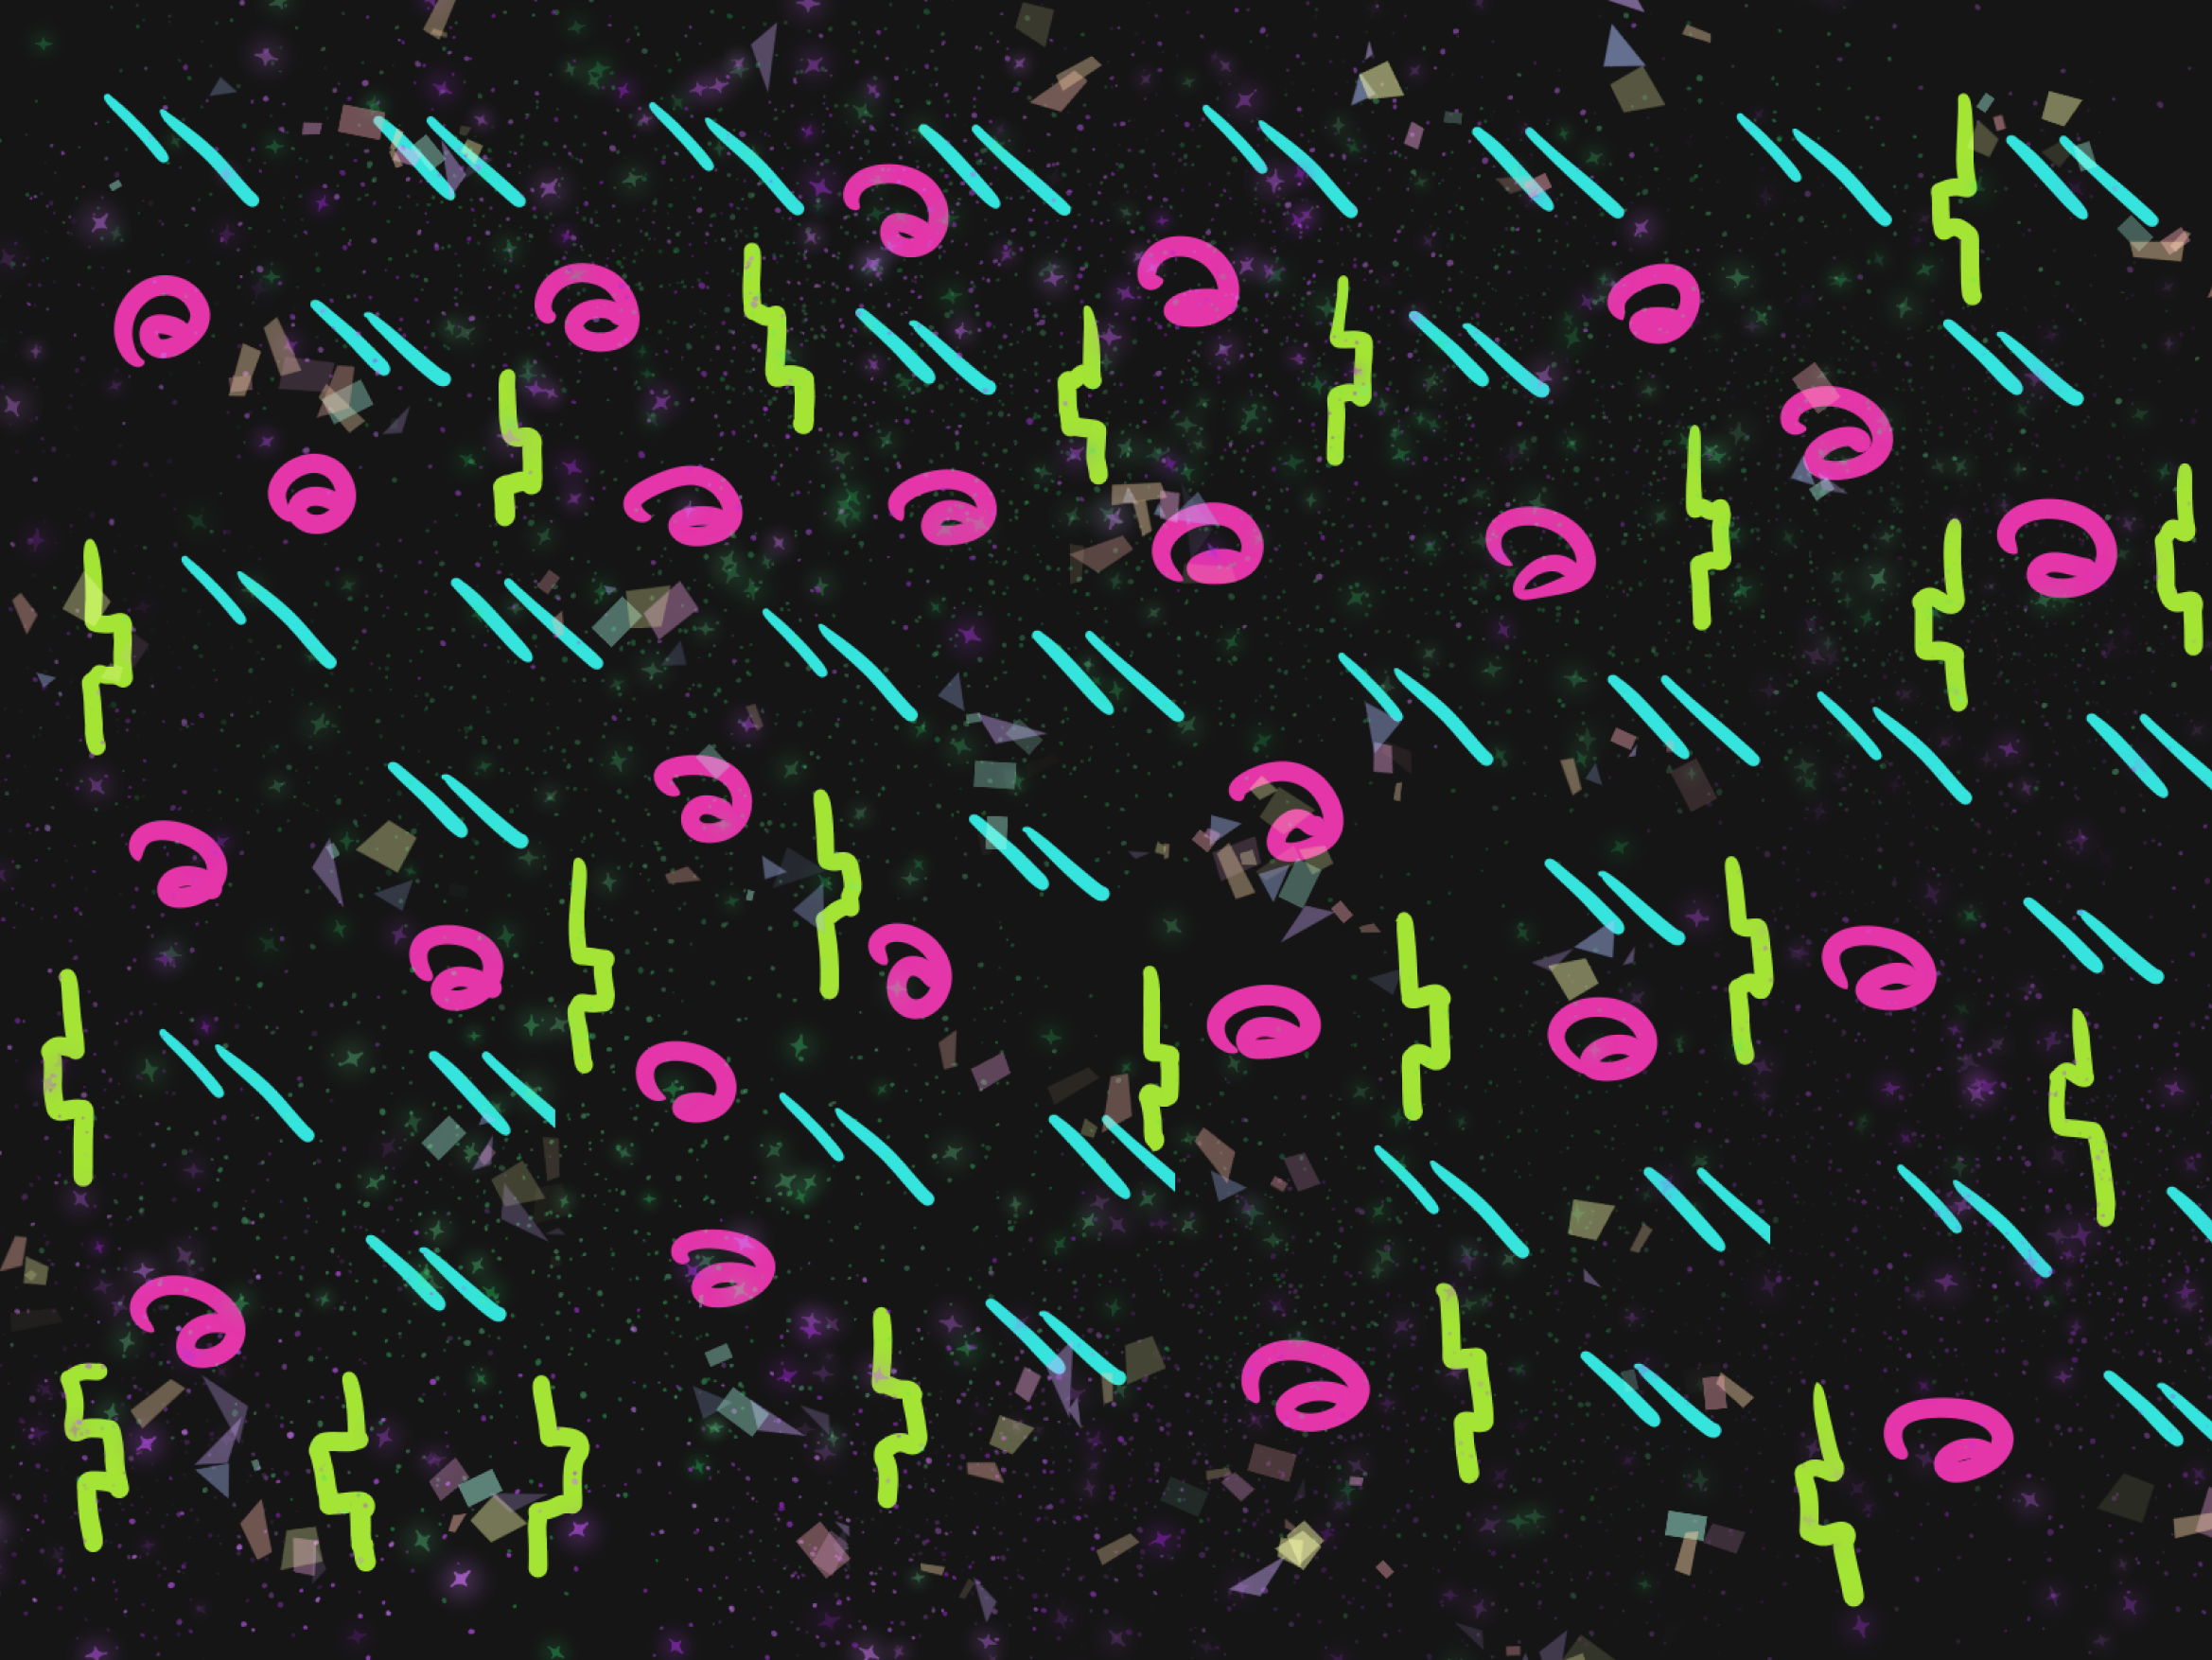
I applied a bump map to the floor after applying the textures. A bump map can be described as a painted layer of an object. Using Medibang Pro, a digital artwork software tool, I painted the floor of the arcade and saved it as a .JPG image, becasue bump maps usually read image file types such as .JPG and .PNG. Applying the bump map to the floor was a simple process, since the floor was a flat surface. With a more complicated 3D model such as a character model, one would need to unwrap the 3D model into a 2D projection first, then paint over that 2D image. After applying the texture and bump map, the modelling process was completed.
A challenge that I faced during this process was unfolding the arcade machine model into a 2D projection. Even though I followed through all the tutorial steps in unfolding the model, the result was a messy 2D projection that did not resemble an arcade machine. Thankfully, it was not necessary to apply a bump map to the arcade machine. Instead, I applied a texture to the arcade machine, which gave it a glossy and reflective surface.
The problem I encountered was most likely due to a careless error that I made during the modelling process. In the future, I will take my time in the modelling process because mistakes made in the initial process are harder to fix.
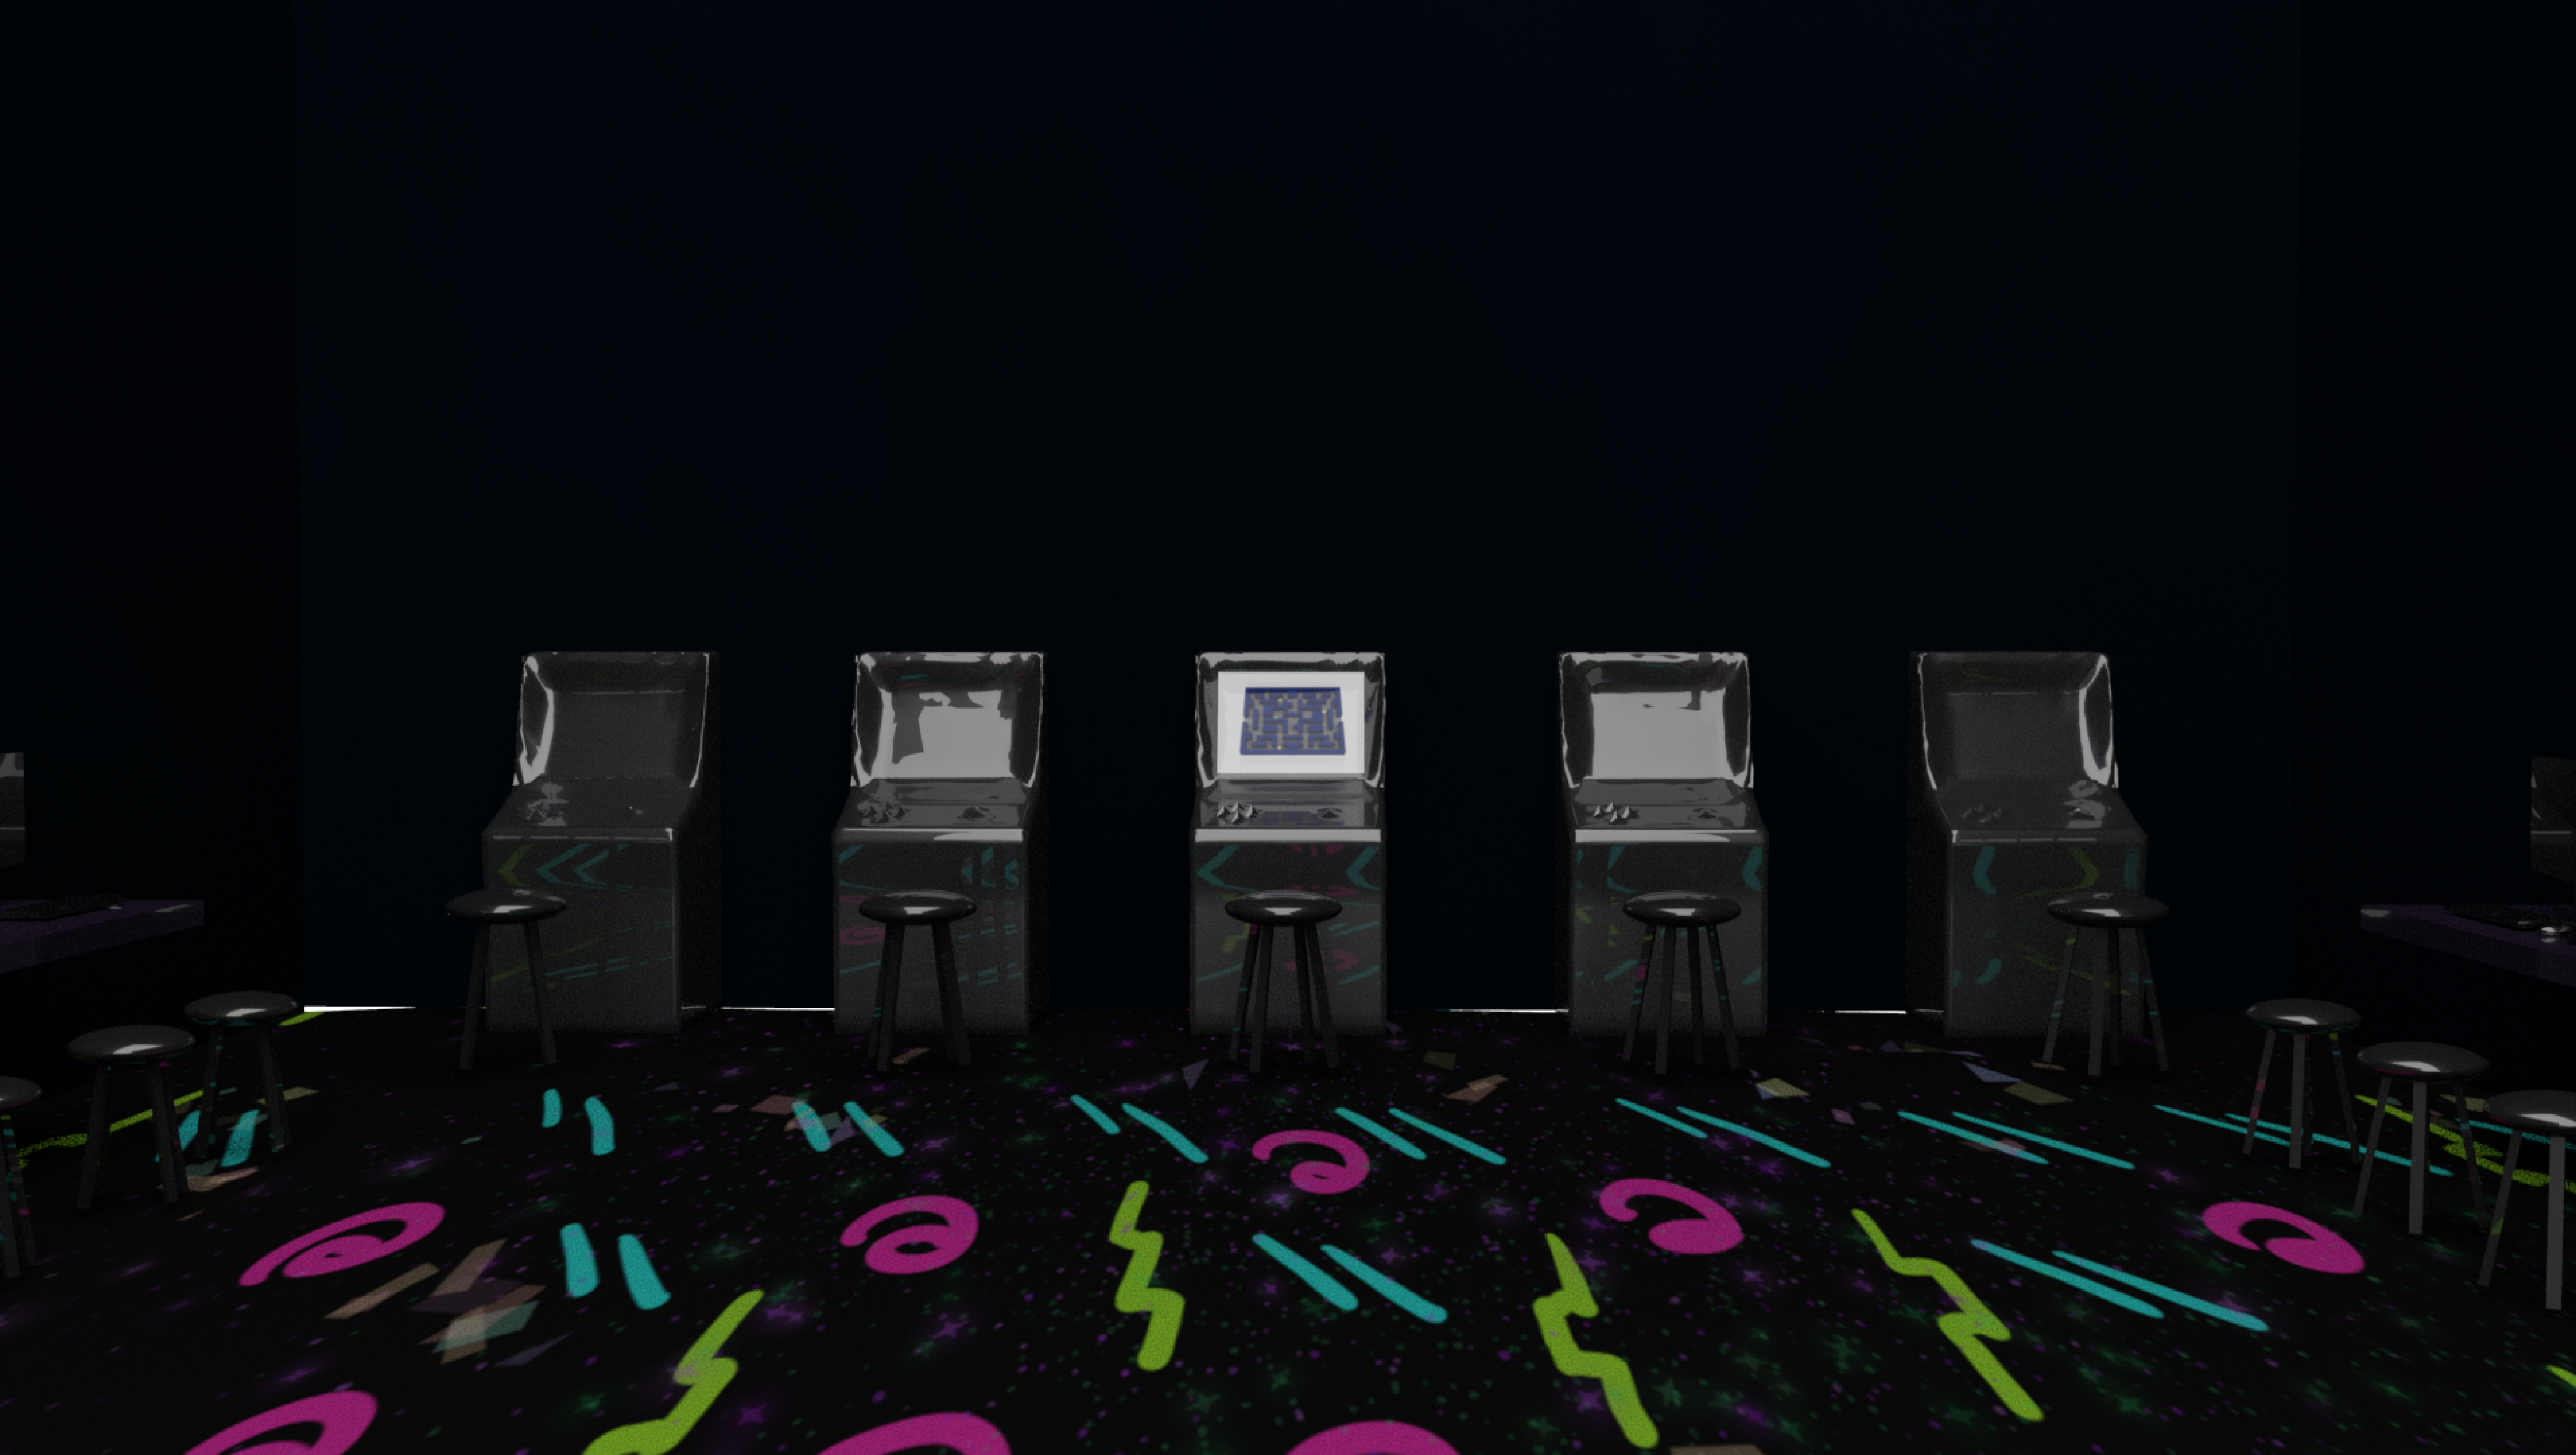
This project taught me a lot about the 3D modelling, texturing, and animating process. It required a lot of detail and effort just to make a simple scene. It changed the way I observe and think when I watch animations, such as analyzing character movements, lighting and environment rendering, and facial rigs. Overall, the model was a success in the final animation production and reflected our team's vision of the project. We were able to create a short arcade animation that displayed smoothly animated characters, detailed environements, and a convincing clear narrative.