Editing Basic
Video Editing
Tools Panel
Learning how to use the tools are an essential part of editing; the panel is located to the right of timeline panel in the Standard set-up, but can be dragged anywhere on the desktop.
1. The first three tools are Selector![]() , Track Selection
, Track Selection![]() , Selection Edit
, Selection Edit![]() . The most commonly used tool is the default selector at the top. Those three tools are selection tools of some kind or other. You can move your clips around on the timeline with those tools.
. The most commonly used tool is the default selector at the top. Those three tools are selection tools of some kind or other. You can move your clips around on the timeline with those tools.
2. Roll/Ripple tools![]() : A Roll trims adjacent the In and Out points simultaneously, by moving the points by the same number of frames. This moves the edit point between clips while preserving the relationship on the Timeline to other clips, and maintains the total duration of the sequence. There are several ways to perform a rolling edit.
: A Roll trims adjacent the In and Out points simultaneously, by moving the points by the same number of frames. This moves the edit point between clips while preserving the relationship on the Timeline to other clips, and maintains the total duration of the sequence. There are several ways to perform a rolling edit.
3. Slip/Slide Tool![]() :Maintain the length of one clip but slips the content within it forward or back.
:Maintain the length of one clip but slips the content within it forward or back.
4. Viewer Tool![]() : These make clips in the Timeline larger or smaller.
: These make clips in the Timeline larger or smaller.
5. Razor Blade![]() : Cut/Trim your clips
: Cut/Trim your clips
Linked/Unlinked Video and Audio
To move or control the video separately from the audio tracks, you might want to unlink them from each other. To unlink video and audio, select the shot and go to Edit > Unlink Selection. Otherwise, you can navigate to the top-right corner of Timeline panel. By clicking on the first green icon, you can link or unlink audio and video in FCP.

Editing Techniques
There are several basic techniques you will perform when it come to editing.But before we explain those techniques, here is a very important shortcut you should remember, Shift+ Z, to fit your timeline into your screen. It will speed up your editing process.
Basically, editing is to orient your clips on the timeline according to your story development. To orient clips is to select them, to move them, to insert them and to trim them (There are several video clips and audio clips in the exercise files pack for you to practice editing).
1.Adding Multiple Tracks
You can place clips on one track as well as place them on different tracks. To create a new track, you can right click/Command click and add a new track.

Or simply drag a clip to the empty area above your current top track.

2. Selection
Selection tool allows you to select one or multiple clips and perform actions to it.
You can select clips continuously on the timeline by holding down Shift.

Or you can select them discontinuously by holding down Command.

3. Move/Delete/Insert
Once you select one or several clips, you can drag them around and insert them to different edit points.
If you just move a clip to another edit point, there will be a gap appearing at where the clip originally is at. There are several ways to get rid of it. You can just manually move all the clips after the gap backward, but this will take tremendous time which is not very efficient way of doing it.
You can also simply select the gap and hit Delete key.

FCP will get rid of the gap.

Or you can hold down Option key as you moving the clip around, it will automatically close the gap left behind.

*Note that the beginning of the clip determines where the clip goes, not your mouse cursor.
4. Trim Clips
Trim is another standard technique for editing video. Basically, it cut off part of a clip without change its playback speed. There are two tools in FCP allows to perform this action.
Ripple Tool (hit R key for shortcut), which does one side trim.

You can trim the in or out point of a clip.

Roll Tool(hit R key twice for shortcut), which does two sides trim.
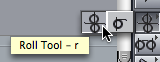
It trims both in and out points of a clip.

You can see the in and out frames on the Canvas Window.

Audio Editing
Basic Editing
When you place a clip with audio attached on the timeline, you will see there are chunks of audio appearing on the audio timeline just like video clips. Audio editing works pretty much the same as video editing. You can add tracks, and select, move, delete and trip clips. The two things you need to understand about audio editing are audio channels and waveforms.
Mono vs. Stereo
Clips with Mono Audio can only be placed on Mono track and it only has one channel.

For the same reason, file with Stereo Audio can only be placed on Stereo track and it contains two channels.

Basically, we would use the stereo track when we care about the left or right of the audio source. For most time, Mono channel works exactly the same as stereo.
Waveform

The bumping shapes on the waveforms tell us about the volumes of this audio signal. When the waveform is fatter, the sound is louder. Whereas the waveform is thinner, the sound is quieter. A waveform as narrow as a thin line means silence. Therefore, if you do not want the sound to be stopped abruptly, the editing point should always be made at where the waveform is as narrow as a thin straight line.
Audio Mixer
To control the volume in audio editing, you can use keyframing like you do with Motion; however, it could be very ineffecient and tedious if you have a lot keyframe to set and the result of your editing will not be reflected immediately since you need to render it out first.
Audio Mixer in FCP provides users with an more effective yet accurate alernative for audio mixing.
To access the audio mixer go to Tools>Audio Mixer (Option+6);

The View buttons allow you see different channels; each channel corresponds with a volume bar and meter. When you begin to adjust the volume and create panning; you need to turn on automatic keyframing.
Click on the bell icon at top-right corner of the Audio Mixer to turn on automatic keyframing.
![]()
Now, as you moving the volume/channel sliders during playback, the volume and channel of your audio will change with your actions.