Flash Animation
Animating in Flash requires certain understanding of motion and a lot of patience. Figuring out how the animation will work is not so hard, but achieving the desirable result is usually painstaking. In the tutorial, we'll explain Keyframes, motion tweens, and other basic techniques needed to make animations happen. You'll be animating things before you know it.
Shape Tweening
The basic idea is that at point A in time you have one object, and at a later point B you have another object. Between the two points, you have a gradual shapeshifting transformation from object A to object B. Like this, for example:

Lets get started on our first tutorial.
Pink Circle to Blue Square
1. Create a new Flash document, and draw a pink circle on the left side of frame 1.
2. Click frame 15, and right click to insert a blank keyframe. You now have 15 frames full of nothing but a circle.
![]()
3. In the keyframe at frame 15, draw a large, blue square on the right side of the work area.
4. then select all of layer 1(by clicking on the layer), and at the properties bar select shape tween
what we just made is a shape tween. Between frames 1 to 15, a transformation occurs.
The most important thing to remember when creating shape tweens is that unlike motion tweens, shape tweens must involve shapes or drawing objects and not groups or symbols. For a shape tween to work, the basic attributes " the stroke and fill" must be able to change so that it can morph the original shape into something else. The simplest way to ensure that all the elements you want to shape tween are “shape tweenable?is to select all the objects and use the Modify > Break Apart menu option to ensure they’re broken down into their constituent elements.
To view what you've just made, CTRL- ENTER
Motion Tween
Motion tweens tends to produce smaller file sizes, and they tend to be easier to produce. If you have a choice between using either shape or motion tweens, it's generally better to go for motion tweens, and use shape tweens as sparingly as you can. Having said that, shape tweens give the experienced animator more control. Motion tweens allow you to make the subtle animated changes that add emotion and expression to characters, such as changes in facial expression during speech, or subtle body movements during walking.
Drawing with Shape Tools
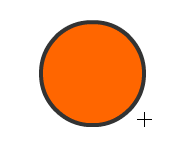
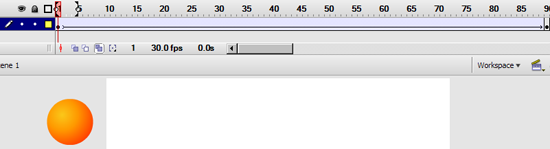
1. Let us select the Oval Tool (O) from tool bar and drag-draw a circle;

2. Go to Fill Color and change the color to vibrant orange; Also, go to property inspector and disable the stroke contour;
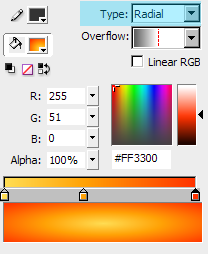
Applying Gradient
3. Go to the Color Panel, select Radial under the fill type(highlighted), and add an new slider in the gradient control so we can create a more smooth and naturally looking gradient.
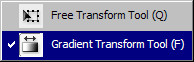
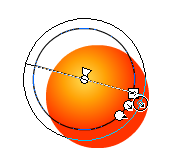
4. Go to Tool Bar and Select Gradient Transform Tool;
5. Click on the orange circle; now you can control the size, direction, and center point of the gradient.
Converting to Symbols
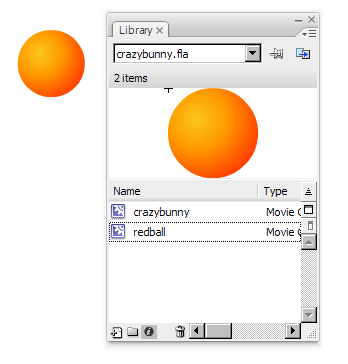
6. After you are happy with what you got, click on the red ball and hit F8 or Right-Click >>Convert to Symbol; set the symbol time to movie clip; note that the graphic symbol you've just created is now in the library; then delete everything in the stage and drag the movie clip: redball to the stage.
Inserting Keyframes
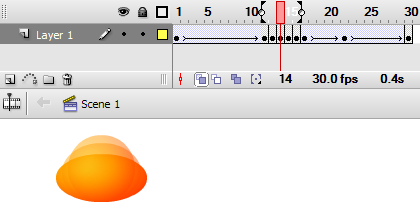
7. Now we are going to animate the ball and make it bounce up and down; click on frame 15 and hit F6(what F6 will do is copy the object in the previous keyframe to the current keyframe; then use mouse to move the ball to the bottom of the canvas. Next, click on frame 30 and copy frame 1 to frame 30; now we have three the most important keyframes setup in this animation.

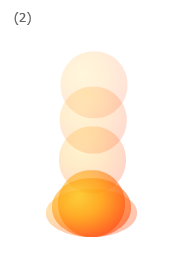
8. If we just go ahead and create a motion tween, the animation will work, however, it will be lack of realistic feeling since it will move up and down constantly in the same speed; what we want to do now is to add some real-life ingredients; when a ball hits the ground in real life, it will squeeze and squash, so let us insert a few frames right before it hits the ground and scale the ball a bit.

9. Turn on Onion Skin function;
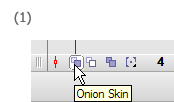
on your stage, it allows to see the previous and after frames of your current frame.
10. You do not have to follow what I have done here exactly as long as your animation looks convincing.
Easing In/out
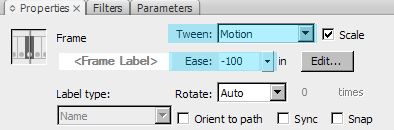
11. Gravity speed things up when they are falling, if you need more touches of real-world physics, you can use Easing In/Out to make your object move more naturally.
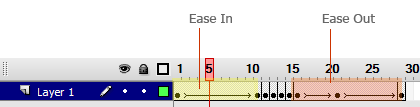
From frame 1 to frame 15, the ball is accelerating, so let us set Ease to -100 so the ball will speed up as it approaching the bottom. From Frame 16 to Frame 30, let us do the opposite, set the Ease to 100, so the ball will slow down as it approaching the top.
Here is the final result of a simple bouncing ball animation.
Nesting Animation
Nesting means to place all the compositional element in one of your animation sequence into a single symbol; It is an incredibly powerful technique for animators.
With nesting, we can easily create animation like this without using motion path;
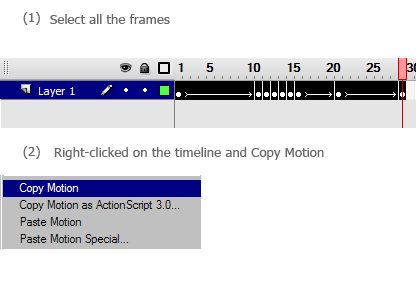
1. Let me show you how it works in this tutorial; first, let us select all the frames on the timeline of your bouncing ball animation;

2. Right-click and select Copy Frames;

3. Create a new symbol named bouncingGR(you can use anything you want), select Graphic as its type and click OK;
4. Double click on the new symbol in the Library, right-click on the timeline(if there is no frame on timeline, simply press F6 to insert a frame) and select Paste Frames;
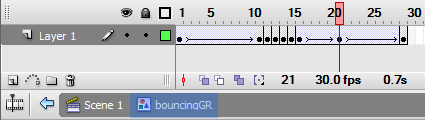
5. Now we can delete everything on the scene1's timeline since the animation has been pasted into a symbol; then let us drag the symbol bouncingGR to the stage; On frame 1, move the symbol all the way to the left of the canvas; next, click on frame 90, press F6 then move the symbol all the way from the left to the right of the stage; finally, let us create a motion tween between this two frames, then you will see the bouncing ball is now bouncing across the screen.
Copy Motion
In Flash CS3, not only that we can copy frames, we can also copy motions. Copy motions allows you to apply the same motion to a complete different object.
3. Drag the crazybunny graphic symbol to the stage(or if you have not imported it yet, just import the crazybunny.swf file and convert to a symbol) ;

4. Select on the bunny, click on the timeline and right-click>>Paste Motion;
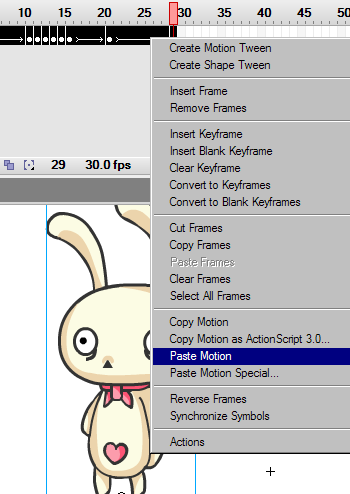
6. Now this bunny is doing exactly the same thing as the bouncing ball you just animated; Copy motion is a very simple technique but it is a huge time saver.
Motion Path
You can now make your objects grow, shrink, spin around, speed up, slow down, disappear, and change color. You can also vary the rate that a tween occurs via easing, and fine-tune the easing to create complex easing graphs using custom easing. In all such cases, though, your objects are still moving in straight lines. You can, however, get them to move in complex patterns like curves, loops, and zigzags as well. To add these features to your animation, you need to learn to use motion guides.
A motion guide is a path you draw for an object to follow during a motion tween. The motion guide is invisible outside of the authoring environment, and it sits on a special layer underneath the object you are tweening. Let's create a motion guide and see how it works.
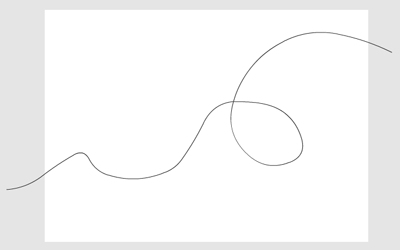
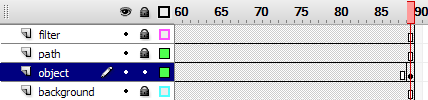
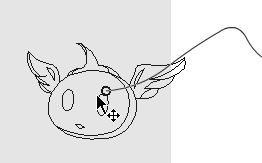
1. First, let us open motionpath.fla, create a new layer and draw a random path across the screen. *note that the file has already contained a filter layer and a background layer in it ; those two layer has nothing to do the motion path but they add more excitement into the animation; otherwise we will have only the winged onion head flying around a blank space; so please place your object layer and path layer on the top of background layer but beneath the filter layer.
2. Place the onion head(in the file's library) in a new layer and snap it to the very right end of the path at frame 1(make sure the snap function is on);
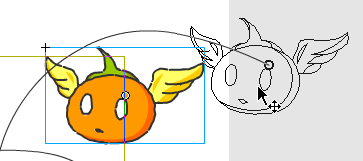
3. Move the playhead to frame 90 and press F6;
4. Then snap the onion head to the left end of the path;
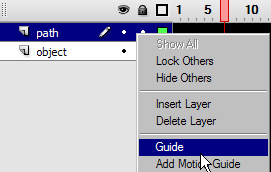
5. Right-click on the path layer and select Guide;
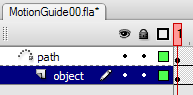
6. Then drag the object layer on to the path layer, then icon of the path layer turns to a dotted curve and the object layer snaps under the path layer.
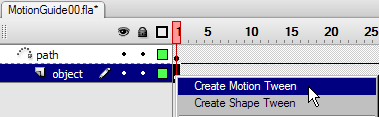
7. Right click on the object layer and create a motion tween;
8. Here we can see the onion head is moving along on the motion path(the path shows up in the stage but it will not show after you export it);
Flash Masking
Here we are going to create a few animations using motion tweens in Flash. The finished file is in the source file masking.fla, but we will show you how to create this from scratch.
1. This is the animation we are going to be making. Now lets make it.
2. Before we create this animation, its good to know that usually you should be working in 30 Frames per Second or higher. Flash's default frame rate is 12, but you can set it by choosing the selection tool (v) and looking at the contextual tool bar at the bottom of the screen. For this animation we will be working at 12 FPS, but usually you will want to change this, it will allow you to make smoother and cleaner animations.

3. Next we are going to draw the first thing we want to animate, which is a box. Click on the Rectangle tool and draw a box on the stage.

4.Since we are going to animate 3 things we need to make 3 layers. You can create a new layer by clicking the Insert Layer button at the bottom left corner of the score.
![]()
5.Now we are going to turn the object that we created in Layer 1 into a Symbol so we can animate it. You do this by selecting the shape and pressing F8 or by going to your menu and choosing Modify > Convert to Symbol. Once the box comes up with options in it, name your symbol and choose the behavior: Graphic.

6.You can now create the keyframes for your animation. The way this method of animation works (tweening) is by you creating keyframes (the frames with the little black dots on them) and on those frames setting the important positions of your shape. Then when you apply a motion tween, flash will fill in the frames between the keyframes for you. So the first keyframe, we have the box at the left side of the stage. To make a second keyframe at frame 20, click on the frame and press F6 to create a new keyframe. Then click on frame 40 to create another keyframe. Since we want the box to go back and forth we are going to want the middle keyframe to have to box at the right side of the stage. So click on the keyframe and move the box to the right side of the screen. Now your 3 keyframes should have the box on the left, then on the right, and the final one on the left again.

7. Now we want flash to fill in the frames between our keyframes so that we get an animation. (1) Right click on each keyframe in the Blue Box layer and choose: Create Motion Tween. If you have done everything right the frames should turn blue with a little arrow (2).


8. If you drag through the score, or press RETURN, your animation should play through now. The box you created should be sliding back and forth. To create a more smooth and organic looking animation click on the keyframes that you have applied a motion tween to, and in the contextual menu at the bottom of your screen put Easing to 100, or -100, play around with the effects of this.

9.Now in the layer above your blue box layer, draw a circle. We are going to create a Shape Tween animation with this shape. You need to make 2 more keyframes using F6 just like you did for the Blue Box animation, however, in the middle frame, delete the circle and draw a different shape somewhere else on the stage. In this case I made a box. Now, instead of right clicking on the keyframes and selecting motion tween, you need to click on the keyframes and go down to your contextual toolbar where you can choose Motion from the Tween pull down menu (1). If you did everything right your shape tweened frames should be green with little arrows in the frames, as you can see in figure (2).

10.So now we are going to make 3rd and final animation, and that will be animating a mask over some text. The first thing you want to do is create your text using the text tool (t) in a new layer. Fill in 40 frames with this text, so click on frame 40 and press F5, this will create frames in the score. Now that you have your text, create a motion tween animation on a layer above it just like you did for the blue box. Make sure your animation is happening right over the text. Now all you have to do to turn your animation into a mask is right click on the layer and choose: Mask.

11.To preview your animation in the end just hit Command-Enter or Control-Enter on a PC. And that's the finished animation. If you have any questions or you are confused about something your mentors in class.
Masking Exercise
Now you know the simple mechanic of masking, Give this a try! (source files are in the Masking.fla library)