| The Sync Path for Film: Overview |

On LocationOn location, audio is recorded onto analogue recorders like a Nagra (1/4" reel - reel tape recorder), a Walkman Pro (portable audio cassette) or a digital recorder or DAT. Synchronization on professional shoots usually involves the use of SMPTE time code and the use of a stereo Nagra or a "time code DAT". |
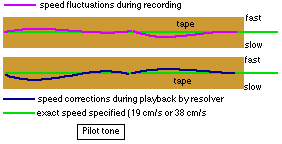
For semi-pro and student shoots, it is more common to find a mono Nagra using Pilot tone or a more simple, less expensive DAT. In any situation where lip sync is required, the camera must run at an exact 24 frames per second (generally 25 fps outside of North America). Also the camera must be relatively silent (or blimped) - especially when filming indoors. |
| For the student shoot, the Nagra maintains synchronization with the film through the Pilot tone recorded on the tape. |
| The slate or clapper plays a key role in this process by providing the sound and image for synchronization and by identifying pertinent sections of the project for screening "dailies" and for post production. |
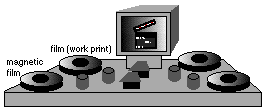
| The procedure is for the recordist to start the recorder and to state ("rolling") when the device is ready to synchronize (for the Nagra this is when the white Pilot tone flag is visible on the recorder, for time code DATs this is when time code input is indicated) and for the clapper/loader to position the slate in front of the camera. The boom is positioned near the slate and when the two parts of the slate are snapped together after the camera has started filming, the scene, roll number, take, etc., are announced and the filming begins in earnest. The film is processed and either (usually) transferred to video for editing or a work print is made and that is cut on an editing machine. |
|
|
 |
| Post
Production
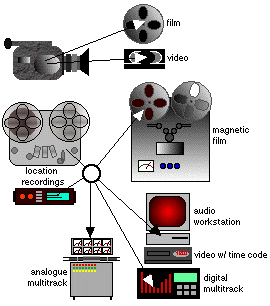
The Nagra tapes may be transferred via a resolver to a number of different systems:
|
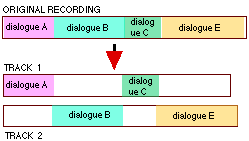
Common To all SystemsSplitting TracksIn the systems listed above there are many principles common to all. Primary is the splitting of sound into various tracks (real or virtual). The usual categories are:
|
|
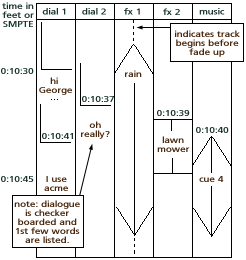
The second major principle is laying the sound onto these tracks so that sounds in the same category which follow another closely are placed on different tracks. (Checker boarding or splitting tracks). This is necessary for the mixing stage which is to follow and insures flexibility as well as proper level and equalization settings. |
This is a simple hand cranked system which insures that the tracks are
in sync by providing interlocked sprocket wheels for all of the audio tracks
and the work print. This process is necessary because editing machines
(like Steinbeck) cannot always be trusted to be frame accurate. 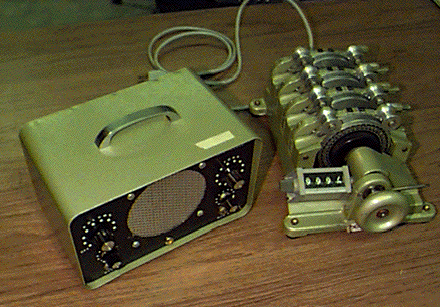
| An accurate mixing sheet is then drawn (DAWs can create these automatically)
for the mixers to follow. In the mixing studio a wide variety of audio
playback and image systems may be found. Conventional studios use 16 or
35 mm dubbers or sound film playback machines synchronized to the work
print or a black and white copy of the work print known as a slash print.
The later may be marked with punched holes (cue punch) or lines (streamers)
as visual cues for the mixers. A video projector may be used instead of
a film projector: although the image lacks resolution, video rewinds/fast
forwards much faster than film. Audio may also be stored on analogue or
digital multitrack, time code DAT, sound film loops or be mixed directly
from a professional DAW (such as a Synclavier or a ProTools system).
These various sources are mixed to a multitrack format - the minimum being three (dialogue, sfx, music) for mono releases. This is required to allow the dialogue to be dubbed into another language without affecting sfx or music and to facilitate the mixing process. (Usually dialogue is mixed first, then sfx and foley, followed by music.) Various mixes will be done for feature films; Dolby Surround, mono, International (w/o dialogue), etc. The multitrack mix tape is then transferred to optical film, video or digital film format for release. |