|
FIELD RECORDING |
Recordings and Documentation by Jacek Smolicki
|
FIELD RECORDING |
Studio recording and field recording are shorthand terms for recording in an acoustically controlled environment (or “studio” whether or not it is specifically designed as such) or in an acoustically uncontrolled environment (traditionally called the “field”) which clearly presents more challenges – to be avoided or incorporated.
Studio recording usually involves a single microphone (which can be monophonic) in a quiet environment, ranging from an isolation room to an acoustically treated space which minimizes reverberation and external noise. The normal procedure in a studio context involves what is called “close miking” so that the desired signal is much stronger than any ambient sound, although with voice (which can have a wide range of sound levels, some unexpected), the choice of exact distance may vary. Also, it may be wise to position the microphone at a 45° angle from the person’s mouth to avoid air being blown directly into the mic (even if a screen is being used).
In both field and studio recording, there are many options and possible intentions, so in the following sections, we will explore some of the more important ones. However, the emphasis will be on an active and creative approach to recording, not just a passive one exemplified by the cliché “I’ve got it on tape” (or whatever storage medium is being used). Instead, we will insist on recording as an extension of listening.
We will present the topic in these sections.
A) Recording with specialized microphones
B) Issues about recording: Why field record?
C) How to get started
D) Personal recording project
A. Recording with specialized microphones. Editing of source material aims to enhance certain qualities, bring to the fore some aspects and, perhaps, mask some unwanted artifacts. A conscious choice of microphones, their setting in relation to the event, space, or actors that one intends to capture can save some of these editing efforts. Moreover, one can consider the act of recording as a specific form of editing (or pre-editing if you will) that specifically acts upon the situation which it creates a record of. Similarly, such an approach to recording reveals it as a creative process and challenges the idea of creativity as something that is expressed primarily through skillful and innovative handling and editing of the recorded material.
Selected features of the place and event can be highlighted, amplified, brought to the fore (or to the background) through a rich choice of microphones today available on the market, or custom-made ones. Below are some examples of several types, each with their own patterns of directivity:
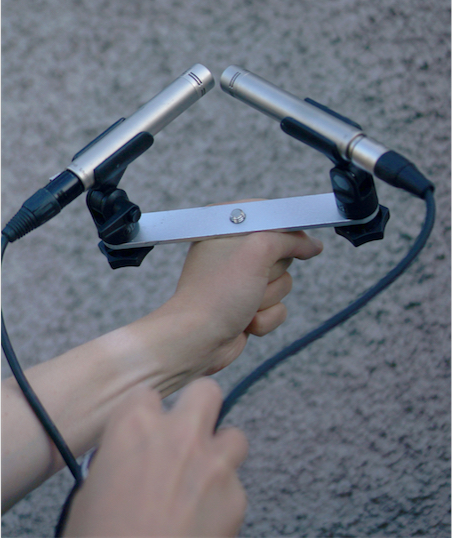
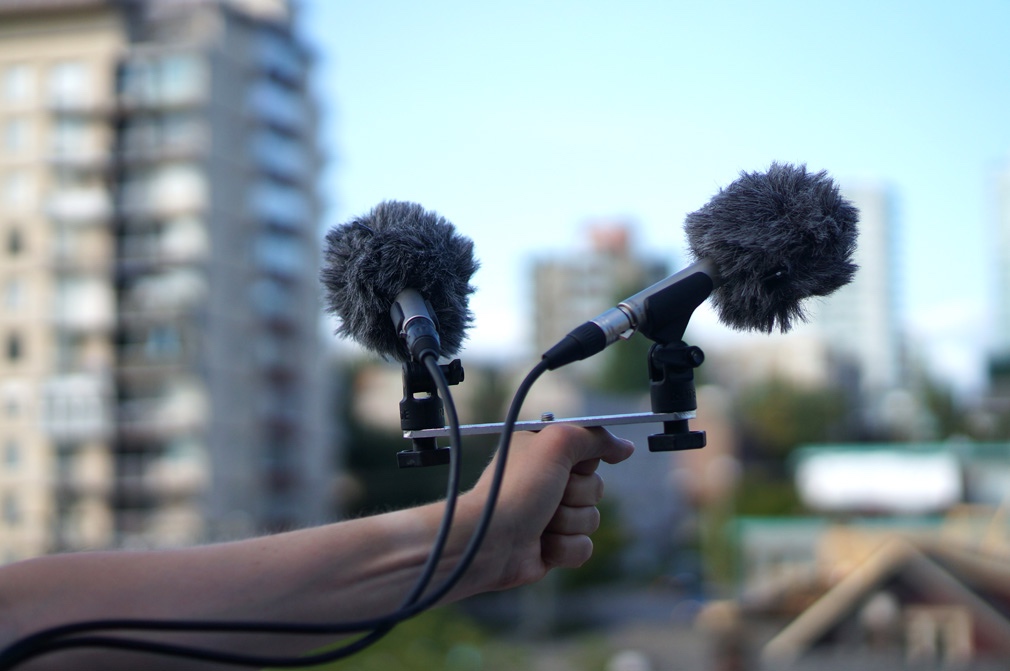
caridiod condenser microphones (Rode NT5)
paired condenser mics in crossed-cardiod X-Y formation
hydrophone mics (Aquarian H2a XLR)
micro omni condenser mics (lavaliers)
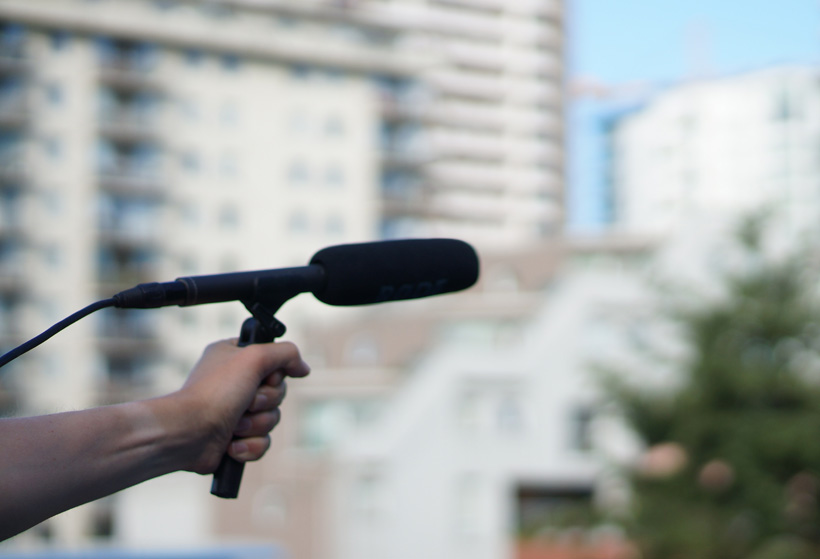
directional mic (Rode NTG II)
electromagnetic coil based mics
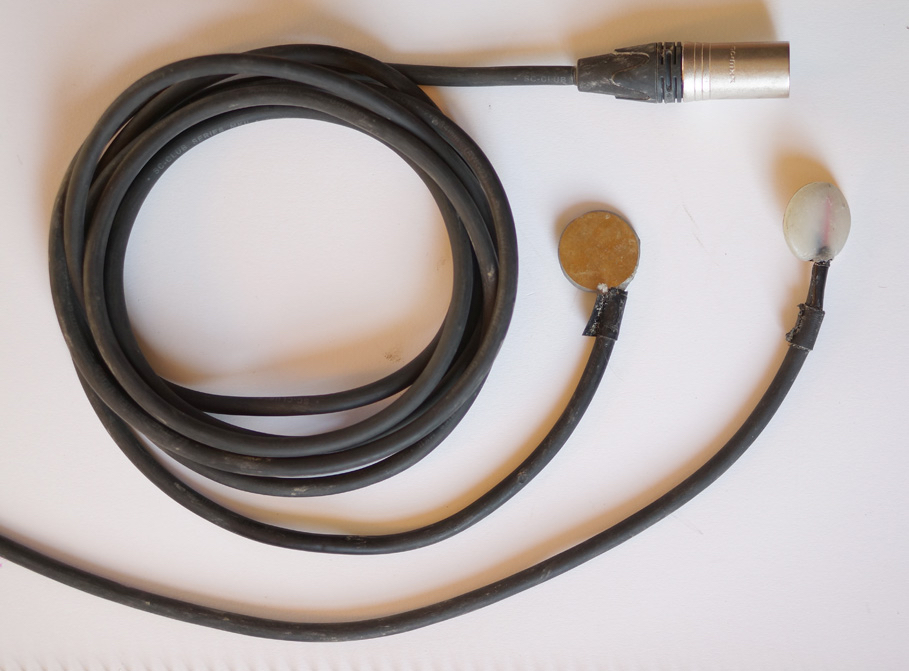
custom made contact mics
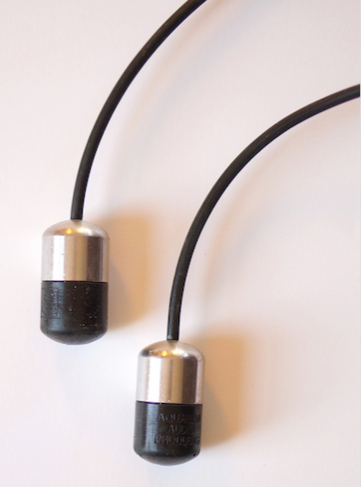
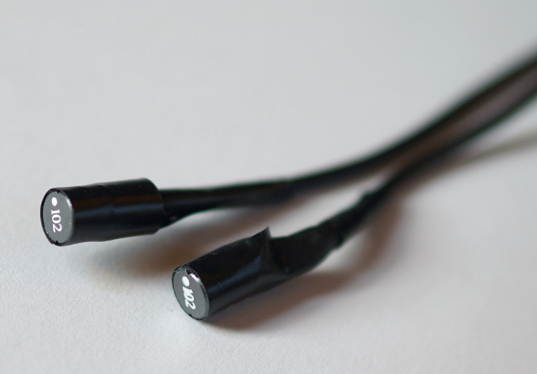
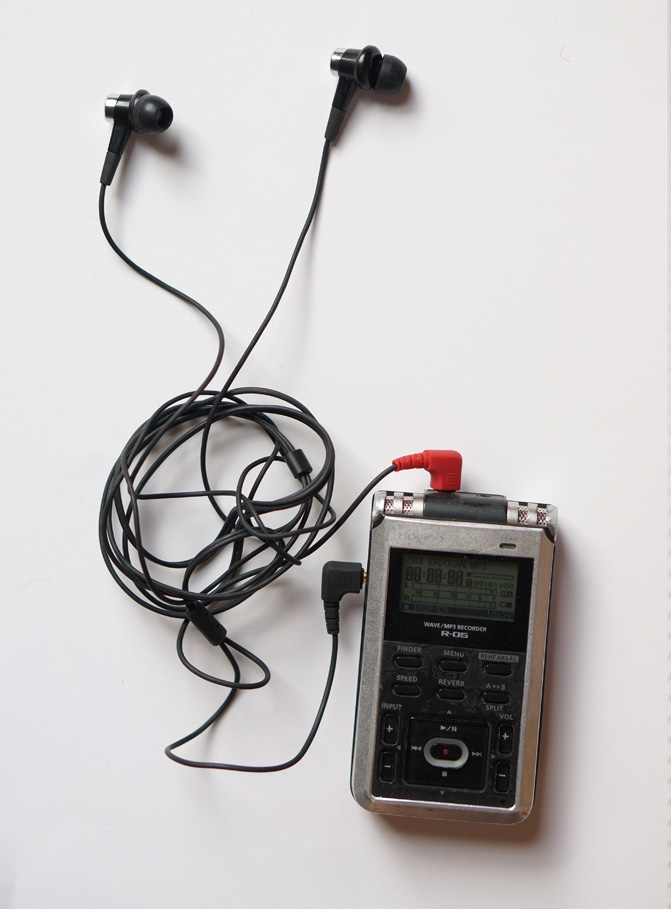
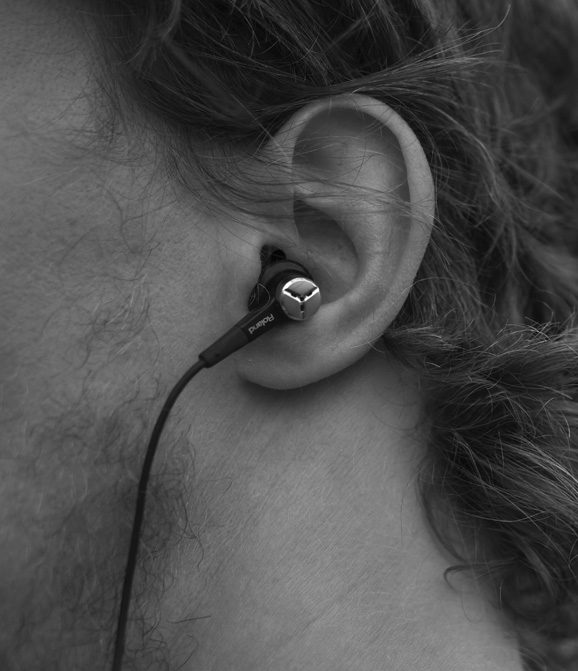
in-ear binaural mics (Roland CS-10EM)
1. The following is a recording of Dawn Chorus at the Totem Display in Stanley Park made in May 2020. It is done with a pair of Rode NT5 which are small-diaphragm cardioid condenser microphones typically referred to as pencil microphones. They are typically used for instrument recording, also during live events as they pick up signals from the front and sides and reject it from the rear. It can be successfully used in outdoor field recording sessions provided that the 'scene' that one wants to capture is mostly in front.
Dawn Chorus, Stanley Park, Vancouver, May 2020
Click to enlarge
The effect these microphones create 'brings' sounds from afar closer to one's ears. The perception of distances between events in the recorded soundscape is disrupted; it does not correspond to the real situation. In other words, the recorded soundscape is skewed in a way that it is characterized by a spectrum of frequencies broader than those present near the listener/recordist. Distant sounds get 'pulled in' by the microphones from spatially distant situations such as the industrial activities taking place on the opposite side of the harbour as exemplified in this recording (the microphones were pointing at a patch of the forest right behind the famous Totem display).
2. This second recording of the same situation was done with wearable binaural microphones (Roland CS-10EM). These are in-ear microphones, a cheaper variation of more advanced types of binaural audio technologies that typically take a form of an external device, such as a dummy head or kunstkopf (for example Neumann KU100). Regardless of the design and way of handling, binaural microphones are intended to capture how humans hear multi-channel content. They are expected to provide a more spherical, 3D-like experience of the recorded environment.

Click to enlarge
If compared to the recording done with cardioid condenser microphones, the soundscape as recorded by the binaural microphones seems to be broader, more spatial. The spectrum appears to be more balanced and there is a feeling of a larger space between individual sound events that constitute the soundscape (birds chirping, squeaks of the harbour).
3. The following recording of an Easter procession in Krakow in 2018 perhaps better conveys the specificity and purpose of binaural recording. The sound of raindrops hitting the umbrella right above the head of the listener/recordist, highlights and grounds his/her position also establishing a point of reference to other surrounding sounds. Binaural microphones bring interesting results when there are events taking place in the immediate vicinity, surrounding the place in which they are positioned (or worn) alongside more distant events that additionally enhance the 3D effect.
Click to enlarge
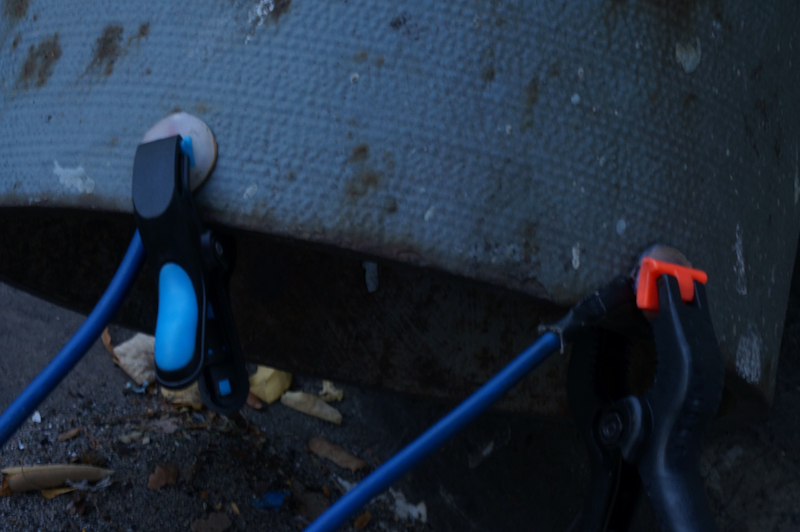
4. & 5. Contact microphones are microphones that capture audio vibrations through contact with objects and surfaces. Their basic element is a piezoelectric component, a copper and ceramic disk which converts mechanical into electrical energy (and vice versa). As opposed to regular microphones, they do not pick up air vibrations. Contact microphones (similarly to vibrational/transducer speakers) use the principle of transduction.
They can be used to detect malfunctions of materials and infrastructures. They are widely used by experimental composers, sound artists, and field recordists. They can reveal sonic qualities and dimensions that can not be detected and recorded through conventional microphones and so they are often used to complement the aural picture of a given site or environment.
The following are field recordings of the Williamsburg bridge in New York City in September 2019. The first one is done with the in-ear binaural microphones while standing right under the bridge. The second one is done using contact microphones by clipping them to the surface of the gutter system with a pair of clamps. Besides diverse events on and along the bridge which make it vibrate (and which are quite clearly distinguishable as opposed to the binaural recording of the same situation where they are more cluttered), the microphones picked up the resonance of the gutter pipe itself.
Williamsburg bridge gutter pipe (left) and contact microphones (right)
Contact microphone recording at the bridge
Click to enlarge
Click to enlarge
6. & 7. The following recordings were made in New Brighton Park during two short visits in March 2020. The place is characterized by a combination of natural sounds such as those made by diverse birds species (36 according to the ebird.org) who benefit from the recently reconstituted wetlands and anthropogenic, industrial noises from the nearby harbour, the port terminal, railway track, and the Ironworkers' Memorial Bridge.
The first recording in mono was done with the Rode NTG II shotgun microphone. Sounds of a song sparrow are captured against the industrial din in the background. Shotgun microphones are highly directional condenser microphones (they fall into a category known as high-directionality microphones). They allow for a recording of a specific target. They differ from cardioid microphones in that they 'ignore' sounds from the sides (and by implication, they are opposite to omnidirectional microphones which capture sounds from all directions).
New Brighton Park, Vancouver, March 2020, with shotgun microphone
Click to enlarge
Click to enlarge
directional mic in the field
paired condenser mics in the field
binaural mics worn in the ears
mics in the field with wind screen
(Click to enlarge)
Highly directional microphones can help avoid editing the background out of the recording and help avoid other unintended sounds. Even though the harbour noises persist in the background, compared to the recording through binaural microphones, the shotgun mic's selectiveness is quite clear.
The second recording was done at the same site but with the binaural microphones. In contrast to the directional microphone, this binaural recording conveys a much wider sense of immersion in the observed scene. The bird and its chirping appear as small details surrounded by much more powerful, almost overwhelming hum of the port.
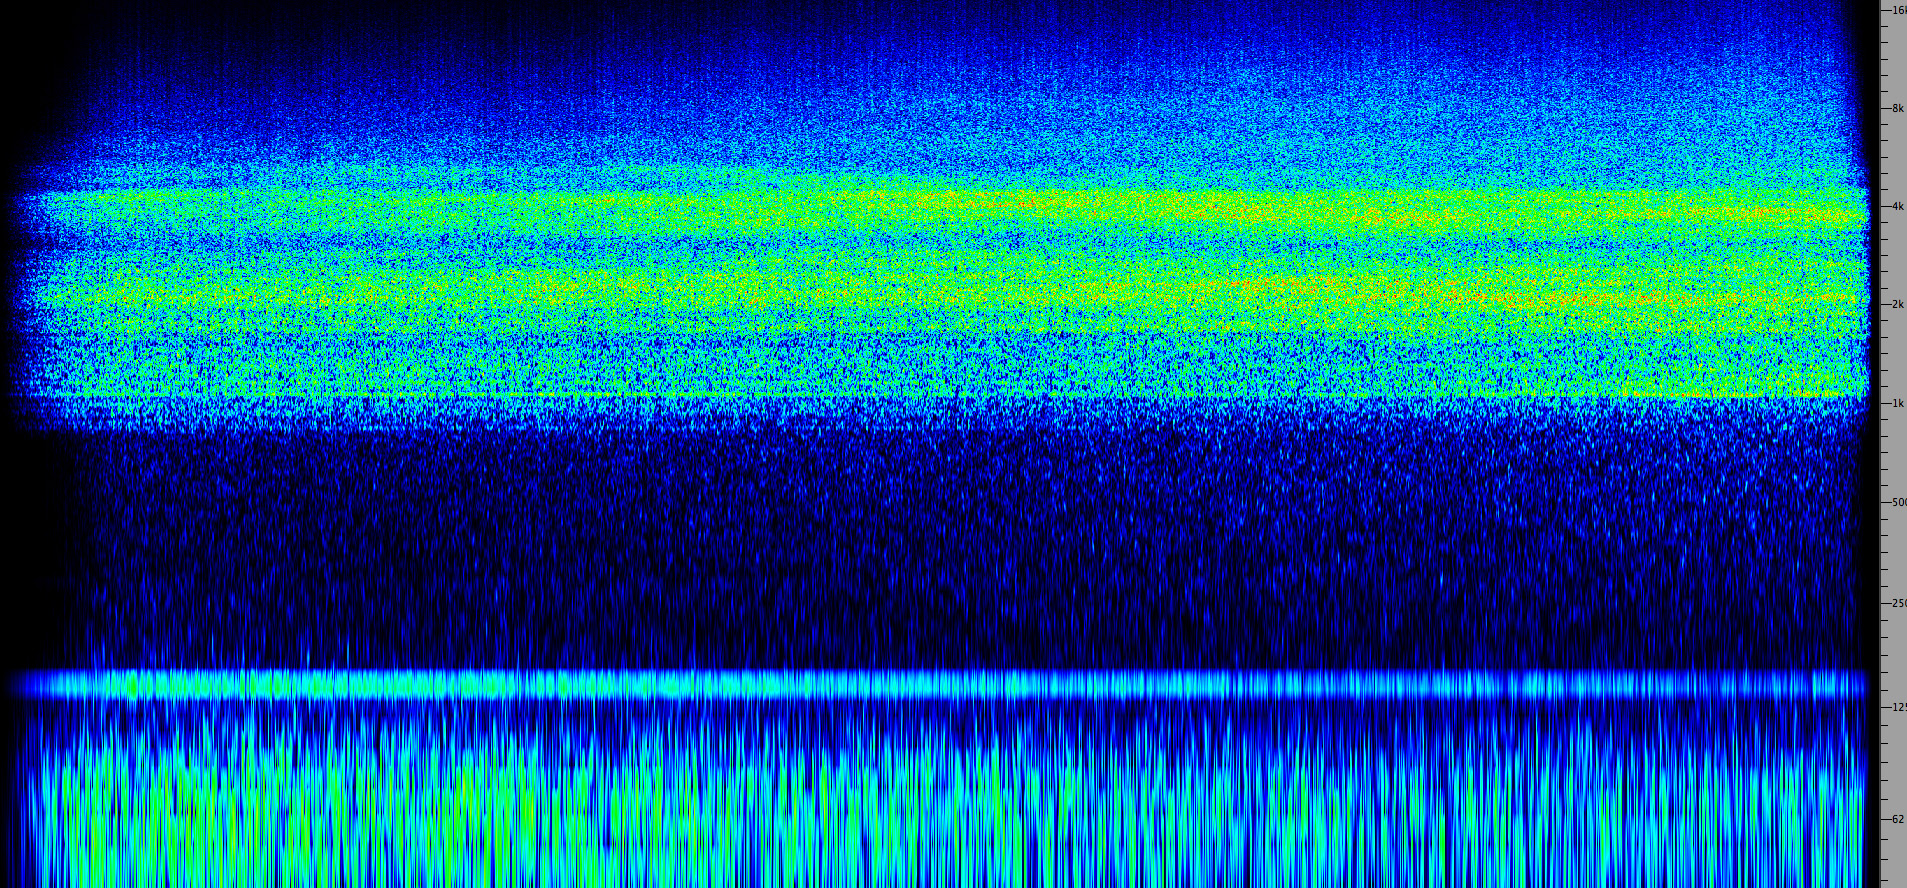
8. The following recording was made in the same park with the pair of cardioid condenser microphones discussed earlier. They were set quite close to the edge of the water and pointed at the waves arriving at a little stretch of the beach. This example shows how through the specific placement of the microphones (and set on a relatively low gain) one can eliminate unwanted sounds, in this case, noises of the harbour. The intention with this recording was to capture delicate splashes of the water that later on could create contrast when set against the low pitch of the port's wheezing.
New Brighton Park, Vancouver, March 2020, with cardioid microphones
Click to enlarge
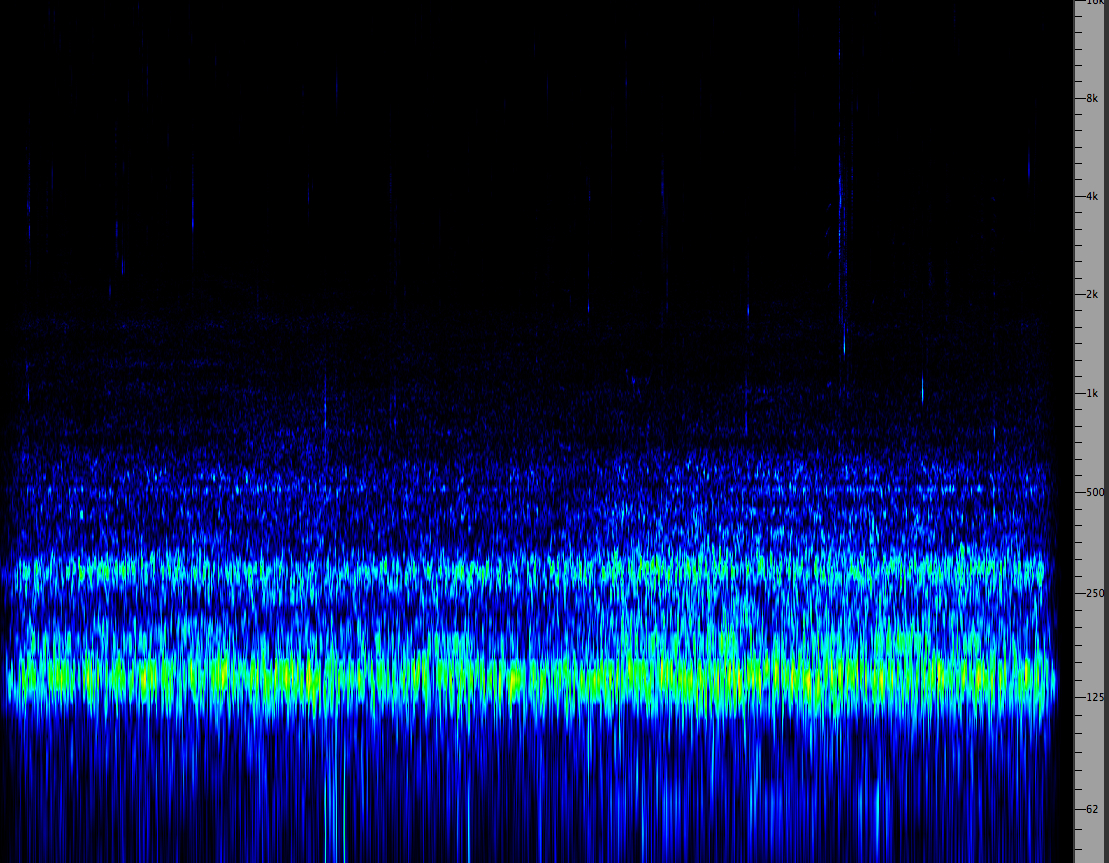
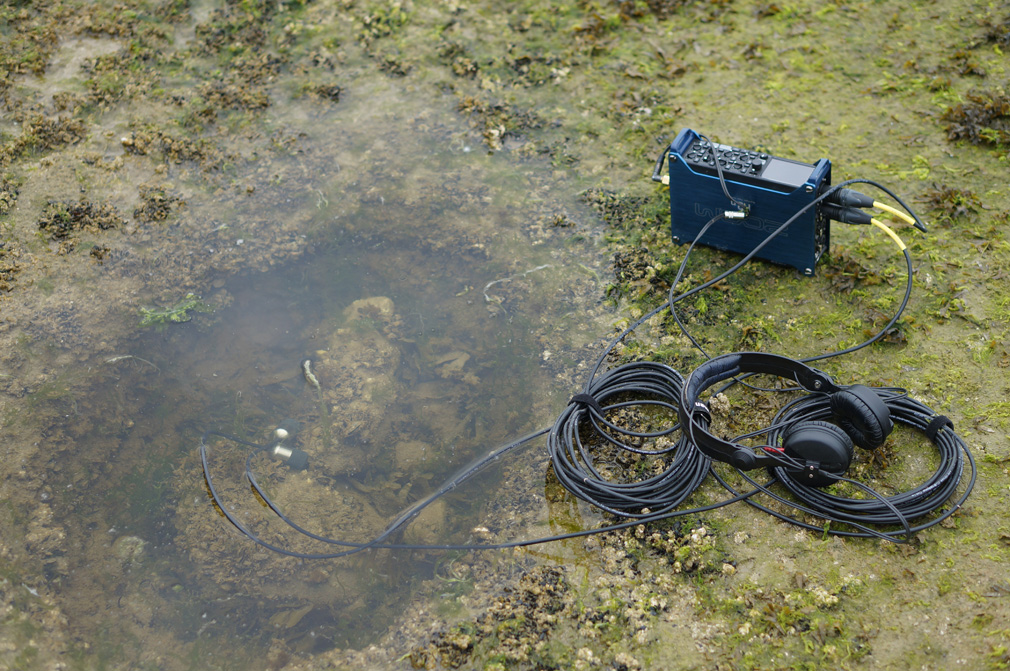
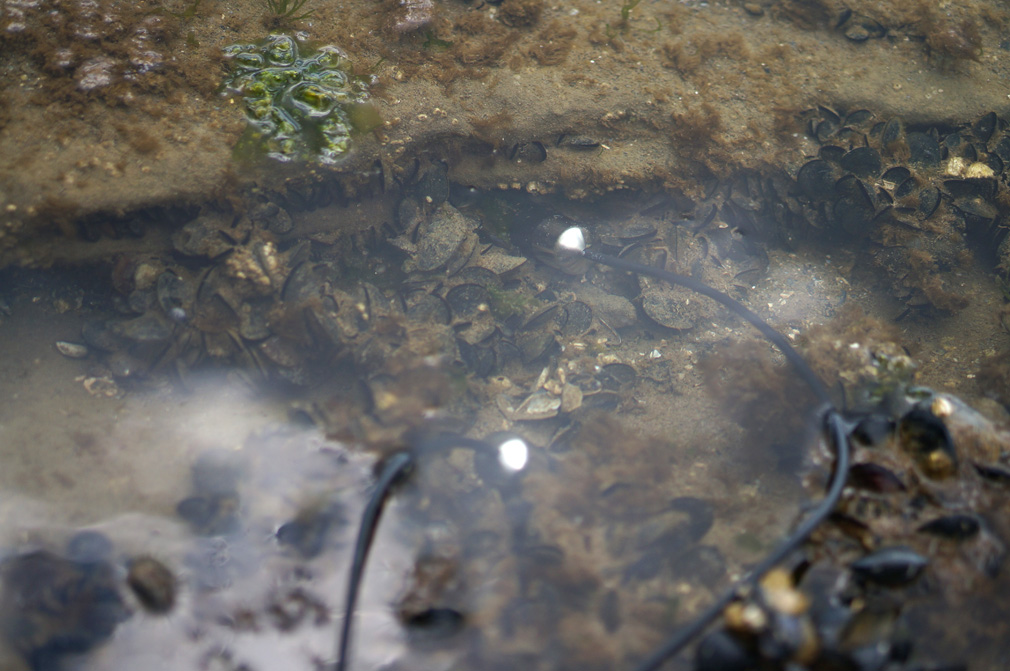
9. The following recording was done at the same spot in New Brighton Park using a hydrophone microphone (Aquarian H2a XLR). Hydrophone converts the acoustic energy in the water into electrical energy. Similar to the contact microphone, the hydrophone uses the piezoelectric transducer that generates an electric signal when subjected to a change of pressure. Water transmits sound waves better than air. Sound propagates a bit more than 4 times faster in water than in the air and so hydrophones can pick up very distant sounds. They are used in the maritime industry, maritime biology, hydroacoustics, and increasingly within various branches of soundscape studies and acoustic ecology.
The recording below reveals the noise pollution of the harbour. The presence of vessels as observed from the level of the coastline seems rather inaudible, but their engines and propellers captured quite clearly in this recording show a different picture.
Hydrophone recordings can help reveal dimensions of the soundscape that otherwise are not that easily perceptible, and in doing so, contribute to a more nuanced, complex and, perhaps a bit unsettling aural portrait of the local environment, such as the one surrounding New Brighton Park.
New Brighton Park, Vancouver, March 2020, with hydrophone microphones
Click to enlarge
hydrophones in an intertidal pool with Zoom F8n recorder (click to enlarge)
hydrophones in the field (click to enlarge)
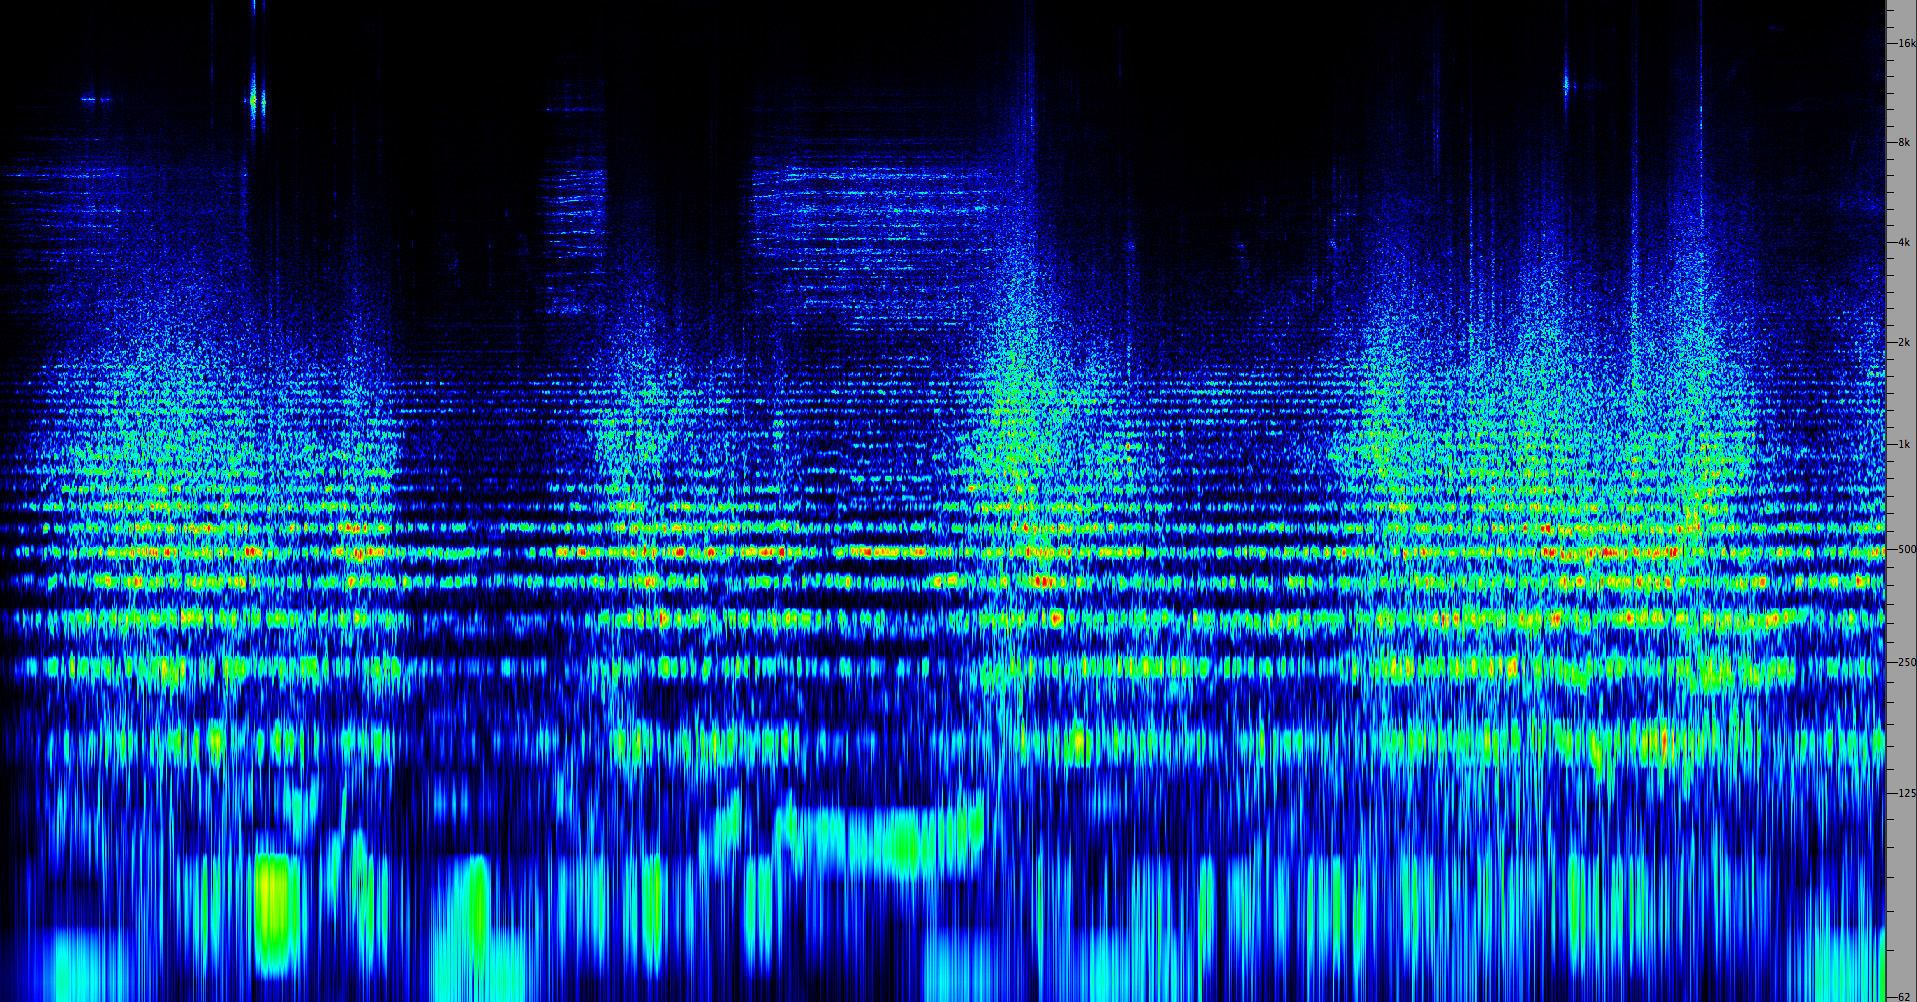
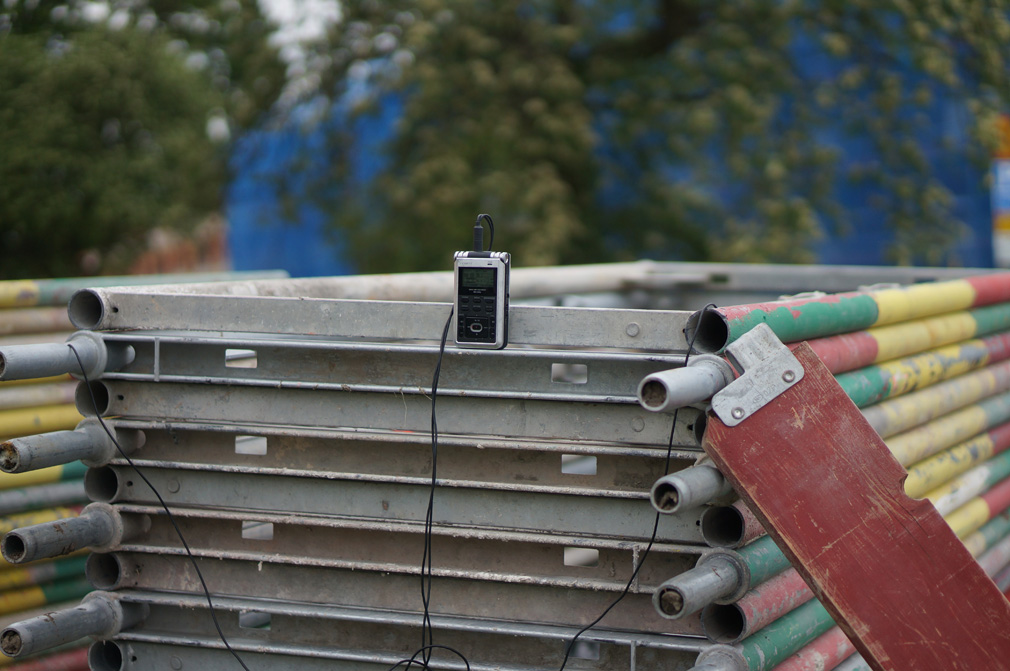
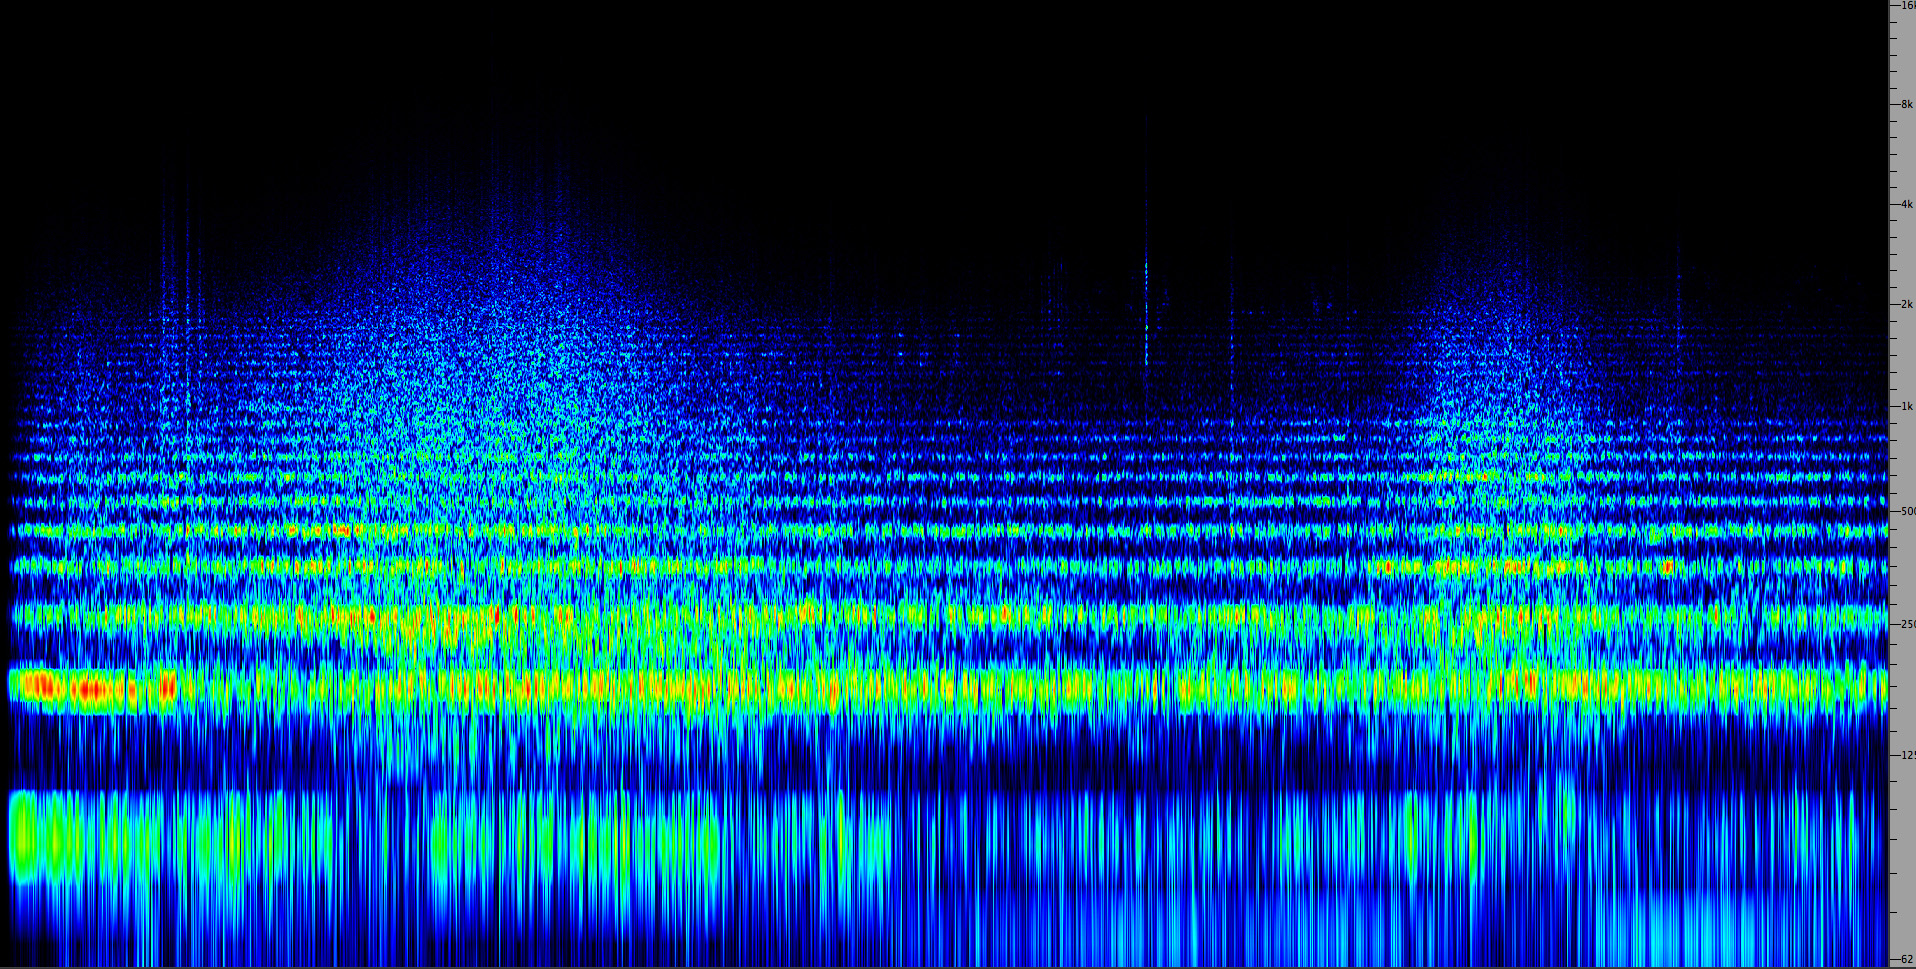
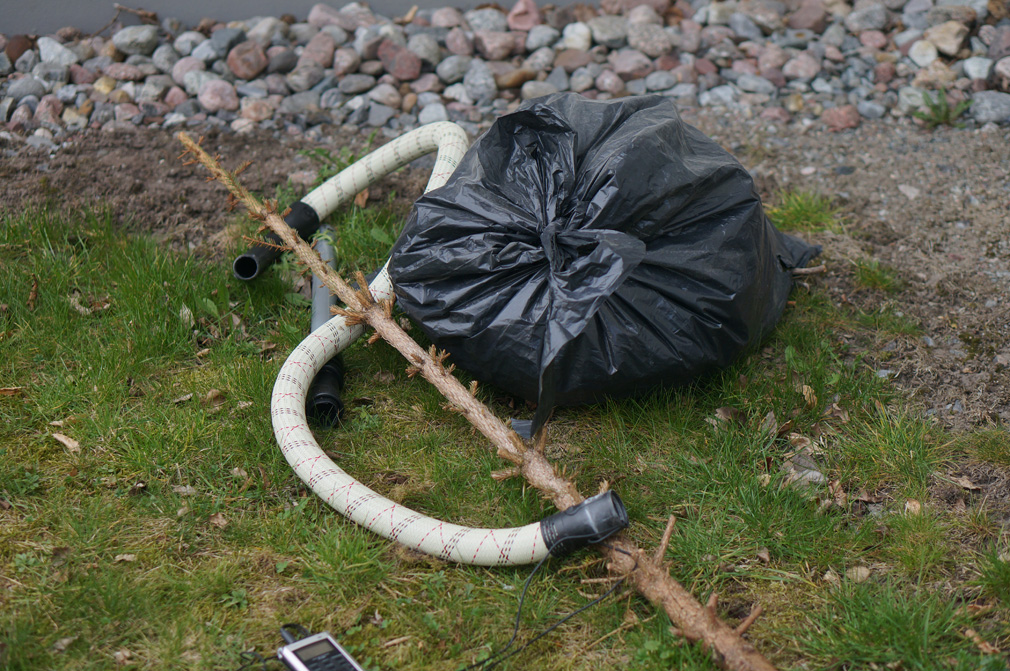
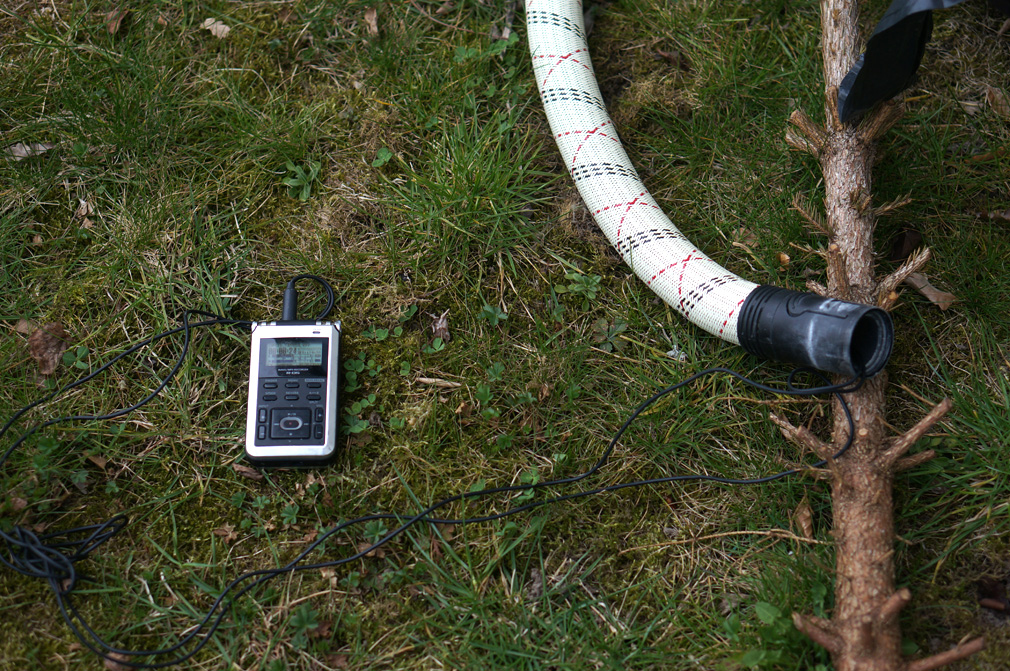
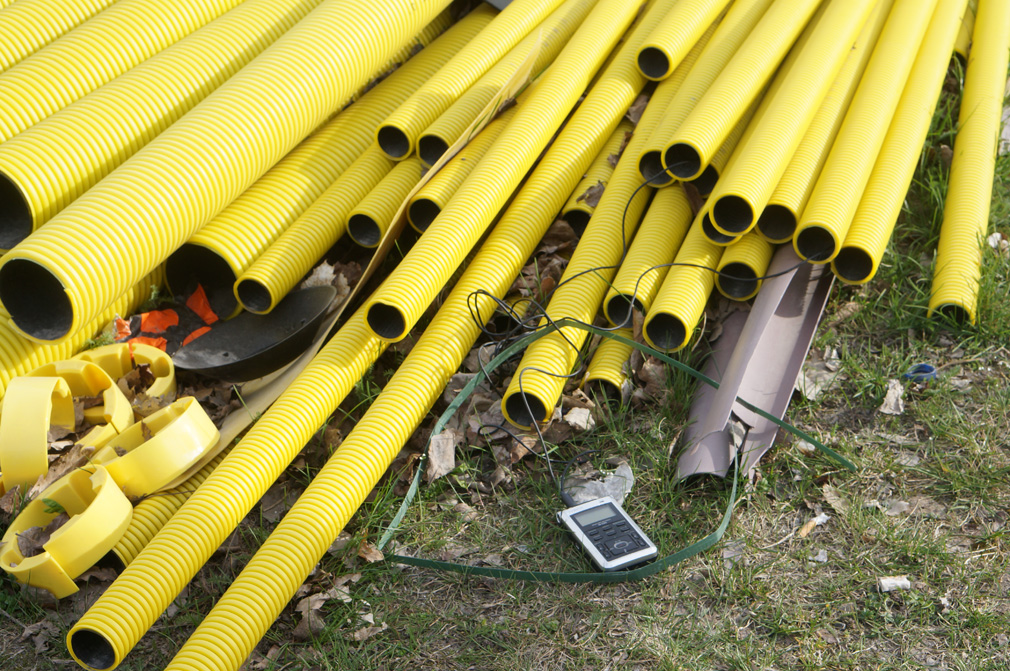
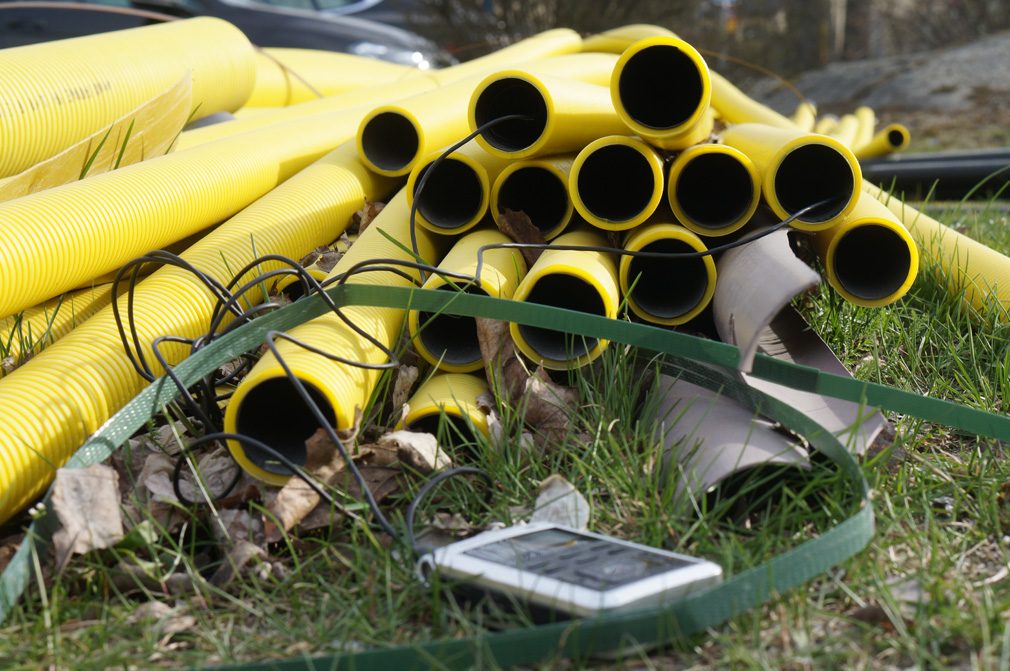
10, 11 & 12. The following recordings were done with a pair of micro omnidirectional condenser microphones. They are often called lavalier microphones and are typically used to enable hands-free operation in television, theatre, and other public speaking situations. Because of their miniature size, flexibility, and relatively long cables they can have wide applicability in creative field recording.
One such use can be through locating them in unusual places in which other, more bulky microphones would not fit. For example, by inserting them into holes and cavities of various elements of urban infrastructure (such as ventilation shafts, banisters, pipes, etc.) they can provide interesting 'sonic perspectives' otherwise unattainable for the human ear. Additionally, as heard in the following recordings, the use of these micro omni condenser microphones can reveal how various elements of our lived environments resonate with fixed and temporary sounds around them. In all of these recordings, environmental sounds are heard "processed" by this recording method.
A pair of micro omnidirectional microphones inserted into a metal element of scaffolding at a construction site recorded with Roland R-5 pocket recorder
Click on any image to enlarge
A pair of micro omnidirectional microphones in a discarded vacuum cleaner hose
A pair of micro omnidirectional microphones pair inserted into a PVC perforated construction tube
13. Sounds that exist beyond our hearing spectrum can also be subject to field recording (for example bat echolocation which takes place within ultrasonic spectrum). Similarly, non-acoustic phenomena, such as a flow of electricity, through the use of simple technologies can become audible. A good example here is an electromagnetic field microphone (see photo above) which uses an induction coil. This component reacts to the variations in the electromagnetic field and translates it into an audio signal. The seemingly inaudible processes that underlie our electric appliances, mobile phones, computers, etc., can be experienced as rather noisy phenomena. The recording below is of an ATM in Romainmótier, a small village in a tranquil region of the Swiss Jura mountains.
Inaudible operations of an ATM machine as recorded by an electromagnetic microphone.
Click to enlarge
Options that go beyond stereo. There are a variety of options that have been developed to go beyond conventional stereo recording, such as the Zoom F8n and other multi-channel recorders.
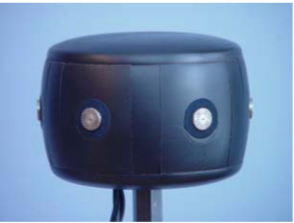
In addition, Charlie Fox at the University of Regina has developed a multi-channel modular microphone array, as shown here, that can capture a surround-sound environment with a choice of the number of mics facing in all directions. Storing the signals requires a specialized set-up, but when played back on multiple speakers, the effect is amazingly immersive.
Ambisonics is a technique developed in the UK for encoding three-dimensional sound fields into a recording, including the vertical dimension. The details are complex, but in general, one could say that if binaural recording is the psychoacoustic answer to “realism”, then ambisonics is the audio engineer’s solution. This is because it attempts to create the exact sound pressure field in all directions and play it back on carefully calibrated speakers.
There is an encoding process with various levels of complexity, such as first-order, second-order, third-order or collectively “higher order” with increasing degrees of accuracy (and computational complexity). And of course there are various types of decoders available which are needed for playback. The encoded format itself is independent of speaker format, and its is the decoder that is designed to match a given speaker system, hence providing a certain degree of flexibility as long as the speakers are placed at precise angles and positions.
The difficulty in using this system for composers is that the signals are encoded and hence most types of processing, other than spatial manipulations, will be difficult to incorporate. Likewise, the calibration of the playback situation is quite tedious, and, depending on the order being used, the so-called “sweet spot” (optimal listening position) will be quite small, with unstable phantom imaging being present. Ambisonics, however, seems to be successful in certain gaming applications.
Index
B. Why field record? Yes, why should you bother to do your own field recordings when: (a) there’s already free libraries of sound like freesound.org readily available; (b) you can probably Google a sound effect you need, or consult a sound effects library; (c) it’s raining again and you really have to get this project done.
Well, those options may seem very tempting in the short run, but they are very utilitarian and offer little scope for discovery. They also imply an industrialized approach to sound design. In fact the language that is typically used – raw materials, processing, mastering and packaging – pretty much reduces sound to a commodity.
Seasoned recordists will gladly tell you stories about their recording adventures, and where the hunt for sounds has taken them. Their eyes will likely glaze over as they tell you about some “magic moment” where everything came together and they got the perfect recording. And they’ll also get nostalgic about “the one that got away” – usually right after they hit the stop button. They obviously have developed a love affair with their sounds.
So, first of all, there’s clearly a satisfaction to be gained by doing it yourself, maybe suffering a bit to do so, but in the end producing a recording that is truly unique and will never be repeated, whether it’s a lucky break with a chance occurrence, or the result of hours of preparation and effort.
Many soundscape recordists today follow the ethic and practice called phonography (by analogy to photography) where their intent is to document a place, event, person or social situation and create a representation of it in sound that seems “true” in some sense to the subject. Of course, these recordists are painfully aware that they are making numerous choices about everything that is involved, nothing is going to be objective or “absolute”, and that their own desires and preferences are probably going to win out in the process. In essence, they are modern aural anthropologists who are self-reflexive about their own involvement in the process.
John Drever, in his chapter in the Routledge Companion to Sounding Art, spends about 3 pages outlining the many questions that circulate in his head every time he is about to record something. He knows he has many options, and like all real-world options, every choice has implications, and in some cases, ethical concerns that his decisions are going to affect.
Drever refers to “sonic tourism” as the opposite of his more “involved” approach. Instead of snapping pictures of tourist sites, maybe the recordist is just collecting memorable aural trinkets to take home. This is not necessarily a bad practice, because as soon as you decide to record, you are now listening far more attentively than any tourist would, and besides, there will be lots of time later to review the experience via the recording and perhaps gain further appreciation and understanding of what it means. However, when you download a free sample from the internet, besides its variability in sound quality, you are not likely to get much information as to its context on any level, and it’s doubtful you could supply that yourself from your own experience. Therefore, the sample itself is just a “sound object” and will be treated as such.
So, let’s take another approach than the free download or the sonic tourist memento. Start with a soundwalk without recording – does that surprise you? Or if you’re looking to interview someone, just spend some time with them, mainly listening to whatever they have to say or remember. If you don’t know what is “available”, you don’t really know what is worth recording. Admittedly, you risk missing some “magic moment” that you may never get to record, but it’s best to be Zen about that. Something better may still happen. The point is not to be guided by prior assumptions – stay open to all possibilities.
If you’re just starting out with recording, you’ll likely be fumbling about with the gear and that will distract you from listening, or in the case of an interview, make the subject feel as nervous as you are. Ideally, you want to mesh listening with recording such that one is merely the extension of the other. Then when you’re out in “the field”, the mics are just extensions of your ears – perhaps literally in the case of binaural microphones.
Having a plan, though, is always a good idea, as long as you feel free enough to deviate from it according to the unfolding circumstances. In other words, think of recording as an interactive soundwalk, and that includes making some of the sounds yourself if the situation merits it. Some recordists prefer to be invisible (and inaudible) behind the mic, like a voyeur, not a participant. But the question remains whether the eventual listener whose perspective you are guiding will really engage with what they are hearing. However, if they hear your presence in the recording, they may choose to adopt your first-person attitude. This is always an option.
In the past, journalists covering events for radio developed an amazing ability for what they called “running commentary” where they described a scene and reacted to it as it unfolded. Today, most people, particularly students, are unused to and feel ill equipped to using their voices in this manner, but it shouldn’t be ruled out. Instead it could be practised.
In some cases and situations, the unfolding of events, whether organized or randomly occurring, provides an aural interest on its own. However, be prepared to later foreshorten the events by selecting the most relevant parts and transparently editing or mixing them together. In fact, no one remembers how any event unfolded in clock time – memory itself does this kind of foreshortening, leaving out the less salient features and concentrating on what was most memorable. You can do the same, and it will likely communicate better to others.
In other situations, you may need to be a more active explorer of the soundscape, as in a soundwalk, seeking out interesting acoustic spaces, exploring transitional access points between spaces, and seeking out their hidden corners. Or the microphone itself, as documented in the above examples, may provide you with a perspective that your ears cannot. Again, keep in mind that you can activate a response from the acoustic space by making your own sounds and using the mic creatively.
And finally, do not be discouraged when you get back home, listen to what you’ve recorded, and feel disappointed. Why does the recording not sound like what I experienced, you may ask yourself. There are many possible reasons, but the most typical one is that the microphones do not hear the way your ears do. We have the amazing ability to focus on something in particular and shut out almost everything else. Admittedly, as already demonstrated above in the use of different types of microphones, you can control to some extent the way sounds are picked up. For this reason, many recordists prefer to always listen through headphones while recording so they are always aware of exactly what the microphone is “hearing”.
Here is the opposite case where the microphone failed to pick up an aspect of a recording that our ears would have been sensitive to. A car is passing along a dirt road in a rural soundscape. Why does it not have a left-to-right trajectory?
Car passing on a country road (source: WSP Can 13 take 3)
All of the spatial cues are present in the envelope of the passing car, except for its lateral movement. The reason this is not picked up is that the recordist was facing away from the road, recording a wheat field, and the car was passing behind him. Since the recordist was using mics with a cardioid field pattern, they were insensitive to sounds coming from the rear, whereas with binaural hearing, we can detect sounds coming from the back which will lack the pinna colouration that is given to frontal sounds. The solution in Barry Truax’s soundscape composition, Aeolian Voices (2013) was to re-spatialize the sound in 8 channels so that it clearly crossed the frontal plane of the speakers.
Conversely, here is an example where the mics can pick up what we probably cannot. The first section of the recording is at the side of a creek at normal standing distance, and the second part is where the mics were lowered right to the creek level where the water sounds become almost percussive. Although moving a sound to an apparently more distant location is relatively easy in studio processing, making it seem to get closer to it is more difficult, and will not add the kind of detail that close miking makes possible.
Creek near Chemainus BC, nearby then extremely close miked
Source: WSP Van 130 take 12
Click to enlarge
As for the next stage – what am I going to do with these recordings? – try letting the recordings themselves spark your imagination. What do they make you think of, what might they suggest, the great “what if” questions that lead to creativity. Of course, you’re also going to need to develop some technical skills and experience in the studio, such as those that will be found in the subsequent modules, but starting with your own recordings may prove to be the best and most satisfying option of how to begin this process.
Index
C. How to get started.
The equipment. To engage in field recording one does not necessarily need any specialized equipment. Today's abundance of relatively inexpensive portable sound recorders and constant improving of the audio quality of smartphones (along with numerous free audio capturing and audio editing applications) one can very quickly get his/her hands dirty.
Working with hand-held recorders (such as Zoom H2n, Zoom H4n, or the slightly more expensive Roland R-05 and Sony PCM D100) or smartphones can become a good way to understand the principles of field recording and realize one's own needs in this respect. This can be the first step to a more fine-tuned approach to organizing one's customized field recording kit. You can see a survey of current field recording devices here.
Hand-held, portable audio recorders usually come with built-in microphones. This is important considering the high cost of external microphones that more professional equipment might call for. While the built-in microphones are fixed and hence do not leave much room for experimental or playful engagement with the environment, they can still produce material of high quality.
Most typical problems with hand-held recorders are handling noises and unintended sounds that typically derive from the way one manipulates the device. One's immediate presence in relation to the recorder might also result in sonic artifacts, an 'imprint' of that presence expressed in breathing, moving, or even stomach growling. To avoid this, one can leave the recording device unattended. However, this might complicate the possibility to monitor the recording process.
There has been a long debate among field recordists concerning the sounds of one's presence that unintentionally make it to the recording. While some advocate for purity, others do not perceive these by-products as problematic, acknowledging the subjective nature of any type of field recording regardless of one's position to the recording device.
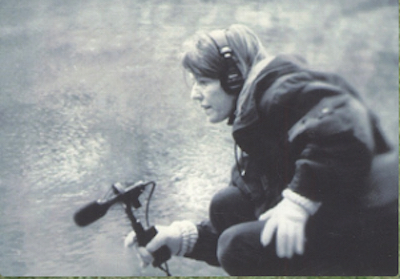
Recently, there has been some debate taking place about the difference between the tradition of acoustic ecology and ecoacoustics. For the acoustic ecologist, the position of the recordist and listener has been seen as one. In other words, in acoustic ecology, there has been critical acknowledgment and even recognition of an added value in the subject's participation in the recording (an aspect of field recording explored in depth by Hildegard Westerkamp through her soundwalking techniques).
Hildegard Westerkamp recording
In contrast to that, practices within ecoacoustics attempt to act upon the environment without human presence. This is afforded through the widening of the distance between the recordist and the environment and even an application of fully automated sensors and microphones that capture sonic information that is later collected and analyzed in a studio or lab environment. Each of these approaches eventually produces a different result and for different purposes. But what is worth noting here is that there is an increasing number of projects taking place today precisely at the intersection of these two approaches.
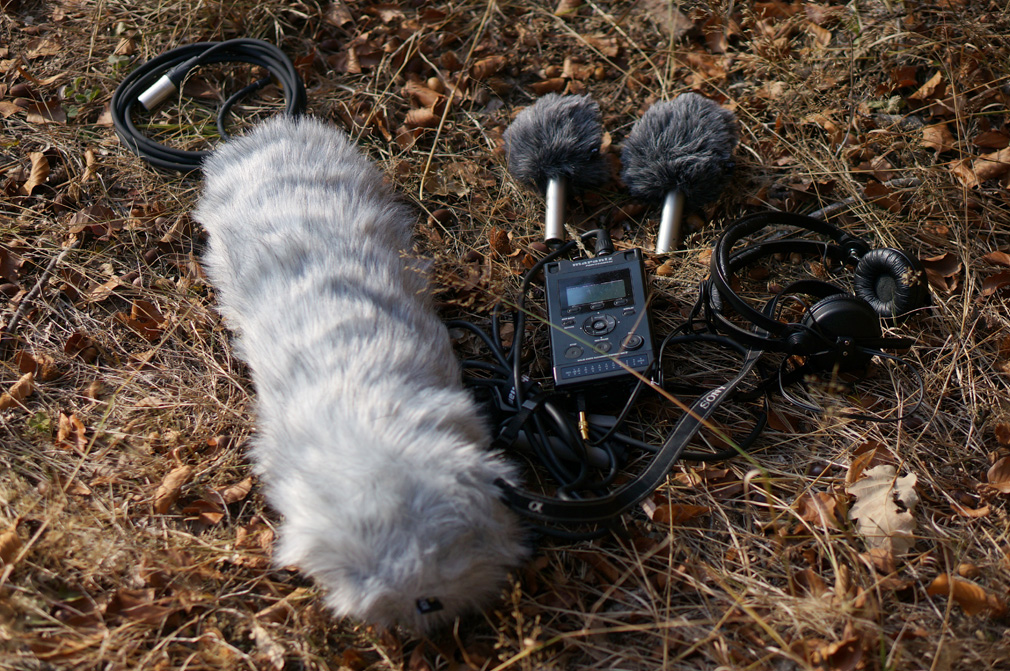
While embarking on a field recording session with a portable recorder (or a mobile phone) a few accessories might become helpful. Over-ear headphones are best for outdoor field recording, mostly because of their comfort considering the often long hours that the session might take. The outdoor recording also requires wind protection such as a furry windscreen (not the foam screens which are typically used indoors to help avoid peaking). The faux-fur windscreens, also known as "windjammers", are usually device-specific, although universal, standardized options are also available.
Basic recording techniques and setups.
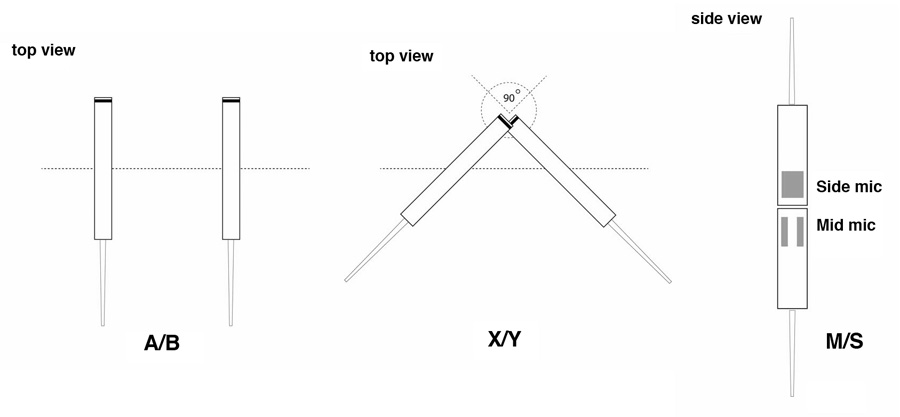
A/B
This technique also known as the spaced pair consists of two individual microphones cardioid or omnidirectional), set in parallel to each other, and spaced apart to capture a wide stereo image of a sound source. It is used typically in an indoor recording of multi-instrumental settings, music ensembles, and such.
XY
The most common stereo recording technique is known as XY. It typically uses a matched pair of microphones which are set in a coincident (XY) pattern. The XY techniques are envisaged to mimic the way our ears work (see binaural hearing), it relies on the time delay of a sound that arrives at one microphone a fraction of a millisecond sooner than to the other. This technique provides a significantly rich sense of ambience. The downside is that the recording is fixed and its manipulation in terms of widening or shrinking the ambience is not possible.
Some recorders, such as Zoom offer specially designed capsules that contain a pair of mics set up in an XY arrangement. They can be manually adjusted between 90 and 120 degrees.
M/S
A technique known as M/S was developed to enable control over the level of ambience. The concept is that the Mid microphone acts as a center channel, whereas the Side microphone adds ambience which can be intensified or subtracted during the recording or in the editing phase.
A directional microphone is placed in the center. Below or above this Mid microphone, an omnidirectional mic is located 90 degrees off-axis from the sound source. It captures the signal from the sides of the central mic. While editing the recorded material, the track from the Side mic needs to be split into two channels, left (with panning set to 100% L) and right (100% R).
One of these two should be processed by reversing phase (which, illustratively speaking, flips the wave upside down causing an effect of a slight misalignment between the two which as a result increases a sense of ambience).
To free up one's hands, a tripod might be a good idea for any of these mic configurations. It does not have to be the bulky and heavy kind, but any small, flexible tripod that allows for an easy adjustment of angles. There is a range of multi-functional tripods available on the market which can be used as either stationary supports of the recording equipment or hand-held grips.
Monitoring with headphones. Monitoring is an important element of field recording, the term meaning to observe the signal without necessarily altering it, such as by watching level indicators and/or listening to the signal at a comfortable volume. It helps assure you that the recording is conveyed according to one's intention when it comes to the placement of the microphones (their position and orientation) and the microphones' gain settings. However, one does not need to keep monitoring the input during the entire field recording session, especially if it is a long one. It might be enough to only begin the recording session with the headphones on, especially if the acoustic situation is not expected to be varying radically over time.
Relying on the headphones depends obviously on the type of situation one intends to record. While the capturing of 'situated' and 'steady' sounds (for example, lake soundscapes, dawn chorus, etc.) might call only for an initial microphone setting and gain check, more dynamic situations, when one, for example, has to follow the subject or navigate through the environment might require more constant monitoring.
There are two main kinds of headphones to be considered for studio and field recording: closed-back and open-back. Both of them are types of over-ear headphones which means that they cover the ear to essentially block out the unintended sounds. The closed-back is a highly insulated type that seals the ear from any sounds and that way helps focus on the recording. This type allows us to hear the situation very close as to how it will sound in the recording.
The open-back headphones are used more commonly in studio environments rather than in an open field. They are intentionally designed to let some of the ambient sounds enter the ears directly. By doing so, they allow adjusting one's position concerning other sound sources on the go. Open-back headphones are especially useful in live music recording sessions. While enabling to monitor the overall balance of instruments (or all sound sources to be included in the recording), they simultaneously keep one's sense of space. In other words, they allow for a combination of the mediated and unmediated sense of presence.
In quiet acoustic environments and especially when the recording is done with omnidirectional microphones (or in the case of a multi-microphone recording) it is important to work with headphones that do not leak sounds. Otherwise, they might end up in the recording. This is a common problem with in-ear binaural microphones equipped with a live monitoring function. Because of the minimal distance between the earphone's speaker and the microphone, there is a risk of interference and a feedback loop that can corrupt the recording.
Levels. Most common audio recorders work with a 60 dB range (between -60 dB or -40 and 0 dB). Depending on the type of sound source and microphones in use, there are different approaches to setting the levels. The most optimal level setting for clean sound sources (such as voice) is somewhere between -16 and -8 dB (this means that the peaks should not reach above the -8 dB). The more intense the source the lower the setting should be. The available range above that reference is called headroom, and since vocal effort can suddenly peak, it is desirable to leave this much headroom.
For example, a regular din of urban activities or traffic noise might require going down to about -20 dB. In environments characterized by a wide dynamic range of acoustic events, it is important to set up the gain lower than normally. Generally speaking, to be on the safe side it is always better to have the levels set up a bit lower than higher. It is much easier to increase the gain than to remove peaks and distortion.
Keeping enough room for unexpectedly loud sounds will assure that those get captured with no clipping or distortion. Later on, in the editing phase at the studio, the levels of the recording might be normalized to even out the differences in gain. Essentially, what should determine the level setting is the character of the recording that one intends to produce.
Documentation. Capturing sounds is only one part in the process (and art) of field recording. The second highly important component is the handling and annotating (or tagging) of the recorded material. While you should engage in field recording with enough room left for spontaneity, serendipity, and the unexpected, it is good to keep at the back of one's mind some basic principles regarding the organization of the material which can already be implemented at the recording stage.
One useful approach is to give a voice ID at the start of each take, including date, time, location, and any information that might affect the recording. When reviewing the recording later it may help to quickly identify the take. Long field recording sessions often result in an abundance of material. Back at home or studio, the evaluation and organization of that material may cause a real headache. Several simple habits can help avoid it.
For example, one can save extra work by clearly naming files. The most common and almost always the default setting is that the recording device names the files using the precise time they were made at (in some cases including even seconds). Another hint here would be to set up folders for specific types of recordings. For example, if using different kinds of microphones during one session, one can set up several folders and name them after the type and number of microphones used at the time (for example, stereo condenser microphones, mono shotgun, quadraphonic hydrophones, etc.).
However, while switching between such folders might consume extra time this habit won't be very helpful especially when doing field recordings in rapidly changing environments where one has to act fast. Another good habit for the more efficient reviewing of the recorded material is to also accompany the recordings with a short commentary after each take. It can be done at the end of the recording or as a separate file. The commentary can include a summary of the recorded event, information about the technical setting, one's opinion about the quality and value of the recording as well as very clear indication about moments in the recording worth particular attention. By listening to these commentaries one can save time and skip going through the whole length of the recording.
To document the process of field recording one can also resort to other media such as a camera, notebook, and GPS device. A camera can be used to document the setting of the microphones concerning the recorded scenery. If the location is of crucial importance to the recording, one can use a GPS device (or a smartphone app that captures the geolocational information). Keeping an 'analog' notebook is always a good idea. It helps organize thoughts about the process 'on the go' and does not interfere with other devices (whereas mobile phones might).
Here is an example of a systematic set of logsheets combined with detailed timings of events, transcribed from notes after the recording session, including GPS and photo information and some sound level readings.
Cleaning up. If the recording is done properly it usually does not need much cleaning up. If upon reviewing the recording one has a feeling that to sound as intended it requires a lot of extra editing effort, if possible it is better to repeat the recording altogether. The most basic form of cleaning up and preparing the material for further editing requires cutting out the beginning and end where unintended noises, such as the handling of the microphones, might get captured. One general form of processing that one can implement straight after downloading the files from the device is normalization.
Today essentially all audio editing tools are equipped with this rather basic function which brings the amplitude of the recording to a target level. Running this function across an array of recordings allows us to even out their gain before further editing. The way that normalization works is that it brings the amplitude up to the level of the loudest moment in the recording. This is why incidental clicks should be removed beforehand so that they do not determine the normalization process. To remove clicks and pops one can either run automated functions or do it manually. The latter approach, although more time consuming, might lead to better results, as for some high amplitude clicks (such as water drops) it might be enough to lower the gain instead of getting rid of them. Automated removal of clicks and other unintended sounds might disturb the continuity of the recording and introduce a troubling sense of it being computationally treated and manipulated. Again, depending on the intention, in some cases, one might prefer to leave these unintended artifacts in the recording instead of going to great lengths to remove or mask them.
Even if you use a windscreen, you may surprised by the presence of wind noise in your recording. The windscreen is "acoustically transparent", that is, it does not impede the sound from getting to the microphone. However, even a slight breeze can create turbulence around the microphone and result in low frequency energy below 500 Hz being added to the recording, and stronger wind can add a great deal of this type of energy. Unless you are trying to capture a lot of low frequency energy in a recording, a high-pass filter can be used to filter out most of the wind noise, as in this example. It may also be wise to delay normalization until this form of clean-up has been finalized.
Normalization can be followed up by equalization (EQ) which allows for boosting or reducing the levels of different frequencies captured in the recording, as documented in the next module. If, for example, there are noises that remain throughout the recording within a certain frequency range, they can be reduced or even removed by lowering the levels of those specific frequencies. By implication, if some sounds were not captured properly and appear as insufficiently strong in the recording, they can be boosted by lifting the corresponding frequency range. Working with EQ is quite straightforward especially in the case when the recorded sounds are sustained and do not divert much from their frequency range (for example drones, signals, din, etc.).
File management. There are many ways to manage sound files. A lot depends on one's habits, preferences in terms of equipment, software, and operating system. As mentioned earlier, audio recording devices are designed to facilitate the management of the files on the fly. Upon downloading them on a hard drive, one common way of organizing the files is by assigning them to folders named after the date and place where the recordings were done. Before editing the files, one good habit is to make a spare copy of the original files and store them in a clearly labeled subfolder. In multi-step editing, it may happen that for some reason one is not able to revert to the previous stage or return to the original setup. If such is the case, the folder with unedited versions might save the day.
It is good to accompany one's field recordings with a text document where some contextual information can be stored (date, place, equipment used). One can consider digitizing the notes from the 'analog' notebook and keeping them alongside the audio files in a text file.
Index
D. Personal Recording Projects. All types of recording experience are potentially valuable to you, and basically the norm is that you really learn how to do it through actual experience, often of the trial-and-error variety.
Personal Recording Project No. 1. The purpose of this first suggested project is to record material that can be used as a sound object in the subsequent modules. That is, you need a “clean” recording of a specific sound or series of sounds, preferably (for you) in a reasonably quiet environment. So, this will qualify as either a studio or a field type of recording, as defined at the start of the module.
It is desirable to use headphones when doing this recording as you need to hear as much detail as possible. You should also expect to do several “takes” as they are called, i.e. a take is a recording from start to end. Note that on some handheld recorders, such as a smartphone, you can pause a recording and continue it when ready, whereas with a more professional recorder, it’s start and stop only.
There are several reasons for doing multiple takes, the simplest being you won’t know which is the “best” until you start using them. However, don’t stop and re-do a take if something goes wrong with the sound source – mistakes can be simply edited out. Sometimes, what you think is a mistake turns out to have some interest when listened to later – but not often.
More significantly, in multiple takes you can perform the sound source in a variety of ways. You should probably have a more neutral version, such as a single hit that is allowed to die away naturally. There may be more than one way to coax a sound out of your source, so explore that. It may be tempting (and useful) to improvise some short sequences, but be prepared to edit out some sub-sections of the entire recording that may have an appealing sense of gesture or rhythm.
There are a few cases where different distances from the mike may be useful. Distance itself can be simulated later, as you will learn, but as in the case of the close-miked creek sound presented in section B, you may find something interesting in comparing a recording done at a normal listening distance, and one done in close proximity (but watch the recording levels).
In the subsequent sections, particularly the Filter and Equalization one next, you will learn techniques for “cleaning up” a recording, as well as editing extraneous material, so with experience you’ll know what not to worry too much about during the recording.
What to record? Well, that’s where the exploration begins, but the answer will likely lie with your ears when you start listening from a recordist’s perspective. What do you find aurally interesting? Something you’re already familiar with and like, or will the recording reveal something you haven’t noticed yet?
Speech or a musical instrument? There are some pitfalls with these two types of sounds, although nothing is impossible to actually use. With speech, words will likely be too structured and too short to be useful as a sound object, so we suggest you leave that until a later exercise, such as found in the module on Voice and Text-based Composition.
However, vocalizations not with words but just vocal sounds can be a lot of fun, and quite rich in their timbre and gestures, not to mention even more interesting with transpositions in pitch (unlike words). Plus there is a lot of room to improvise.
Musical instruments as a source have obvious pro’s and con’s. The biggest advantage is that an instrument has already been optimized to produce acoustically rich sound material, and a skilled performer can use a lot of “extended techniques” to make many more sounds that you’re familiar with. The biggest pitfall is when you’re thinking of “playing music”. It’s way too structured, and all you can do with it is to destroy it, not to mention how tired of hearing it over and over again you’ll become during your studio work.
However, just as with vocalizations, if you treat the instrument as a sound source (not a music source), then you can get a rich array of material that is more neutral and can be magnified, so to speak, through subsequent transformation.
Environmental sounds. Well, what kind are you thinking about? Entire soundscapes are not useful at this point because they also are too structured and complex. At this point it will be difficult to separate foreground sounds from background ones. However, specific sound sources in an environment, if they can be clearly recorded, usually by close miking, can be wonderfully rich, so do explore them.
A final caveat: don’t try to record very quiet sounds as your first sound material. It will be too difficult to get a decent signal-to-noise ratio, and you’ll be fighting for sound quality the rest of the way through the project. As you heard in the first set of examples, there are types of microphones that make this possible and exciting, but it’s not usually practical to start with that yet.
And most of all, have some fun, and be patient.