Animation Techniques
Basic Animation Techniques
Keyframing
Animation is made of numerous frames; when those frames are showed at a certain speed; we perceive the individual frames as moving images. Keyframes are the important frames which contain information of a start/end point of an action. A keyframe tells you about two things; first, it tells you what the action of your frame is at a certain point of time; second, it tells you what time that action occurs.
In AE, you can pretty much keyframe everything from the attributes on layers to effects control;
In this demonstration, we will show you how to keyframe a still image;
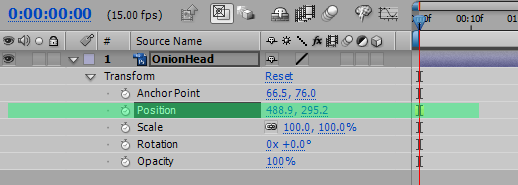
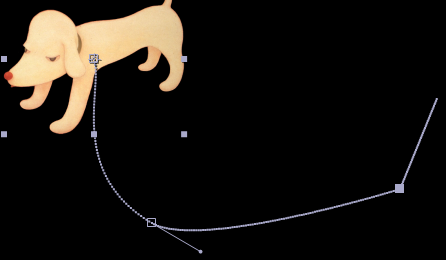
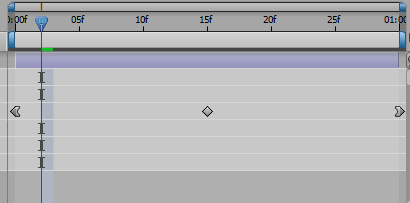
1. Import OnionHead.psd and drag it to a new comp; move your play head to the beginning and click on the stop watch icon beside Position; now a keyframe has been added.
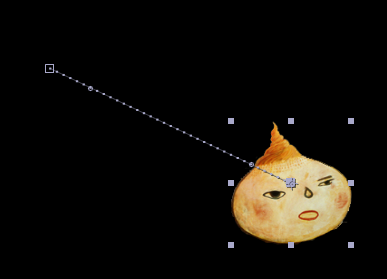
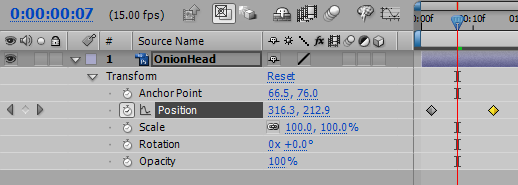
2. Move the play head to another point on the timeline(where you want the action to end), go to the composition canvas and drag the onion head away from the original position; now you will see a dotted line is created. This dotted line indicates the motion path of the onion head.
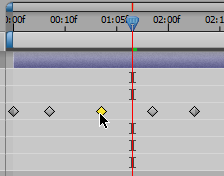
3. You add more keyframe on the timeline in the same way you just did and do not afraid to play with the path on the canvas;
4. Also, you can move the keyframe around on the timeline in case you want to adjust the speed of movement.
Bezier Curve
When you click on the rectangular shape box on the motion path, you will find that a little handle appear, you can use this handle to adjust Bezier Curve to smoothen out the animation.

Keyframe Assistant
When you have an object constantly moving in the same speed, it is not very exciting or realistic. There are acceleration and inertia in the real world. Fortunately, AE provides us with options to simulate all those realistic physical quality( motion blur is one of the great options).
1. Here we can select a keyframe which marks the begin of the movement and right-click. Then go to Keyframe Assistant>>Easy Ease Out(speed up)
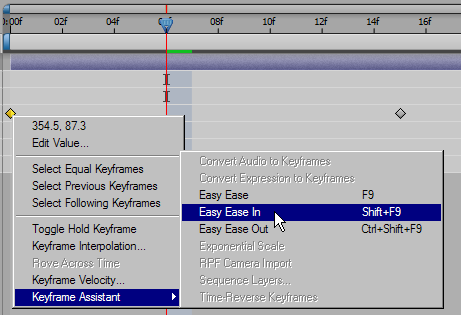
2. Next we go to the keyframe which marks the end of the movement and set it to Easy Ease In(slow down)
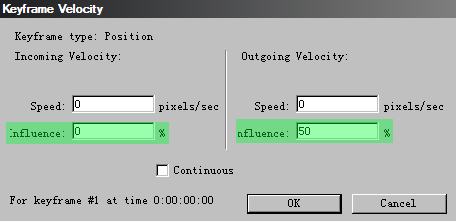
3. If you find the acceleration is not fast enough you can go to Keyframe Velocity and increase the Influence value to make it speed even more.
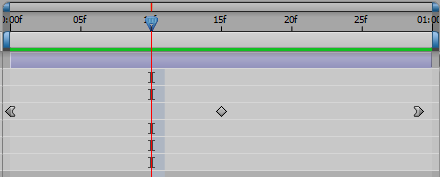
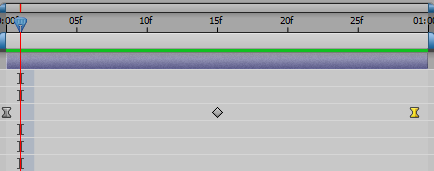
4. Once you change the velocity you find your keyframe turn from a diamond shape to a hourglass shape; you can also apply Easy Ease to the middle frame to achieve the same effects since Easy Ease slow down as the object approaching and speed up as it moving away.
Keyframe Interpolation
Keyframe Interpolation allows you to change the types of motion path;

If you set the keyframe Interpolation to Linear, you will find the path will be made of straight lines and sharpe corners.
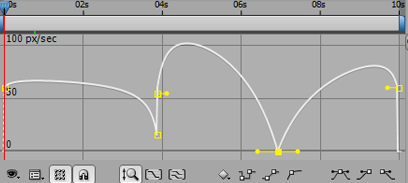
Graphic Editor
Graphic Edistor is also a very good way to adjust your keyframing;
1. Click on chart icon at the right corner of the layer panel to activate graphic editor;

2. In the timeline, you will see the motion/speed being represented in Bezier Curve;
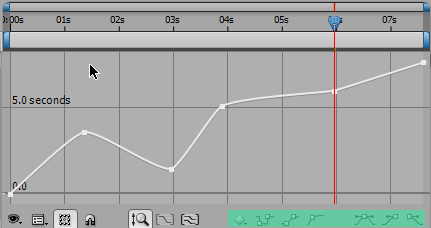
Time Remapping
Time Remapping is a very popular technique in music video; it allows you to control the playback speed and direction(move forward/rewind) of your animation;
In this demostration we will be using walking.mov
1. Import the mov and drag it to a new comp; right-click on the walking.mov layer, go to Time>>Enable Time Remapping

2. Turn on the graphic editor;

3. Next, move your playhead around the timeline and insert a few keyframes; then you can adjust the curve shape to control the time remapping;
Uprising curve line represents moving forward in time.
Descending curve line represents moving backward in time.
Sequencing Layers
Sequencing is a function that AE automatically spreading multple footages along the timeline;
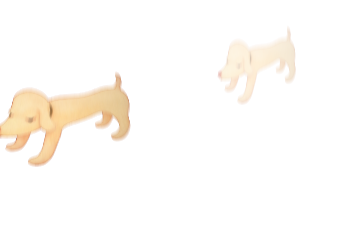
1. Drag the JumpingDog comp to a new comp and duplicate the layers several times; now we can see all the dog are jumping at the same time; what if we want everytime only one dog is jumping; we can achieve that through sequencing.
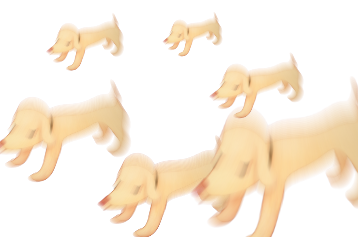
2. Select all the layer, then go to Keyframe Assistant >> Sequencing Layers
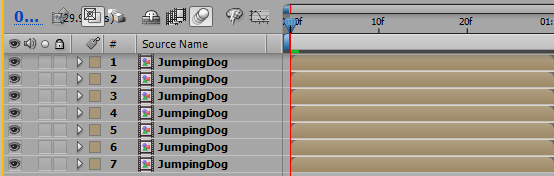
3. Click on overlap and set duration to 5 frames;

4. Now AE has arranged all the layer accordingly on the timeline;
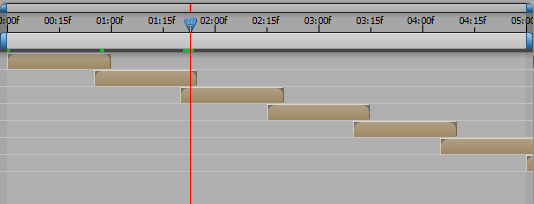
5. Here you can see one dog appearing as another appearing;
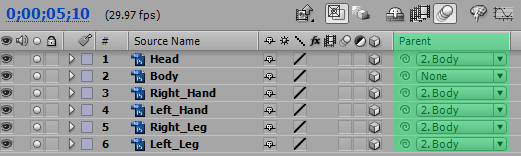
Parenting Elements
Parenting is when you have a sequence of layers, you can have one master layer moving and the other layer will follow; this is very useful if you are animating a person walking, you can have the limbs moving and parent them to the body layer, then if you want to move your character around, you do not have to animate every single limb.
1. To activate the parent option, right-click on the column of layer panel and select Columns>>Parent;
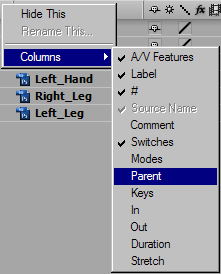
2. Now you have the parent column; you can use the drop down menu to select which layer you want the current layer to parent to.
Applying Effects
Applying effects to your layer is exactly the same as applying presets to your text, just go to Effects&Presets panel, select an effects and drag to your layer; then the effect will be applied.
1. when I type "trans" into the search box, you can see all the effects which contain the letters of "trans" are filtered out, so if you ever want to find a specific effect for your animation; you can try to type in a word in the search box; it might get you to the effects much faster than looking through lists of effects one by one.
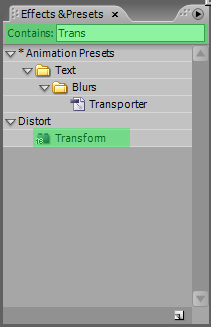
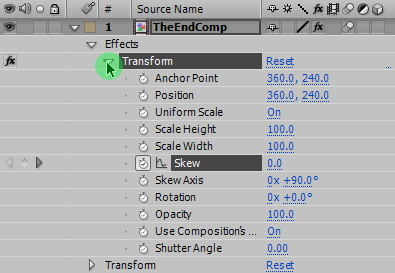
2. Here we drag Transform effects to the text layer;
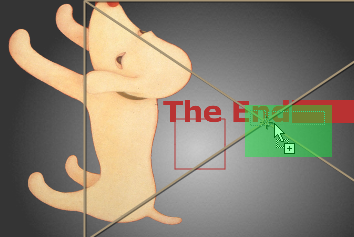
3. Go to layer panel and you will see that an "effects" option has been added into the layer properties. Finally you can animate the level of the effects using keyframing.
Exercise: Bouncing Onion Head
1. Setup Comp: Drag the onionhead.psd to a new comp, change the length of the time to 1 sec and frame setting to 30 frame/sec;
2. Animate It !: Create three position keyframes on the timeline; place first one(frame 0) and the last one (frame 30) at at the top of the screen; then move the middle one(frame15) to the bottom of the screen;

3. Simulate Gravity:
Select the first frame and set Keyframe Assistant to Ease Out;
Then select the last frame, set Keyframe Assistant to Ease In;
Next, adjust the degree of speedup/slowdown using Keyframe Velocity;
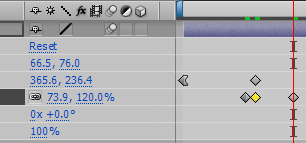
4. Simulate Forced Deformation:
Turn on the scale position;
Insert a keyframe at a few frames(3-5) before the head touching;
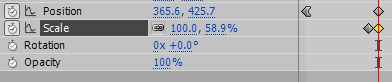
Then set another keyframe at frame 15 and scale it to make it look like it is squeezed vertically;
Next, insert another keyframe a few frame later and scale it to make it’s stretched vertically;
Finally, insert a keyframe at frame 30 and reset the scaling to the original size.
5. Adding Motion Blur: Turn on motion blur and preview it, now we have a bouncing ball.