Titling
If you carefully analyze those kinetic titling sequence, you will figure it out most of the techniques they used are not very complicated and AE already offers us a lot presets on them; so the things that actually make professional titling sequence great is that it has very compelling typography design and color design. Here we are going to provide you with the techniques needed for creating a good titling; however those design skills you need to earn them through years of practice and experiences.
What We Will Be Creating Today?
Demo File 1: Handwriting Effect
Presets&Effects
Many people tend to look down on the presets in AE; surely most of the them looks very cheesy and corny; however, they are not set in stone, you always change it with layer properties and effect controls; therefore, they have a lot of potential, here are a list of very useful presets for titling:
Typewriter
Pop Buzz Words
Straight In Multi-Line
Fade Out By Character
Scale Up Words
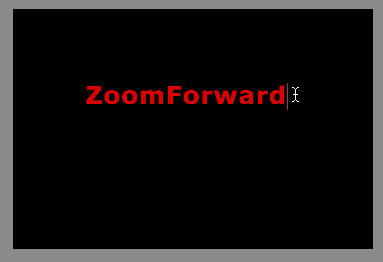
Zoom Forward
We are going to explore a couple of them in today's tutorial and show you how to can manipulate it to suite your own purpose.
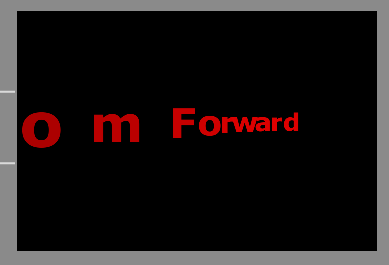
Using Preset - Zoom Forward
1. Select the Type Tool(Ctrl+ T) and create a text block on a new composition;
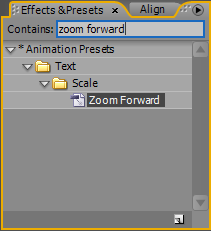
2. Go to the Effects&Presets panel, type "zoom forward" in the search box(contains) and the Zoom Forward option under Text/Scale will show up;
3. Drag the preset option and drop onto your text layer;
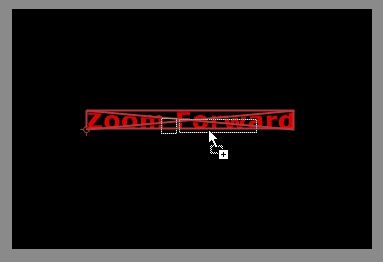
4. Now let us go to the timeline panel, expand the text block you should be able to see a few keyframes created under Animator 1>>Range Selector 1 >> Offset; you can drag the first keyframe to the right of the second keyframe so the animation effect will play backward;
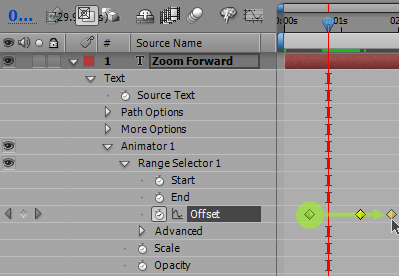
You can use this preset not only as an effect for animating out of a sequence but also for animating into a sequence;
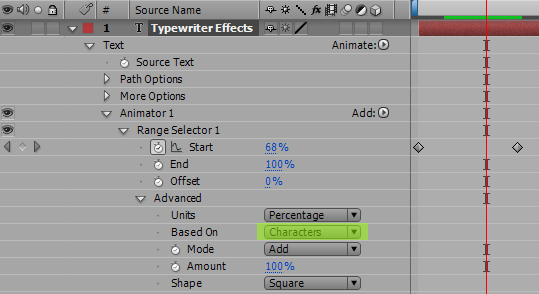
Using Preset - Typewriter
The typewriting effect is very heavily used in kinetic typography design/professional titling; it offers a great visual solution for synchronizing speeches with motion-graphic; fortunately, the Typewriter preset in AE allows us to easily create typewriting letters as well as typewriting words.
1. Let us start with creating a text block on the canvas;
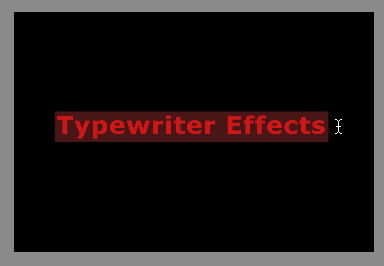
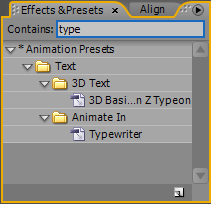
2. Search for typewriter in the Effects&Presets panel and drag it onto the text block you just created;
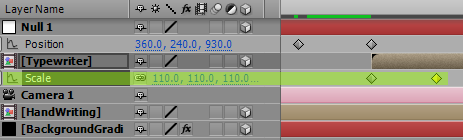
3.On the text layer, under Text>>Animator 1>> Range Selector 1>> Advanced, you should be able to see the "Based On" option and it allows you to switch character(letter) mode and word mode. *make sure you save what you have created in this tutorial, we will be using this composition in later exercises.
Handwriting Effects
Another commonly used effect in titling is handwriting; of course if you want to use the sketch function in AE and write the texts with your mouse that would be fine, but in the most cases, your handwriting is no match with professionally designed computer type and with this handwriting effect you can use any font to create a handwriting effect.
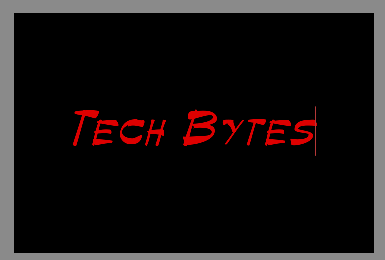
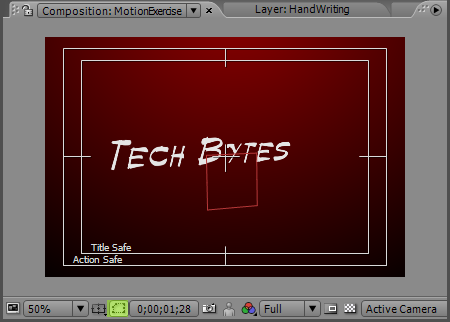
If you are wondering what does it look like , here is an example: Click here to view the example
In this tutorial, you will be creating a titling animation like the one you have just seen;
1. First, let us type in some text;
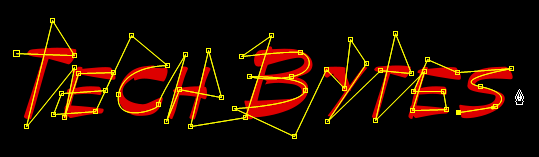
3. Please the proper font, font style and color(like font similar to handwriting style) so the handwriting effect will be convincing;
4. Keep your text layer selected and choose the Pen Tool(Ctrl + P);

5. Try to draw a path that covers most of the text, you do not have to be 100% precise at this stage; switch back to move tool once you are done with drawing the path, you will find out there is a Mask option created under the text layer;
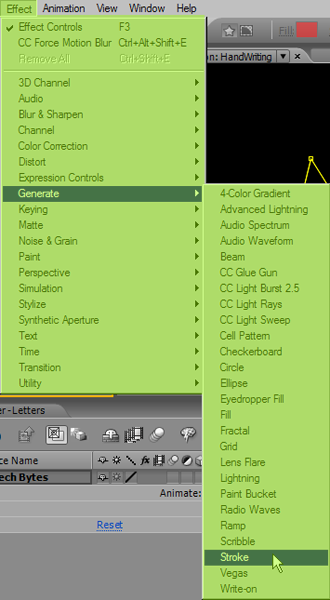
6. keep the Mask selected, go to Effect>>Generate>> Stroke to apply a stroke effect to this path;
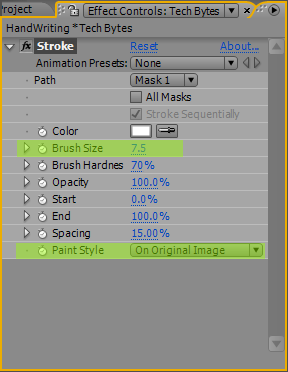
6. what we are trying to do here is that we want to create an animated stroke which will graduate reveal the shape of the text block, so it will look like handwriting; increasing the brush size to some number(depends on what the font you are using) so it will cover the most of the text; we are going to switch the Paint Style to Reveal Original Image later but for now, just leave it there;
7. Some area might not be perfectly covered, instead of increasing the brush size a bit more, let us move those vertex points around and try to get all the letters covered;

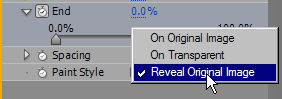
8. After you finish adjusting the path, let us set the Paint Style to Reveal Original Image; if you just move the End slider around you will start to see the handwriting effect; now what we need to do is just to animate the End property;
9. Go to Text>>Effects>>Stroke>>End and turn on the stopwatch icon; for the first keyframe, let us put 0% so there will be no text in the beginning;

10. Then let us move the CTI to around 1 sec and insert another keyframe; this time set the End value to 100%; now the handwriting effects should be working and you just the placement of the second frame to get the best timing. *make sure you save what you have created in this tutorial, we will be using this composition in later exercises.

Exercise: Creating a Kinetic Titling Sequence
In this exercise, we are going to use all the techniques we just learned(and a couple of new techniques we will be learning along the way) and to create an interesting dynamic titling sequence; here is a demo of the sequence we will be creating: Click here to view the completed sequence
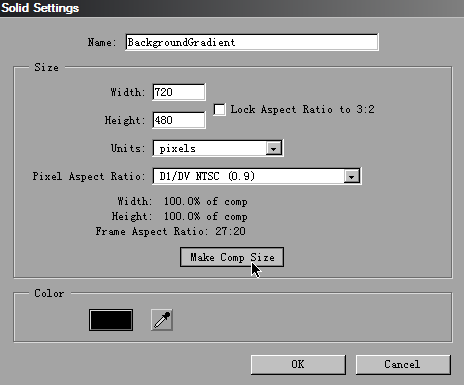
1. let create a 10 sec long composition with 30 frame per sec; the first thing we are going to do is to create a solid layer;
To create a solid layer, go to Layer >> New >> Solid Layer; we will apply gradient to this layer and it will be our background;
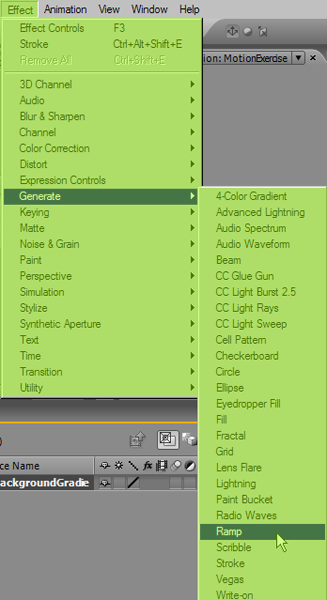
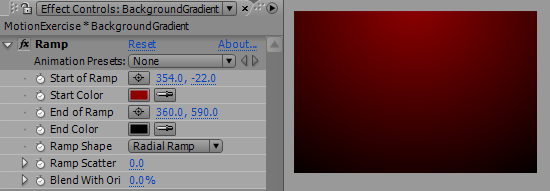
2. With the solid layer selected, go to Effect >> Generate >> Ramp; what ramp does is that it will create a gradient on a solid layer;
3. Change the Start Color to dark red(or whatever the color you like) and the End Color to black; if click on the fx ramp and you can use the mouse to adjust the gradient size and orientation on the canvas;
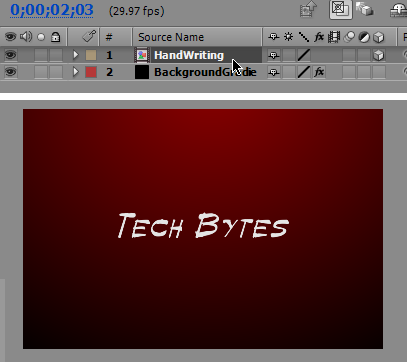
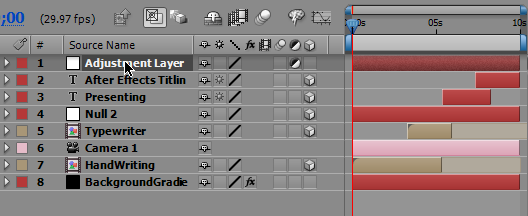
4. Drag the Handwriting comp you just created in the previous tutorial to your current comp and place it on the top of the background layer;
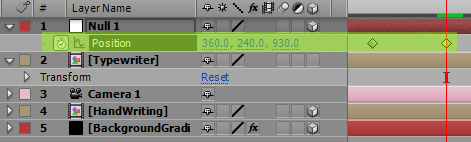
5. Create a camera layer and a null object and parent the camera layer with the null object; the reason we are doing this is that in After Effect, all cameras are represented by a dot, it is really hard to select a dot in a 3D space so it makes animating the camera very difficult (i.e. if you try to set the rotation on a dot you will not able to tell from the visual clue on the canvas, since now matter how you are going rotate a dot, it will look the same) ; however, if we parent the camera with a null object which is an invisible layer with width and height; since the null object layer appears as a box plane, we can easily scale, rotate and move it around.* Note that all the layers (except background and camera layer) should have the 3D mode on before you apply any changes to them.

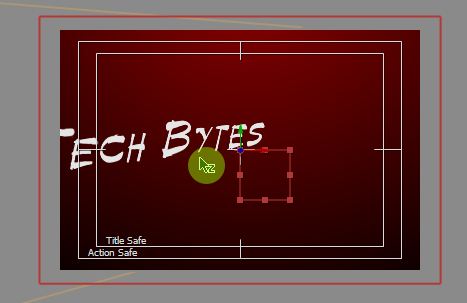
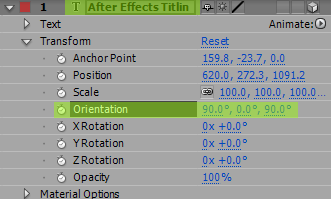
6. Now let us animate the hand writing text and make it rotate to the north for about 45 degree right after it finishes the handwriting effect; select both Position and Orientation properties and insert the keyframes which indicating the starting point of the rotation; at about 20 frames to the right, insert the other set of keyframes;
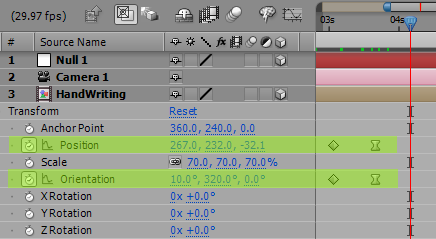
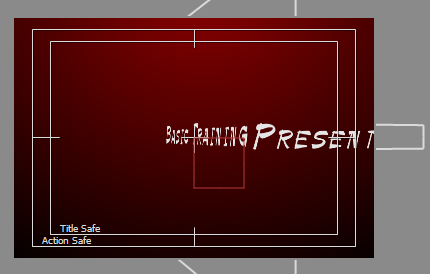
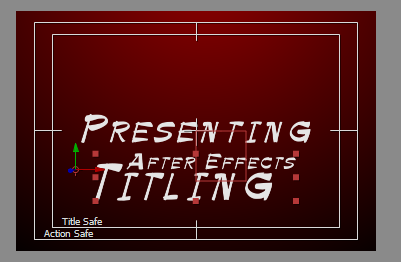
7. Keep the second set of keyframe selected and use the Selection Tool(on Z axis) and Rotation Tool to orientate the text block in the composition monitor; also remember to turn on the title safe option(highlighted in green);
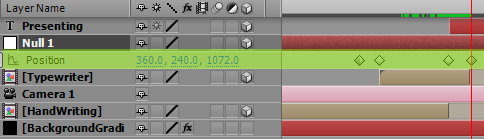
8. Right after the rotation, we want our camera to dolly zoom into the space so it will leave the handwriting layer behind; at a few frames after the rotation, select the Null 1 layer and insert two Position keyframes on the timeline;
9. Keep the second Position keyframes selected and use Selection Tool and move along the Z-axis till the handwriting text is completed left behind;
10.Drop the Typewriter comp you created on the timeline and Trim off everything before the point where the camera has flew over the Handwriting text so it will not interfere with what we have created before;

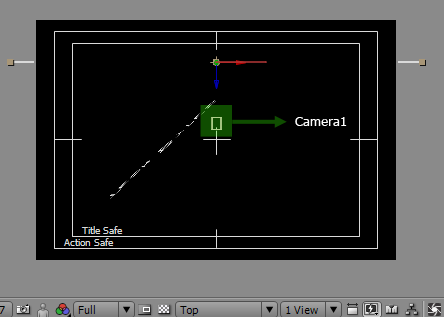
11. For the next effect we are going to create a transition sequence using 3D rotation; in order to make the rotation function properly(if you are confused please bear with me, you will figure out as soon as you see the result) we have to align the Typewriter layer with the null object in z-axis; AE offers us a lot of way to see your compositions, in this case, top view would help us the most, so let us switch to Top view, keep the Typewriter layer selected and drag blue arrow and align it with the null object layer(you can even use arrow key to nudge it around)
12. Now we are ready to do the rotation , however, since we moved the Typewriter layer further, so it will appear smaller on the screen; let scale it up a bit so the animation still looks the same. Note that I have keyframed the Scale properties to add a bit motion into it but you do not have to do it.
13. Insert a Orientation keyframe on the null1 layer a few frames after the typewriting animation and insert another keyframe about 20 frame to the right;

14. Rotate the Typewriter layer 90 degree on the Y-Axis to the north and create a new text layer, here I typed "Present" and remember to turn on 3D mode;
15. Create a Position keyframe on the null1 layer and adjust it so when the rotation is finished, the title "presenting" will be in the center of the screen;

16. Let us trim off the Typewriter layer after the point where the rotation has completed and also trim off everything before the rotation started on the "presenting" layer;
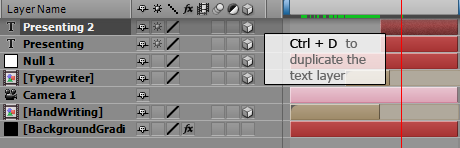
17. Now the animation is almost finished, to make it more interesting, let us create another rotational transition, this time let us rotate it on the X-Axis. Duplicate the "Presenting" text layer;
18. Here I create a cluster of text "After Effect Titling" and move it beneath the "Presenting" title;
19. Next, let us change the orientation of the "After Effects Titling" layer and make it parallel with Z-axis so when we rotate camera 90 degree to the north along the X-Axis, we will be able to see it; rest of the steps is similar to the previous animation you have done; we can even drag one of the presets to the end of the animation and make it more interesting, here I use forward zoom and the text just flies out at the end.
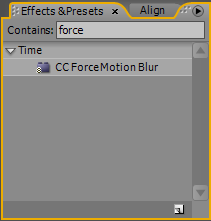
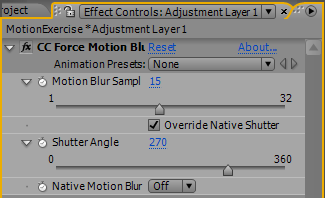
20. Finally, we want to add some motion blur into it, we could use the motion blur on the layer, but this time it does work that well, so we are going to use one effect called CC ForceMotion Blur; first let us create an adjustment layer; Adjustment Layer is the layer you add effects into that affects the layers beneath it.
21. Drag and drop it onto the adjustment layer;
22. Turn up the Motion Blur Sample and Shutter Angle to add more dynamic into it( the larger number you set there it will take more time to render, but for sake of the effects, it is worthwhile)
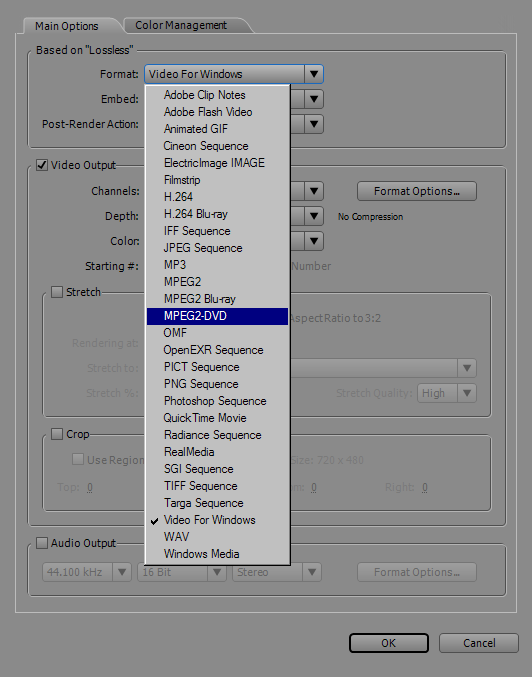
Export to DVD
Not every computer can open .aep file. If you want to export your footage for high quality publishing, you have to compress it and export to media like DVD In AE we can use render queue to encode and export your project.
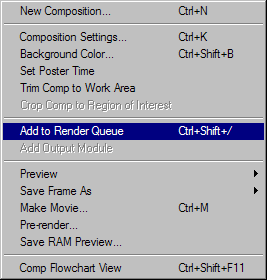
1. Keep the comp you want to export selected, go to Composition>>Add to Render Queue;
2. Now the selected comp will be added into the rendering queue;
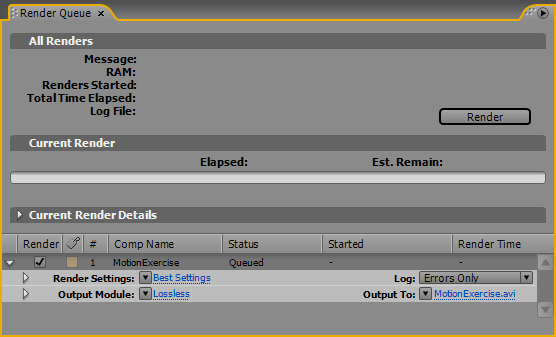
3. Here you can select DVD as one of the option for exporting.