Type/Alignment
Adding Type
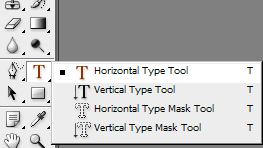
1. Select the Horizon Type Tool T or the Vertical Type tool bar; Even though Photoshop offers several Type tool , but for most of time the Horizon Type tool does everything that other Type tools do as well.
2. On the Type Menu Bar, you can specify font family, font size and etc.

3. Click on the canvas and enter a few words
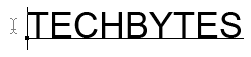
4. The  (anti-alias setting) determines how Photoshop rendering the text, here is a comparison between None and Sharp.

5. For more Type Options, you can navigate to Window>Character to bring up the Character Palette, Keep your text selected
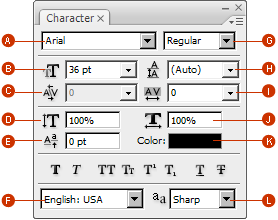
A. Font Family
B. Font Size
C. Kerning
D. Vertical Scale
E. Baseline Shift
F. Character Language
G. Font Weight
H. Leading
I. Tracking
J. Horizontal Scale
K. Font Color
L. Anti-aliasing
Alignment Tools
There are two ways to alignment graphical elements in Photoshop; first, you can alignment elements among different layers; second, you can align one or multiple layers with the selection you make.
Click on Move Tool , the Alignment Menu will show up at the top of the Photoshop;

 Top Edge Alignment
  Vertical Center Alignment
  Bottom Edge Alignment
 Left Edge Alignment
  Horizontal Center Alignment
  Right Edge Alignment
Alignment among Layers
1. Drawing two shapes on separated layers and select both layers(Shift +Click) then select one of the alignment options from alignment menu
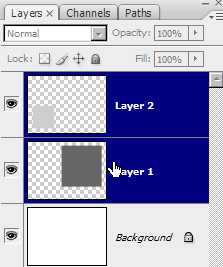
2.Without Alignment | Vertical Center Alignment | Vertical and Horizontal Center Alignment


Alignment with Selection
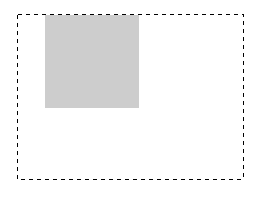
1. Create a selection box with Marquee Tool (you can use any selection tools)
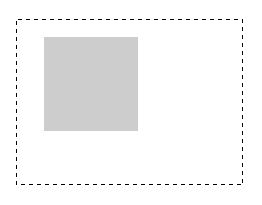
2. Select Move Tool and click on Top Edge Alignment while keeping the gray rectangular layer selected, the gray rectangular will align with the top side of the selection. As well, you can select as many layers and apply different alignment orientation as you need.