Introduction to AE
What Can After Effects Do ?
The first thing you need to remember before we start to explain all the puzzles in After Effects is that AE is not an editing program; if you want to edit a video, Final Cut Pro and Premiere do a much better job than AE. However, when it comes to creating special effects and compositing in motion picture AE has unmatchable capacity. In the industry, AE is commonly used for producing computer animation, titling sequence and integrating computer graphic with real life footage.
Here is a few examples of AE animations:
Animation: http://youtube.com/watch?v=u1Dxn3VWOws
Titling 1: http://youtube.com/watch?v=syf8olcM0z4
Titling 2: http://youtube.com/watch?v=c6Q0dfrbr10
Interface Overview
After you launched AE, it will be nothing on the window unless you start a new project or open a previous project. To start a new project, go to File>>New>>New Project;
The interface is divided into several areas:
Project Area: All your footage and stock resource will be placed in the project area;
Composition Area: The composition area allows you to monitor the result of your manipulation and you can also visually orientate your footage in the composition canvas;
Timeline: Here is where most of your animation work will be done;
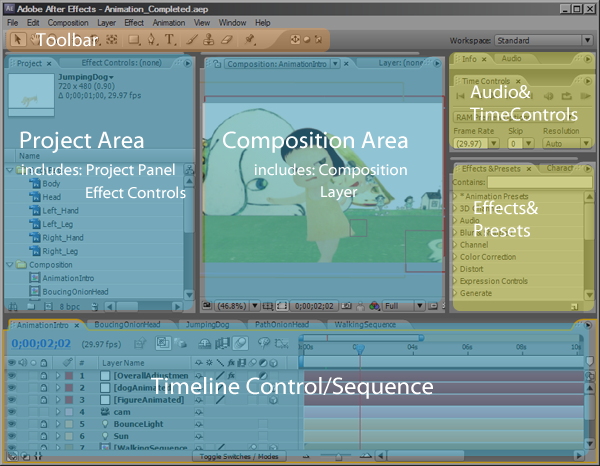
Tool Bar
At the top of the interface you will find the tool bar which allows you to activate different tools;
Generally, Selection/Hand/Zoom tools are for navigating through your project; Rotate/Camera/Pan Behind tools are used to move elements around in 2D/3D space; Mask/Pen tools allow you to create assisting elements for your project; Brush/Clone Stamp/Eraser tools are three major pixel manipulation tools; Local/World/View Axis Modes are primarily for 3D composition;

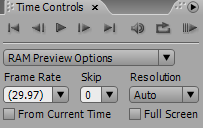
Timeline Control
By default, Timeline Control is located at the very right of the interface; it allows to control playback of previewing. You can set the preview option according to the computational power of your workstation;
Shortcuts
Here is a few frequently used shortcuts in producing animation; it is highly recommended to remember them because it will help you speed up your work flow tremendously;
ALT+ SHIFT + Any Following Keys to display different options in layer;
T - Opacity
A - Anchor Point
S - Scale
P - Position
R - Rotation
O - Jump to the end of the timeline
HOME - Jump to the beginning of the timeline
SPACE BAR - Play/Preview
CTRL + D - Duplicate Layers
Understanding Composition
Comp = Container
Composition is the key concept of AE; comp(short for composition in AE) is very much like a container. It is the place where you store/arrange all the things such as images, sound, text, and video. Also, each comp has an independent timeline. Moreover, since comp is a container, you actually can take one comp(let's name it comp A) which contains many different things and place it into another comp(comp B); then the comp A become one item just like other items in comp B and you can place it on comp B's timeline and applying effects to it like any other piece of footage; this process is referred as "nesting" in the industry
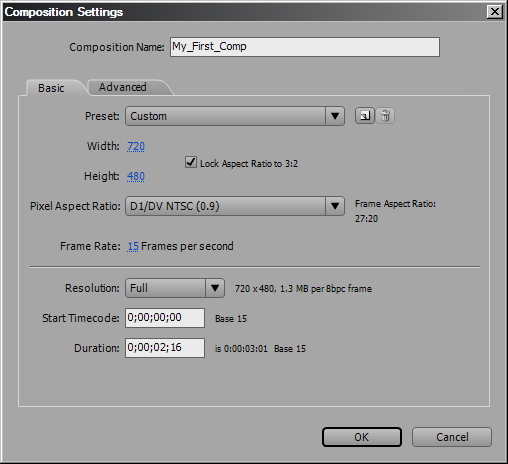
Composition Setting
To create a new comp, go to Composition>New Composition; it will bring up this Composition Setting window; here you can specify all the settings such as aspect ratio, NTSC/PAL, resolution, frame rate and etc.
Please make sure you have set the correct duration because you do not want to have a timeline that is either too long or too short; but you can always go back to change your setting as you working on your project. To access composition setting, navigate to Composition>>Composition Setting.
Notes that if your project will be broadcast on TV or on DVD, you should always set the pixel ratio to 0.9; on the other hand if your video will be published on website, the pixel ratio should be set to 1.0;
The color of project background is black by default; you can change the background color from Composition>Background Color.
Customizing Workspace
In After Effects CS3, you can customize the workspace anyway you want; depending on what kind of project you are working on, you can have the most used panel to be displayed and kill some useless panels to save some space.
Drag and drop to dock a panel to a different section;

As well, you can adjust the size of different section by moving their boundary around;
If you are not happy with what you have done with the workspace, you can always go to Window > Workspace and reset workspace. If you want to save your own workspace layout, you can choose Window>>Workspace>>New Workspace, give a name for the workspace and click OK.
Importing Files
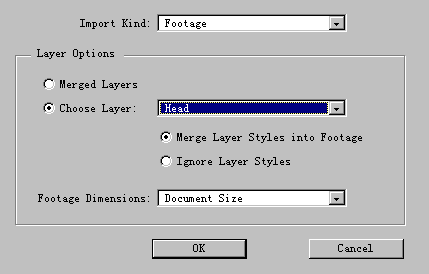
To import files into your project, go to File>>Import;
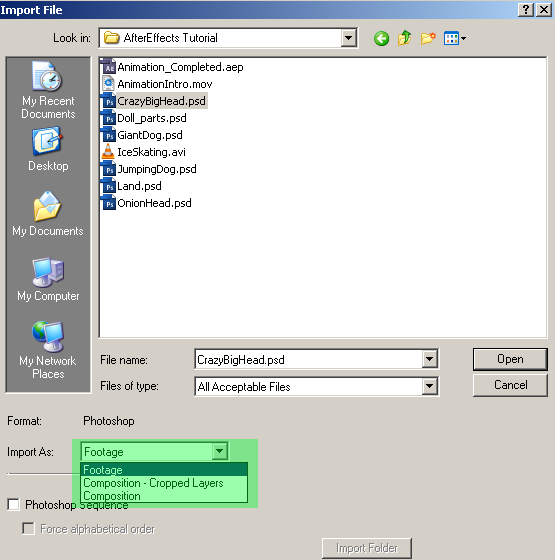
When you import a layered photoshop file, you can choose to import individual layers at once;
Project Managing
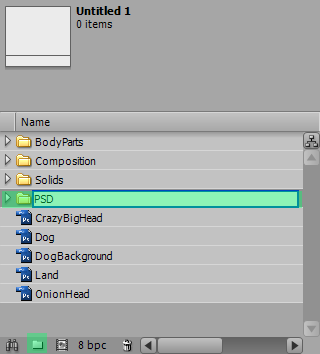
As your project becoming complicated, you will have a lots of different files mixed up in the project window; to increase the work flow, it is always good to organize your project so when you want to find something you know where to look for; click the folder icon at the very bottom of the panel to create a new folder. You should give every folder a recognizable name like a folder named PSD which contains all the PSD files.
Composition Panel
At the bottom of the composition panel, there are a few options allow you to adjust the display size of your composition, jump to any point on the timeline, select different color channel, select different camera view and etc.
As well, if you select the footage on the canvas, you can actually scale it, move it and rotate it with mouse.
Layer Control
At the first glance, the layer panel is full of buttons; do not be scared them , because for the most time, you only need to know/use a few of them to get your job done.
In this figure, those important button is highlighted.
The yellow highlighted area is the place you can apply motion blur to your layer; motion blur generate blurriness on moving elements in animation in order to create a more realistic effects and add more substances into your animation;
This icon  highlighted in green is a switch for weather previewing with motion blur effects or not;
The purple highlighted area is the layer shy row; you can mark your layer as shy layers then click on this little cute face hiding behind a wall icon( ) to hide all the shy layers.
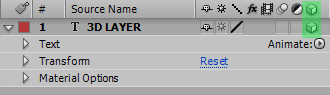
The orange highlighted area allow you to turn a layer into a 3D layer;
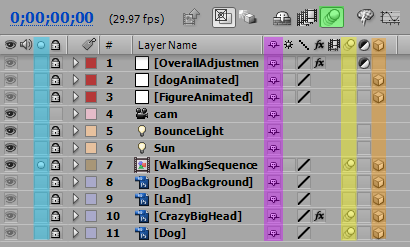
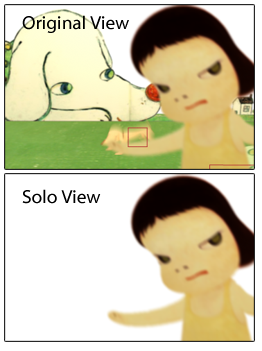
The circle in the blue highlight is the solo button; once it is activated on one layer, the rest layer will hide automatically, this feature is extremely handy when you work with multiple layers(more than 10).
Layer Types
Right click on the layer properties panel on the left of the timeline; you can access several commonly used options such as creating a new layer;
there are basically six types of layers:
Text: A text layer;
Solid: A solid layer is a color plane, you can use it to create gradient background or apply other more complicated effects on it such as particles;
Light: A light layer contains a light resource using for illuminating 3D layers;
Camera: A camera layer contain a camera which you can animate(only works on 3D layers);
Null Object: Null object basically is an invisible layer; some time you do not want to use an invisible layer for animating so you can parent all the layer you want to move with a null object, then only animate the null object and rest of the layer will move with it.
Shape Layer: Shape Layer allows you to create vector graphics, it is similar to the shape tools in photoshop/illustrator;
Adjustment Layer: Adjustment layer allow you to adjust all the layers beneath it at once, it is similar to the concept of adjustment layer in photoshop.
To illustrate the notion of a camera layer in 3D, this figure shows what information that a different camera view can provide you with; as you can see, all your layers are in 3D space, they all have different depth of field.

Project Nesting (Pre-compose)
It is always good to organize your layers. When you animate your elements in the composition, sometime you will need to animate an item which is made of several layers; in this situation, it is always good to pre-compose this element into a new comp, then it will appear as one item on your current composition. By doing so, you can avoid selecting the wrong layer and mess up with the whole production.
1. Select the layers you want to make into one Comp, then Ctrl+Shift + C/Commend + Shift + C;

2. Give it a name and click OK;
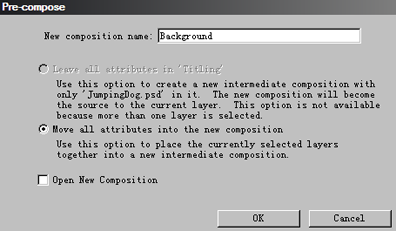
3. Now you will see all those layers become one Comp on your layer panel;
Text Tool in After Effects
Creating Text
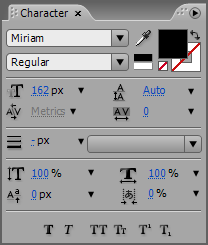
When you select the Text Tool, the character panel should show up automatically; if not, click Window>>Character to bring up the character panel;
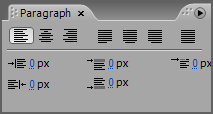
As well, you might need the paragraph panel to align your text block; click Window>>Paragraph to bring up this panel;
Next, you can click on the composition canvas and type in the text;

If you change back to selection tool, you can actually scale/rotate/move your text block around the canvas.

3D Text/Camera Layer
We have explained 3D layer, now let us try to turn a text layer into a 3D layer;
1. Click on the box icon;
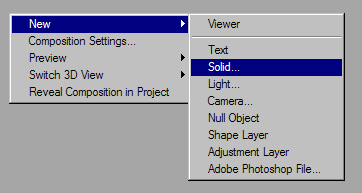
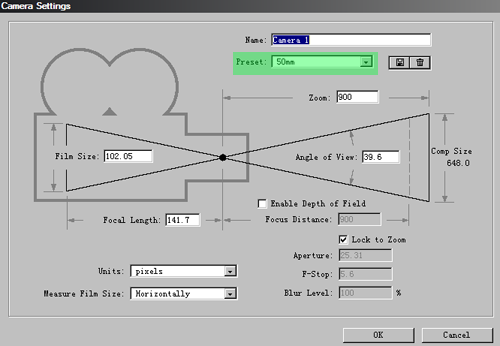
2. Right-click on layer panel then go to >> New>>Camera to create a new camera layer; preset 50mm should be fine
3. Select the Orbit Camera Tool;

4. Click on the canvas and drag around; now you can orientate your text layer in 3D.

Basic Titling/ Adobe Bridge
To create a good title sequence requires a certain understanding of keyframe animation;
Before we get into animation, we want to show you here we are going to show you how to access the titling preset data base in After Effects;
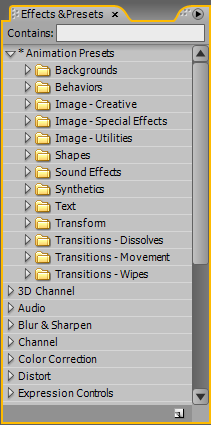
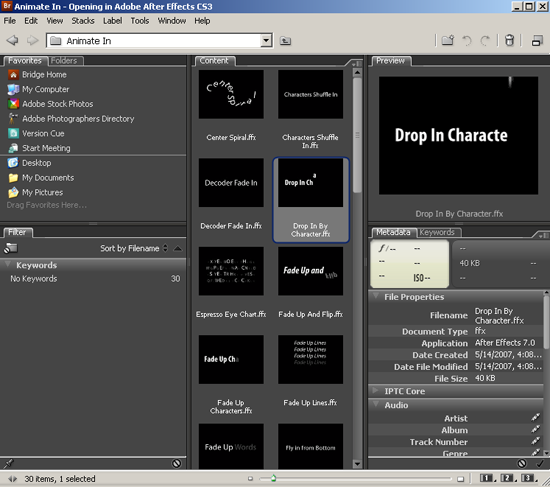
1. Type in a text layer, then go to Effects&Presets panel; next expand Animation Presets>>Text, here you can see lots of titling preset; drag anyone of them to your text and you will see the result; however, by merely looking at those preset names, we have little idea on the result of the effects. Through Adobe Bridge, we can preview the presets demos and it surely makes a better workflow.
2. Go to File>>Browse Template Projects to open the Adobe Bridge; then go to the same folder listed in Effects&Preset panel and you will find those previews.
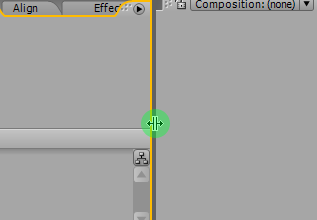
Layers Alignment
Align panel allows you align and distribute your layers in different order;
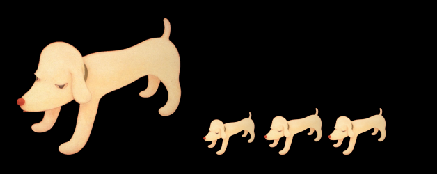
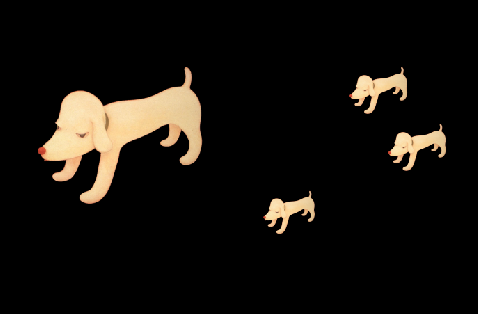
In this demonstration , we will be using JumpingDog.psd;
1. Import it first then drag several copies to the comp canvas. Let us resize some of the dogs and pretend they are baby dogs.
2. Go to Window>>Align to bring up the align panel;
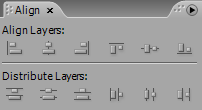
3. Select all the dogs, and click on ![]() (Horizontal Center Distribution ) to distribute them evenly in horizontal line; then click on
(Horizontal Center Distribution ) to distribute them evenly in horizontal line; then click on ![]() (vertical bottom alignment) to align them to the same bottom line.
(vertical bottom alignment) to align them to the same bottom line.