Introduction to PS
Overview
The objective of this lesson is to familiarize with the understanding and navigation of Photoshop interface; as well to introduce some of the most fundamental tasks in Photoshop to help you with various image manipulation for your projects.
Let us take a look at the default interface of Photoshop CS4.

A. Document window
B. Dock of panels collapsed to icons
C. Panel title bar
D. Menu bar
E. Options bar
F. Tools palette
G. Collapse to icons buttons
H. Three palette groups in vertical dock
Tool Box
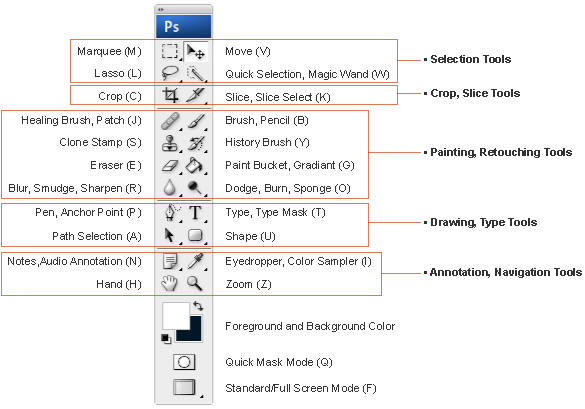
*The uppercase letter in the brackets is the keyboard shortcut for the tool.
New Files
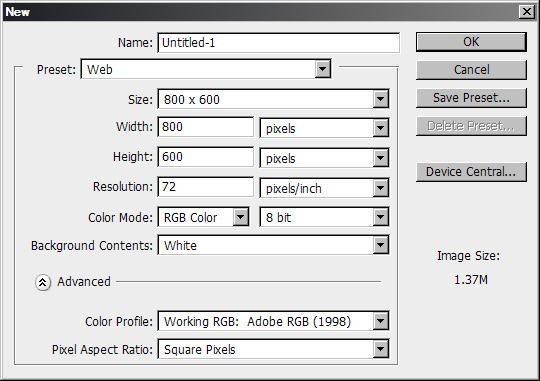
Generally, in the beginning of working with Photoshop, you ususally go to File> New to create a new document. You can use Photoshop presets for your document dimensions or enter the number yourself.
Resolution is measured with DPI (dot per inch) with in Photoshop; DPI is a measure of printing or display resolution, in particular the number of individual dots or pixels that can be produced within a linear one-inch (2.54 cm) space. In most of the case you should set your color mode to RGB, and 8bit color is good enough for 99% of work.
In the advanced setting, the color profile is a fairly complicated issue. It is not necessary or practical (in term of time budget we have) to understand it in the very beginning of this course. All you need to know is that Adobe RGB(1998) is industry standard color profile in North America. Once you finish the setting you can go ahead and click ok to begin your project work.
Customize Your Workspace
Photoshop offers a highly customizable user interface allowing users to show the informational and tool panels that they need, located on the screen where they need them. The following steps show several different methods of customizing the info and tool panels. Info and tool panels can be selected from the Window menu. Several appear on the screen in the default layout but you can move, hide or show any from the Window menu as needed. Note that due to the high customizability of the Photoshop panels, it is common that the panels can get configured in a way that is unexpected. Photoshop allows saving your panel configuration as well as restoring the panel configuration to the default settings.
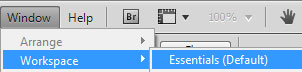
Restoring your Workspace to the Default Configuration
To restore your workspace to the default configuration select 'Workspace' from the 'Window' menu, and choose 'Essentials (Default)'.
Moving Panels (Palettes)
As you move panels, you see the translucent panel appearing in a open space where you can place your panels.
Stacking Panels
You can move one specific panel out of the original stack and place it into a new stack of panels; the blue highlighted area indicates the new stack you want to group it with.
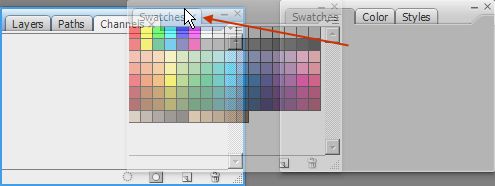
Docking Panels
As you drag panels, you see blue highlighted drop lines where you can place your panels.

Drop between two stacks of panels
Dock at the left side of another dock of panels
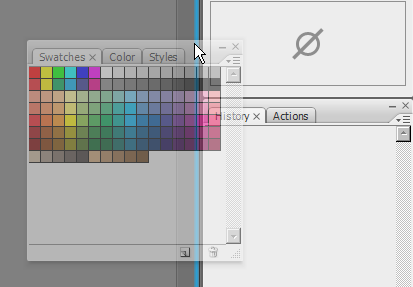
Frequently Used Panels
Layers, History, Color/Swatches, Brushes, Navigator, Characters
Some of the panels in the list might not be displayed on the workspace by default; to show those panels, you simply go to Window and check the panel you need; you can uncheck them if you do want as well. Once you have finished organized your workspace the way you like, you can go to:
Window > Workspace > Save Workspace
Save Your Workspace
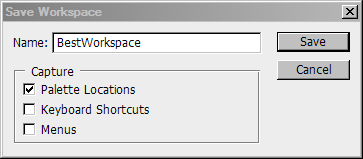
Go to Window > Workspace; you give it a name and click save; it will appear with the name you had typed in the bottom of Workspaces. If you have customized Keyboard Shortcuts and Menus, you also even save those settings.