Introduction to FCP
Overview
Apple's Final Cut Pro is very powerful software for video editing and compositing; the interface is arranged in a way that is very similar to many other video editing programs such as Adobe Premiere and Combustion. For most of the time, you will be working from one panel to another so let us take a look at the functions of major panels
Here is the FCP workspace by default, of course you can arrange it anyway you want, but as a beginner, it is better to be familiar with default workspace first.
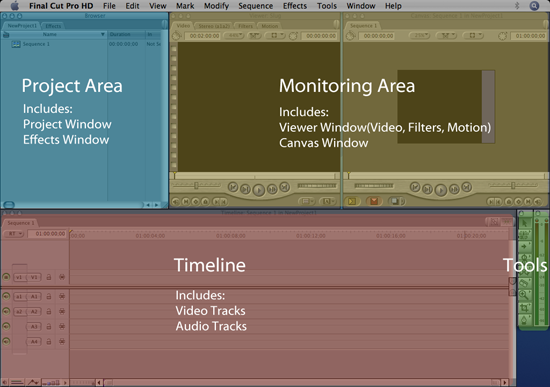
In the Project Area, it serves as an asset container where all your files/footages and FCP special effects are placed; if you ever want to access any of those, the project area is the first place to look for.
There are two major components in the Monitoring Area, Viewer and Canvas. The Viewer Window allows you to make adjustments (such as adding effects or trimming footage) to the clips and the Canvas shows the outcome of your editing.
All of your editing (video and audio) will be taking place in the Timeline; also those tools will be heavily used during editing.
If you close a window accidentally, you can just go to the menu bar>>Windows>>Arrange>>Restore Windows Layout to bring all the windows back.
Setup Your Project
To start a new project, Final Cut Pro menu >>Easy Setup. In the box that opens, click the button Show All.
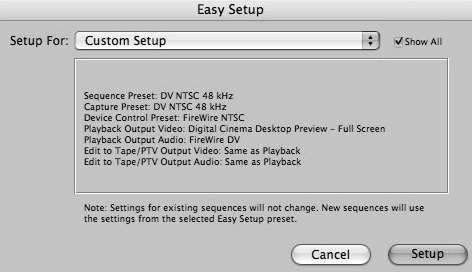
Then choose a setting that matches your source footage and click the setup button.
For more detail setting, go to Final Cut Pro menu>> Video and Audio Setting
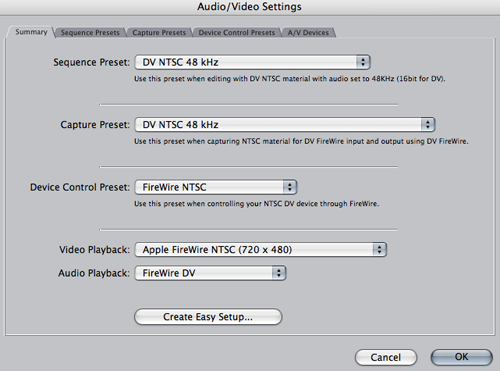
Video Settings:
North America Standard: NTSC, 720X480 (4X3 for standard screen/16x9 for widescreen)
North America Hi-Def: Hi Def 16x9 1080p(1920x1080)/720p(1280x720)
Audio Sample Rate:
48 kHz: DVD quality (on DV equipment, this correlates to the "16 bit" setting on the camera)