Continuous Symmetry: Lesson One
Objectives
Big Idea – We can describe, measure, and compare spatial relationships.
- to build on students' knowledge of symmetry and develop students' reasoning with properties of symmetry
- to develop an understanding of viewing some symmetries as motions rather than as discrete or reflectional symmetry
- to develop students’ positional language (e.g., beside, up, down, away from, toward)
Overarching Aims:
1. The moving of a point helps students see the functional relationship between the point and the corresponding movement in its paired point. This is made visual by use of the trace feature, which tracks the path of the moving points.
a. For example, you might hear students say, “If you move the blue point toward the line, then the red point will also move toward the line.”
2. Informal descriptions of properties that coordinate students’ visual impressions with geometric language.
a. Students’ initial descriptions might be “One side of the line is the same as the other”.
b. Or “The points can cross the line of symmetry”.
c. Students will gain an awareness of the property of equidistant. You might hear them say, “The point on one side of the line is the same distance away from the line as the point on the other side of the line”
d. Students will gain an awareness of the property of perpendicularity. You might hear them say, “A point on one side of the line should be at the same level as the point on the other side.”
e. Students might express these ideas through gestures as well as words.
You do not need to teach the formal property names but help the students begin to articulate their visual awareness.
Activity – Whole Group
Working with Sketches 1 and 2
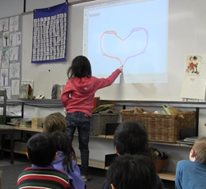
- Introduce the Continuous Symmetry Machine and ask the students to observe and describe what happens when one point is dragged.
- Ask "Where do you think the blue point and the red point will meet?"
- Ask "How many places do you think that the two points will meet? (The line of symmetry can be constructed as a set of overlapping blue and red points.)
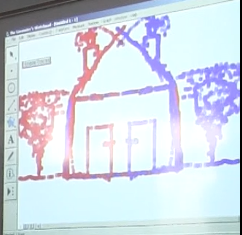
- Have the students explore drawing continuous symmetric shapes using vertical symmetry (Sketch 1) and oblique symmetry (Sketch 2)
- Encourage them to identify the shape they intend to draw before beginning.
Working with Sketch 3
- Have students explore the symmetric properties.
Working with Sketch 4
- Have the students explore creating a continuous symmetrical shape across an oblique line of symmetry.
Working with Sketch 5
- Have the students use symmetry to create quadrilaterals (square, rectangle, parallelogram, rhombus, kite, trapezoid).
Assessment – Individual or Partner
- Have the students draw continuous symmetric configurations that the Continuous Symmetry Machine could produce.
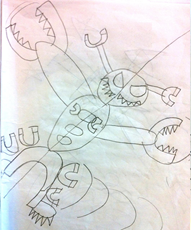
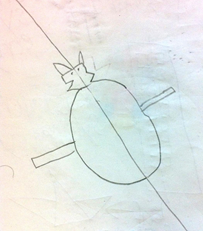
Sample Student Work