Compositing/Titling
Adding Transition
Once you have cut your clips, you may decide to add transitions between the shots. Transitions allow you to introduce or exit to another clip by blending the two images together. A dissolve means that one shot fades out while the next one fades in. A wipe creates a graphic transition (like split screen, square or circle) between the clips.
1. Move the play head to where two clips meets
2. Go to Effects>Video Transitions>Cross Dissolve
![]()
3. Drag the Cross Dissolve and place in the center between two clips. If you go to Filter panel, you will see how the clips are inter-placed and overlapping with each other. You can adjust where the Cross Dissolve starts or ends.
![]()
*To remove your transition, simply click on the transition icon on Timeline panel and press the Delete key.
Motions
The Motion Panel gives you a lot of control over the orientation and animation of your images. It is fundamental to compositing and is also one of the most exciting parts of using FCP.
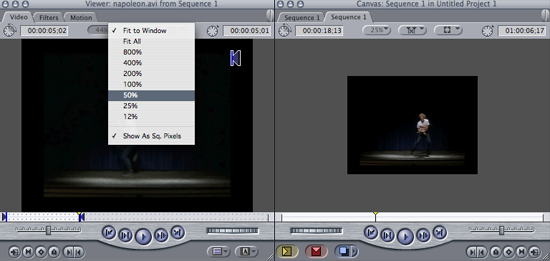
Digital video has fixed size/aspect ratio but the digital image can be any size. Once you drag an image onto the Canvas with different aspect ratio than 720x480 pixels, the display may be different than the original. Still images are heavily used in compositing, so before we get into the exciting functions of the Motion Panel, let’s get familiar with the Fit option because it will help you greatly as you work with images of different sizes.
In both the Viewer and Canvas windows, you can set the Fit option:
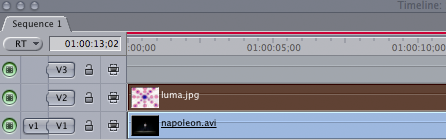
Once you become familiar with both panels, let us apply motion effect to a clip on the timeline; here we will be using luma.jpg,
1. Drag luma.jpg to the timeline and select it;
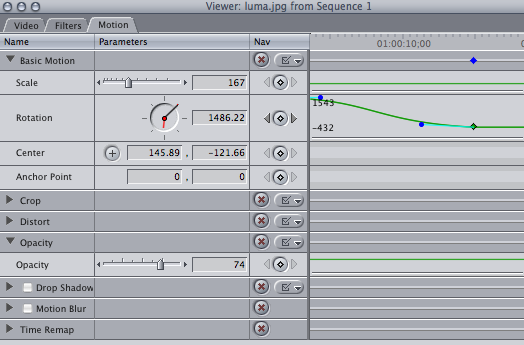
2. Go to Viewer and click on Motion; now you should see options like Basic Motion, Scale, Rotation, Center and Anchor Point. Start playing around with those attribute see what you get in the Canvas window.
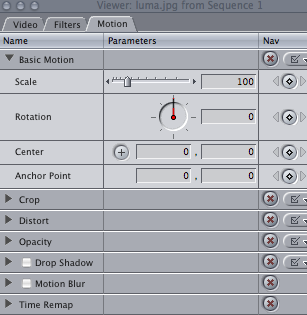
Scale: Scaling your footage; you can uncheck the uniform scale to disable constraint scaling
Rotation: Rotating your image
Center: Change the positioning of your footage on the screen; click on the + sign, you can move the clip around in your Canvas
Anchor Point: Anchor point indicates the center point of your image position; you can also use this to manipulate your footage orientation
Crop: Cut out part of your image
Distort: Apply distortion filter to your image
Opacity: Change the transparency of your clip
Drop Shadow: Give your image a drop shadow around the edge
Motion Blur: Depends on how much your image is moving through the screen, it generates different degrees of blurriness.
Color Correction
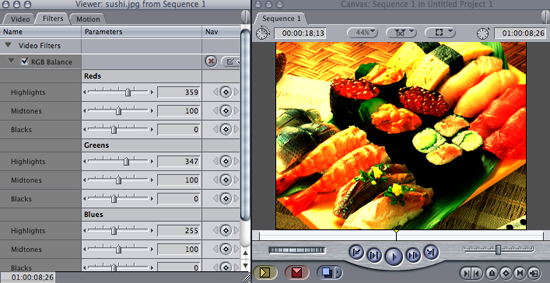
In this chapter, we will be using sushi.jpg to demonstrate the result of color correction since this image contains a full range of vibrant colors.
1. Go to Effects>Color Correction> RGB Balance, drag RGB Balance to sushi.jpg on the timeline, you will see under Filters, there are many options showing up; from there you can adjust individual color channels of your image.
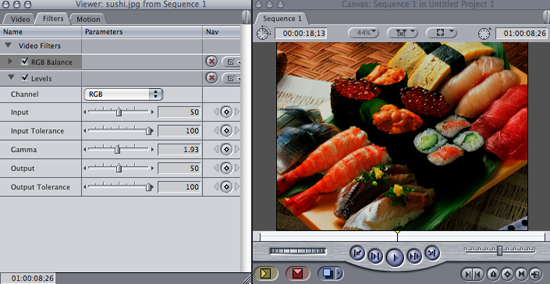
2.If you want to change the contrast and color intensity of your clip, Levels might be a good filter to use. Go to Effects>Video Filters>Image Control>Levels; here you can use Gamma to adjust the tonal balance of your image. The goal of color correction is to make your clip more suitable for whatever purpose you might use it for, whether for television broadcast or YouTube.
Compositing
In the previous example, you manipulated a still image with video effects. Now, we are using the video effects and key framing to create compositing.
What is Keying
In television and film production, the special effects team use keying to map actors onto background footage in order to achieve composite images that would not be possible otherwise. Footage of a subject is recorded against a blue/green screen in a carefully lit set (so there will be no shadows on the green screen). Later in the post-production, the blue/green background is removed and replaced with a technique call keying.
Green Key
1. Let start with Green Key (Remove all the pure green (hex:00FF00) pixels); we will be using napoleon.avi, greenscreen1.psd and greescreen2.psd.
Drag greenscreen1.psd to the top of napoleon.avi and extend the length of greenscreen1.psd to the same as napoleon.avi
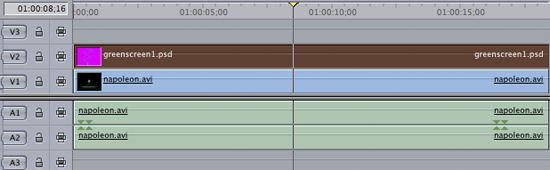
2.Set scale to 100% in Motion tap, then in the sequence tap you will see the green image blocking the view of napoleon.avi
3. Go to Effects>Key>Blue and Green Screen and drag it to greenscreen1.psd on the timeline
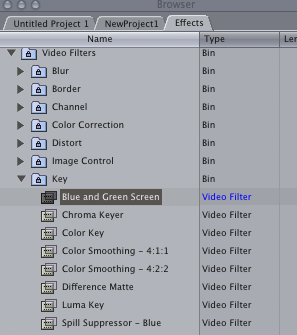
4. Go to Filters tab and set Key Mode to green since the image is filled with pure green.
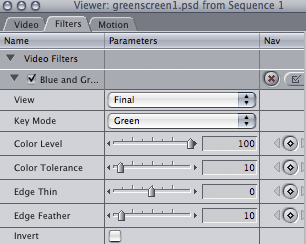
5. Play with attributes in the Blue and Green Key filter until all the green is removed. Navigate to Filters tab; you will see the Luma Key attribute.

Luma Key
Luma key allows you to blend a top layer with layers beneath it by turning pixels into different levels of opacity based on brightness values.
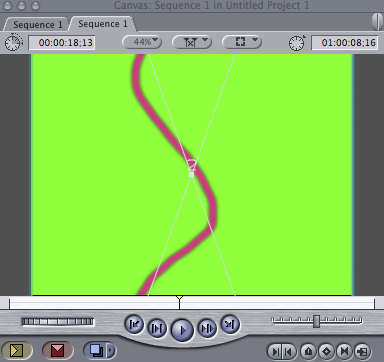
In this exercise, we will be using luma.jpg;
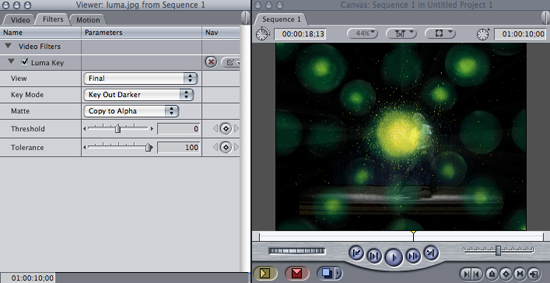
1. Drag luma.jpg to the top of your previous composition, then go to Effects>Key>Luma Key and drag it to luma.jpg.
Navigate to Filters tap you will see the Luma Key attribute.
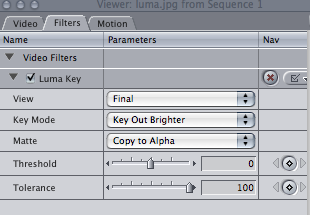
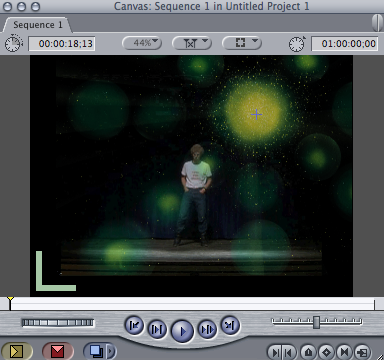
2. In the Canvas window, you will see the dark tone in the luma.jpg turn to transparent.

3. Play with attributes/options in the Luma Key filter until you get your desired lighting effect.
Now that you know how to manipulate your image with keying, let’s use some animation to add dynamic movement to the composition. By animation here we do not mean cartoon animation. Instead, it is more like a spinning logo on the news channel or moving shapes within the frame.
Keyframing
Animation is made up of numerous frames; when those frames are shown at a rate above 18 frames per second, we perceive the individual frames as moving images. Keyframes are the important frames which contain information about a start/end point of an action. A keyframe tells you about two things: first, it tells you what the action of your frame is at a certain point of time; and second, it tells you what time that action occurs.
In FCP, you can keyframe all the attributes in the Canvas window. In this exercise, we are going to create a rotating disco light effect with luma.jpg and keyframing in the dance sequence.
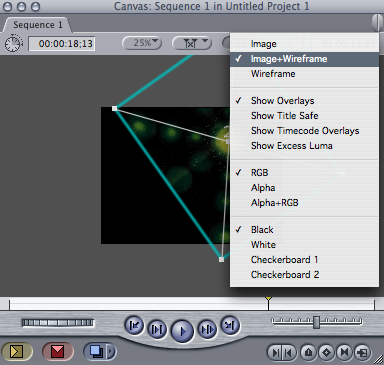
1. Before we set the keyframes, let’s place the light in the right place of the frame. Go to the Canvas window, click on the box shaped icon at the top of the panel and select Image+Wireframe. This allows you to transform and move images with your mouse cursor. This allows you to transform and move images with your mouse cursor.
2. Move luma.jpg to the top-right corner
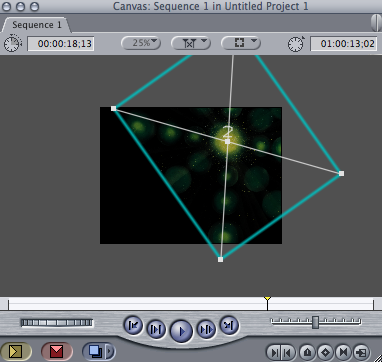
3. Adjust the size of the light and preview with the layer under; it looks pretty good
4. Keep luma.jpg selected and navigate to Motion tab. Turn down the Opacity a bit, move your play head to the time you want the light starting to turn, go to Rotation and click on the insert keyframe button (a round button with a diamond shape in it). After you click, you will realize there is a diamond shape dot that appears on the mini-timeline; it means that a keyframe has been inserted at that point.
5. Move the play head to the very end of the sequence shown in the Filters tab, insert another keyframe and change the value of Rotation to a large number like 1500.
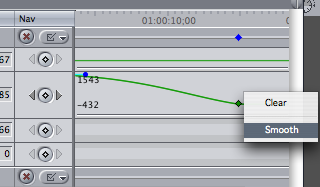
6.Now you can go to the Canvas window to preview the turning disco light animation; if you want to add more dynamic features to it, you can right-click (or Control +Click)on keyframes and select Smooth.
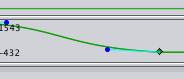
7. You can now modify the easing curve leading to and coming from each keyframe. Try to make the movements of the green screen file look as smooth and slick as possible.
Titling
Titling in FCP is pretty simple and limited in term of the level of control you have, but for most time it should be enough for you to create something consistent with your project.
In this chapter, we are going to show to how to create a static title and a rolling title.
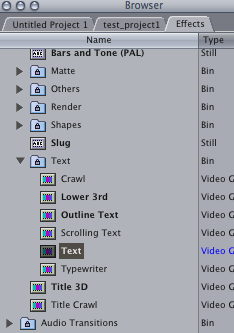
1. To create a new title clip, in the Browser window, go to Effects>> Video Generator >> Text >>Text. Drag the title to your Timeline. Alternatively, you can access Titles in the Viewer window by accessing the titles menu in the bottom right of the Video tab. Click on the A and choose Text>> Text.
* To create a rolling title instead of static, simply choose Crawl/Scrolling Text instead of text, rest of the steps is similar.
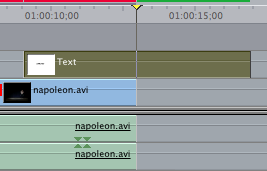
2. You will see a new clip has been inserted after you drop the text effect on your timeline;
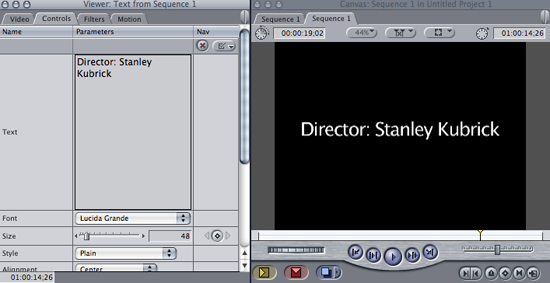
3. Select the text clip, then navigate to Controls tap; in the text field you can enter the title/text you wanted to show on screen;
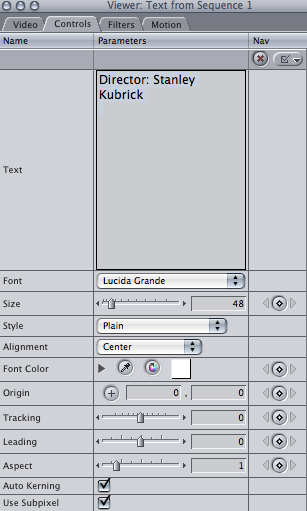
*Note that you can choose the font, size, kerning (space between the letters), leading (space between the lines), and many other things.
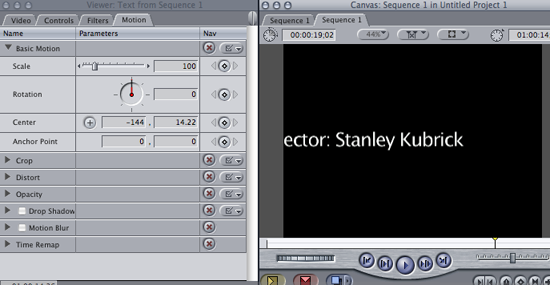
4. As soon as you finish typing and hit Return on keyboard, you will see the title showing in the Canvas window
5. Finally, you can go to the Motion tap to adjust the attributes such as positioning and opacity.