Export Project
Exporting Your Project for Web
Uncompressed video files are huge and impractical for web publishing because it will take huge bandwidth and take long time to download. In order to have your project showing on web page, you have to compress your project, in this chapter, we will show you the basic setting on exporting video to web.
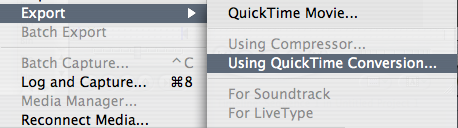
1. Once you have your project finished, go to Export> Using QuickTime Conversion
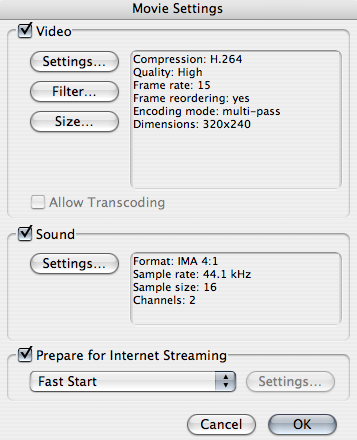
2. Click on the Options menu in the QuickTime exporting dialogue box to bring up movie setting. From here you can effect the compression settings, video size and even apply filters to the video. One of the key features of Quick Time is Fast Start (at the bottom). This allows the file to be played while the download is still in process without any additional software on the server. Change the Quality to Low in the Settings menu and then select OK. Export the clip.
A Word About Compression
Codec: Short for compression/decompression. Any software or hardware device that lowers the data rate on video, most often so that it can play in real time.
There are a number of codecs (compression/decompression algorithms) that can be used to compress video files for the Web. Many of these codecs can be applied to several different file formats (discussed in the next section of this chapter). Video-editing software packages often offer a long list of codecs in their compressor list options. Here we focus on just those that are relevant to video intended for web delivery.
The standard codecs are H264, Sorenson, MPEG, Radius Cinepak
Frame Rate: "Frame rate" refers to the number of distinct images you see per second. Film and television have standardized frame rates, digital flicks do not. A lower frame rate reduces file size - A lower frame rate is less noticeable on a smaller image. You should select your desired frame rate when you compress your video, not when you digitize. The frame rate you choose should be based on a combination of what looks good to the eye and what is appropriate for the type of flick. You can render your movie up to 30 fps. A 15 fps movie will just hold each image for 2 frames. A 10 fps movie will hold each frame for 3 frames. And so on. But if the frame rate is not evenly divisible into 30, for instance 12 fps, you will not have a smooth result going to 30 fps. Some frames will hold for 2 frames and some will hold for three. This can be resolved by taking advantage of video interlacing.
Depends on the type and use of your video, you should set your compression differently. For example, if you publish your video on web, take the bandwidth into consideration, it is recommended to set your keyframe rate no more than 15 and medium quality. Some codec also allows you to use Bitrate setting to constraint the size of your output file. You can use the bitrate number times the seconds of your video, then you get an approximate size of your output file. If you publish your video on a DVD, then you should set the quality to the best and the frame rate to 30 fps. The standard codec for DVD are MPEG2. After you export your video, then you can import the video file into iMovie, Adobe Encore or any other DVD application to make it a DVD.