Selection/Layers
Making Selection
You can use Photoshop selection tools to select areas of an image to change/transform color and shapes for you projects. The selection tool in Photoshop will create an outline around the image that look like dashed blinking lines, to outline selections in an image you want to modify; only the area with in those boundaries are affected. The selection boundary display is called a marquee.
General Selection Tips
There are three essential keystrokes to remember when utilizing any of the selection tools.
CTRL-D (Apple-D on Mac): Removes the selection.
SHIFT: Holding the shift key while using any selection tool will add to the existing selection (the cursor will show a small + sign).
ALT: Holding the alt key while making a selection will remove from the existing selection (the cursor will show a small - sign).
Selecting with Magic Wand
The Magic Wand Tool is one of the easiest selection tools in that you only need to click one place on the canvas and it will select a a region that is within the same color range as the pixel clicked. This is very powerful if you want to select a region that has a narrow color range but has limited uses beyond that.
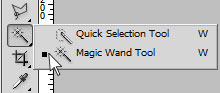
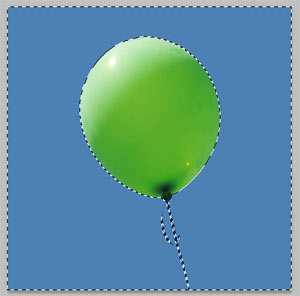
For instance, in the image of the balloon below the Magic Wand tool makes selection of the balloon very easy to do. In this case, it will be easier for us to select the blue sky since it is all one color rather than selecting the balloon directly. Click on the Magic Wand Tool on the toolbar (or if the Quick Selection is currently selected, click and hold on the Quick Selection Tool until the drop-down gives you the option to select the Magic Wand Tool). Then click anywhere in the blue sky. Note that this tool has now selected everything except the balloon. In order to switch your selection to the balloon, on the menu bar choose: Select > Inverse. Note that the options bar for the Magic Wand tool allows a few options, such as setting the tolerance, which will allow it to select a wider or narrower range of colors.
Selecting with Quick Selection
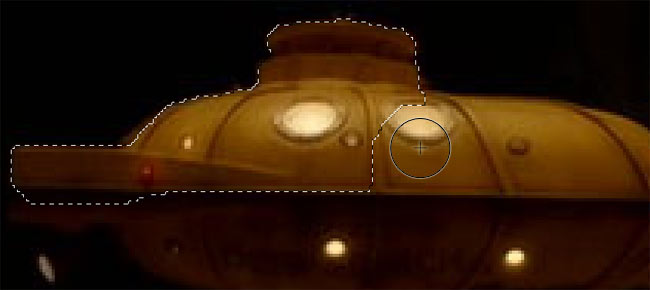
The Quick Selection Tool also offers a very simple way to create a selection. It allows you to select a brush size from the option bar, then click on any region in an image that you want to select. It looks at the colors in the are defined by the brush and creates a selection boundary where there is a significant color change. You can quickly select a region that has strongly defined color contrast with the background despite any color variance in the object selected.
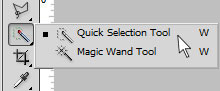
Choose the Quick Selection Tool from the toolbar (it shares a toolbar button with the Magic Wand Tool), define your brush size so that it isn't so large that it will be selecting a significant area outside the boundaries of what you want to select, and paint the object you want to select with the brush. Note that with all Photoshop tools it is better to brush in several short strokes rather than to paint the entire object in a single stroke in case you make a mistake along the way and need to go back in your history.
![]()
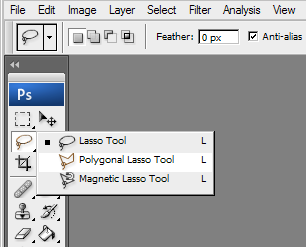
Selecting with Lasso
The Lasso Tool allows you to create sections that have irregular borders. There are 3 types of lasso tools - regular Lasso, the Polygonal lasso and the Magnetic Lasso. All three Lasso Tools require that you set a starting point to begin your selection, then return to that starting point to enclose a section of the canvas. When you return the mouse to the starting point the cursor will show a small circle.
- The Lasso Tool is a good choice when you want to make quick free hand selections. With the Lasso Tool you click and drag the mouse to make a selection returning to the point you started.
- The Polygonal Lasso tool allows you to create only selections with straight lines. You click and let go of the mouse once to start the selection. Each time you click the mouse again it will draw a straight line between the point clicked and the prior point. If you make a mistake and you want to go back one point, use the Backspace key. You must return to the origin point to complete the selection.
- You can use the Magnetic Lasso tool for a selection around very complex objects that have clear color boundaries. The Magnetic Lasso automatically snaps to the edges of your image, those areas of your image where there is a discernable difference in the color of the pixels. This Lasso tool can often make the quickest selections but if there are not clear color differences may require significant adding and subtracting from the selection.
In this exercise we will be using week2_SUB.jpg
1. Click and hold the mouse over the lasso tool (the lasso tool menu appears), select a lasso tool
2. Click around the image to make a selection. *note the lasso requires a complete boundary, so draw with intent to return to the origin point.
3. Finish the selection at the origin, via clicking or releasing the mouse button (when you position the polygonal Lasso tool over your starting point a circle appears next to the curser as an indicator that you are about to finish your selection); Once you will close your selection, you can hold on Shift while selecting to add parts into your current selection and hold on Alt for subtraction of selections.
Saving a Selection
After your selection is done, you can go to Select>Save Selection to save your selection in case you need in the future. To bring the selection back, go to Select> Load Selection to load the selections you have saved.

Selecting with Quick Mask
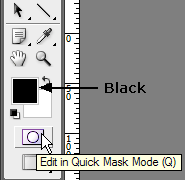
Quick Mask offers the most fine control over making selections in Photoshop. With Quick Mask you can easily "paint" a mask, even pixel by pixel, which will be turned into a selection once you pop back into Standard Mode. Painting the mask is as simple as selecting the Paintbrush tool or the Pencil tool. Drawing with black will paint the mask and drawing in white will remove the mask. Moreover, the selection you made with brush contains gradient information which allows it to blend nicely with the rest of the image if you have applied any filters or effects to the selection. When you exit Quick Mask mode, anything you have not masked will be selected.
In this exercise we will be using week2_SUB.jpg
1. Click the quick mask icon (or keyboard shortcut Q) on tool box to turn on the Quick Mask mode. Make sure your selected color is black.
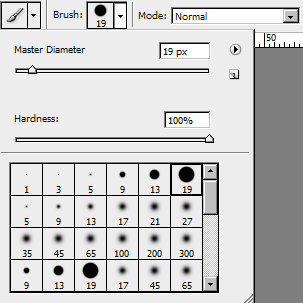
2. Select the Brush tool and set a reasonable brush size to paint the submarine. Make sure you set the Hardness of the brush to 100%.
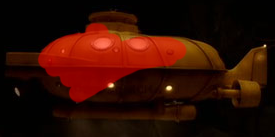
3. Paint the entire submarine with a black brush. It will appear red in Quick Mask mode
(*note that you can erase the mask using the eraser or white if you make a mistake).
4. When you have a clear submarine, you can click the Quick Mask mode icon (Q).

5. Once you switch back to standard mode, the paint over in Quick Mask mode will turn to a selection just like you did with Lasso. Because we masked the sub, everything EXCEPT the sub will be selected. In order to invert the selection go to the Select menu and choose Inverse.


Layers
Layer Visibility
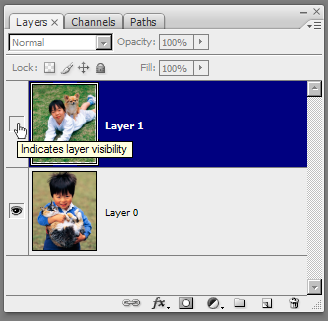
Before you start to work with multiple layers composition, one thing you should keep in mind is that you should make sure you are working on the layer you have selected. To ensure that what you view in the canvas is the actually layer you select you can turn off the visibility of layers which block the way of your view.
Creating layered composition
In this exercise we will be using week2_DOLPHINS.jpg and week2_SUB.jpg
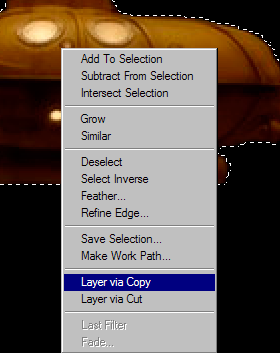
1. Choose any selection tools (magic wand, lasso, marquee), hover over the selected area, right click then select layer via cut or copy.
2. Open the week2_DOLPHINS.jpg and paste your cropped image onto the stage (Photoshop automatically creating a new layer for the pasted contents).
3. Click at the top-right of layer palette, there are several layer options you can apply such as add a new blank layer, duplicate current layer and etc.
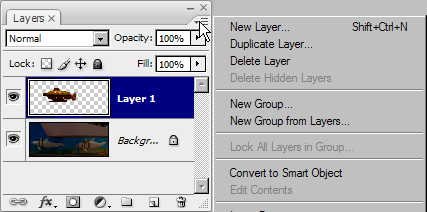
4. Notice that a new layer has been added to your project; this will happen whenever you paste anything onto the stage.
Manipulating compositions
1.To move your pasted image and scale it to the proper size and angle, use the free transform tool (EDIT > FREE TRANSFORM).
2. The lasso tools are useful for quickly selecting regions of your image, you can find them in the toolbox.

3. Copy the original image and paste it above the submarine layer, experiment with the lasso tools to select a rough outline of the boat's hull.
4. The Lasso tools are great for creating quick selected regions, but they often miss some of the softer edges.
Export Your Files
After hours of hardworking, you want to save your file or you want to export the final product. Save your project as PSD format will preserve all the layer information, so you can edit it later.

Exporting your Projects
1. Go to File>Save for Web Devices
Select a format for your project.
GIF, JPEG and PNG are most commonly used format for web transfering.

JPEG: JPEG is a commonly used method of compression for photographic / full-color images. It allows a palettes of 24-bit RGB colors. The JPEG standard specifies both the codec, which defines how an image is compressed into a stream of bytes and decompressed back into an image, and the file format used to contain that stream. The compression method is usually lossy compression, meaning that some visual quality is lost in the process and cannot be restored, although there are variations on the standard baseline JPEG that are lossless.
PNG: Portable Network Graphics (PNG) is a bitmapped image format that employs lossless data compression. PNG supports palette-based (palettes of up to 24-bit RGB colors) greyscale or RGB images. PNG was designed for transferring images on the Internet, not professional graphics, and so does not support other color spaces (such as CMYK). PNG preserves transparency in your images.
GIF: The Graphics Interchange Format (GIF) is an 8-bit-per-pixel bitmap image format; the format uses a palette of up to 256 distinct colors from the 24-bit RGB color space. It also supports animations and allows a separate palette of 256 colors for each frame. The color limitation makes the GIF format unsuitable for reproducing color photographs and other images with continuous color, but it is well-suited for more simple images such as graphics or logos with solid areas of color. GIF has been replaced by PNG for most web functions except for simple animations.
For more file types detail, visit links below
BMP - a standard Windows image format.
EPS - a format that can contain both vector and bitmap graphics (supported by virutally all programs).
GIF - an older format primarily used for animations viewed on the web.
JPEG - a lossy, compressed format commonly used for full-color images to be viewed on the web, this format supports various color modes (i.e. CMYK, RGB, Grayscale).
PDF - a cross-platform / cross-application format, similar to EPS.
PNG - the successor to the GIF format that supports background transparency.
PSD - photoshop file format.