Filters and Liquify
What is Filter
Filter is a fundamental function of Photoshop; it allow you to stylize the appearance of your graphic work, accentuate impression of lines and forms and even structurally modify your images.
Common Filters
Artistic: a set of filters that produces effects similar to painting, and other fine arts.
Blur: a set of filters that allow you to soften individual sections or whole images with various effects.
Sharpen: a set of filters that allow you to enhance an image and bring blurred sections into focus.
Sketch: a set of filters that allow you to add texture to your image, or a portion thereof, with a hand-drawn feeling.
Stylize: a set of filters that allow you to create impressionistic effects by displacing pixels in your image.
To access various filters, simply navigate to Filter on the menu bar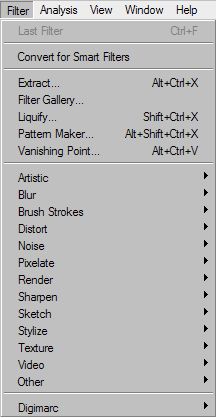
Filter Gallery
Filter Gallery is basically a dialogue box which shows various filters and preview of the selected image layer under one or more filters. To access Filter Gallery, simply navigate to Filter > Filter Gallery; Click on different icons to render your image differently.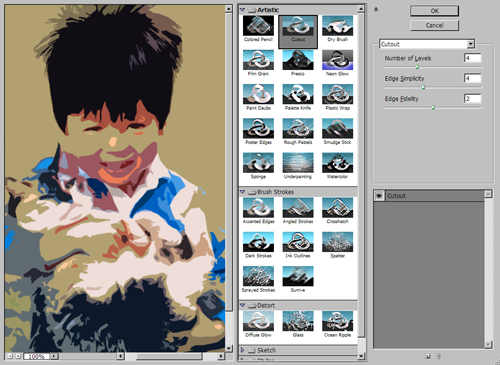
*Thinking about subtlety as applying effects to your image; you should always remember just that you have the technique to alter images in one particular way does not mean you need to use it every time. The Photoshop techniques you learnt here are means not goal. The goal of your composition is always about Unity in Form and Communication in Content.
Filter - Smart Sharpen
Some time when you set your shutter speed too slow (slower than the reciprocal of your lens' current zoom) you will be very likely to get a blurry image.
Photoshop has a filter which allows you to remove minor bluriness and produce a crispy and sharp-look image easily.
For this demostration, please open sharpen.jpg with Photoshop
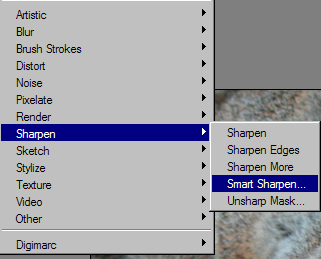
1. Navigate to Filter > Sharpen > Smart Sharpen
2. Here you can see the dialogue box; keep the preview check box on and move the Amount and Radius slider till the image looks fine; Hold on your cursor on the image you can see the image before the sharpening.
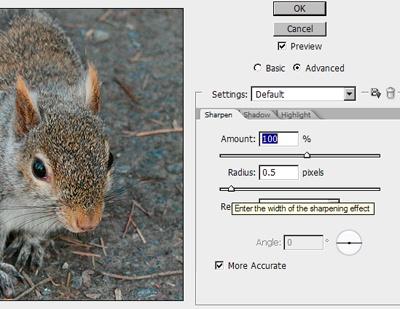
*Usually, you should use Remove Gaussian Blur, since most of image are digital image and Gaussian Blur are the typical blurnesss calculation that computer system does. However, you should always compare the result see which works the best for your image.
Filter - Liquify
The liquify tool in Photoshop is extremely powerful because you can apply distortion and structure alteration to the subject in the image without disrupting the natural and realistic feel.
Let us look at some examples of what Liquify can do; the kid's and the cat's eyes have been exaggerated in size; as well, the third example shows that the kid's face have been bloated up.

Navigate to Filter>Liquify to bring up the dialogue box. The liquify tool dialogue box is very different from other filters, it is essentially a painting and retouching tool
On the left hand side, we can see there are a bunch of different brush/sculpturing tools; In this chapter, we are going to cover several often used one.
The Forward Warp Tool(w) is very much like the smudge tool, but it tends not to lose the sharpness or details of your image.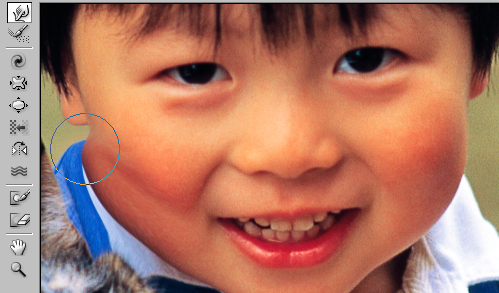
The Reconstruct Tool(e) is basically an eraser in this mode, and it is very useful, you can always go back to the place you think you made mistake and only reconstruct that area without going all the way back to the beginning.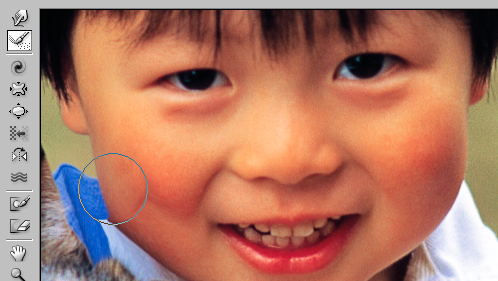
The Twirl Tool is very self explanatory, it basically take the pixels in that area and twirling clock-wise or counte clock-wise.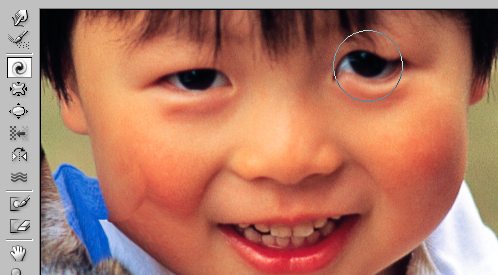
The Pucker Tool(p) works a brush retracting pixels from the edge, usually used it shrink areas.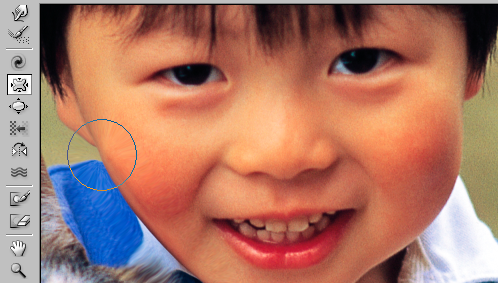
The Bloat Tool(B) allows you to expand areas of an image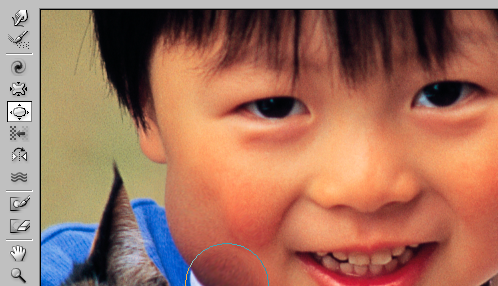
The Push Left Tool(o) moves pixels to the left when you drag up and moves pixels to the right when you drag down. Hold 'Alt' or 'Option' button to reverse this effect.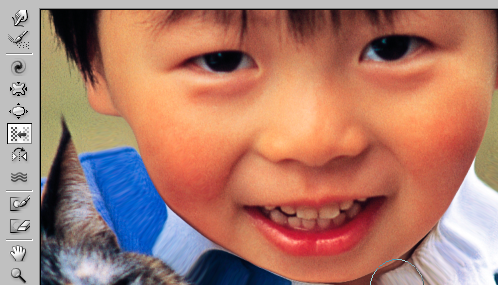
The Zoom Tool and Hand Tool in Liquify Tool works the same way as in standard mode.
Now let us take a look at the right side, this panel allows you to customize all kinds of variable and attribute of your brush/stroke performance. You can increase your brush size ( ] ) or decrease it( [ ); if you are using a wacom tablet, you can turn on the stylus pressure to make your brush pressure change accordingly with your hand pressure; you can change the density which is similar to the hardness setting in standard mode.
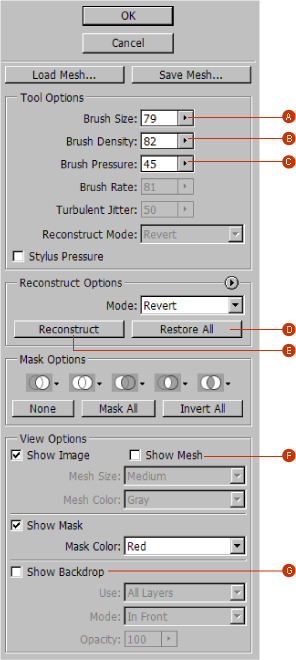
A. Brush Size - How big your brush is
B. Brush Density - The sharpness of stroke modifciation
C. Brush Pressure - The degree of stroke modification
D. Restore All - Return the image to its original state
E. Reconstruct - It allows to imcrementally change back to the previous state of your modification.
F. Show Mesh - A map of your modification record, you can specify different grid size.
G. Show Backdrop - if you are working with multiple layers, turn on this check box allows you to preview the current image against other background/foreground layers.
Advance Transform Tools
In the previous chapters, we have covered the basic transformation; in this exercise we are going to explore the advance transformation and see what we can do with it.
Perspective Transform
In this exercise, we will be creating the illusion of a 3D space in Photoshop using Perspective Transformation, you can use any images you want
1. Perspective Transform allows you to transform your image in a way which produces the illusion of perspective and dimensions in your image. Select the whole image (or an area of the image if you want), then right click within the selection area; select transform (Ctrl + T). Select Perspective, now you can select one corner or one side to transform the orientation of image as it is placed in a 3D space.
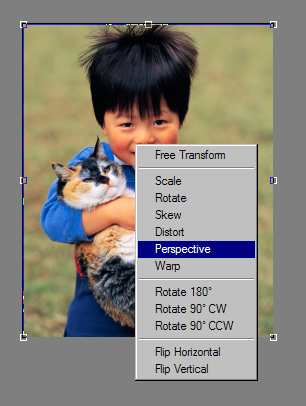
2. As this figure shows, you can see the view point for this kid is as we are looking from a very high angle. **Always duplicate/backup the original layer, so you can make as many distortions without constantly re-opening the original image or even lost the orignal file.
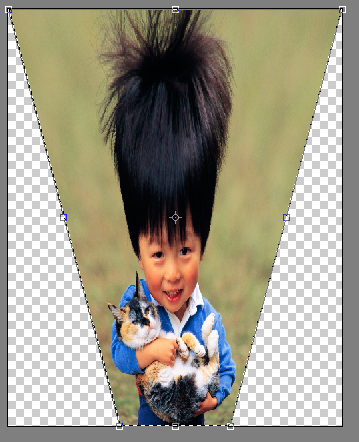
3. You can create different spatial orientation of your layers. *Shift + Drag: Constraint Distortion / Alt(Option) + Drag: Corner Distortion
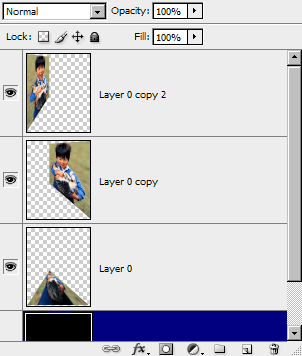
4.Finally we pile three image together to form a 3D space.
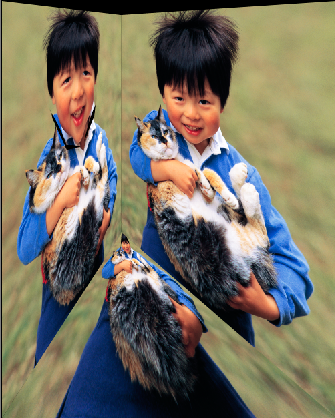
Warp Transformation
Warp Transformation is very powerful for structural manipulation and it is heavily used in Photography Retouching industry. In this exercise, we will be using warp tools to alter the facial structure of the kid.
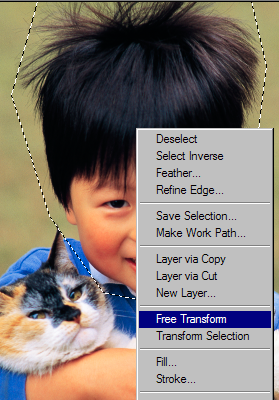
1. Use any selection tools to make a selection of the head *always remember to duplicate with original layer and only work with the copies
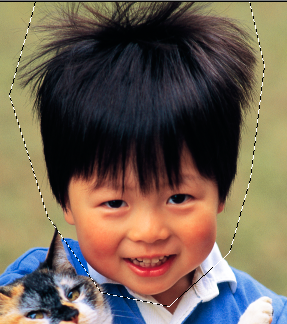
2. Right click on the selection(or Ctrl + T) and select Free Transform
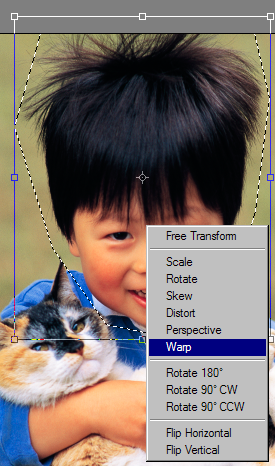
3. Select warp and it will bring up an envlope style transform function
4. You can drag the corner handle, control handle(looks like a lever) or just drag parts of the image and move around to edit your image.
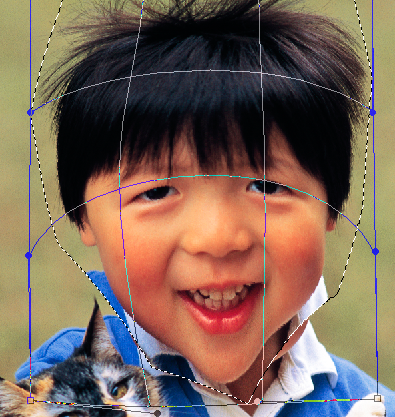
5. Once you are happy with what you got, simply click the check mark on the transformation menu (or hit Enter) to let Photoshop produce the final result. You can use Clone Stamp and Heal Brush to blend the mismatched edges of your selection with the original image.
![]()