Creating a Form
An example form built in AEM.
Creating a Simple Form
Follow the steps below to create and set up a simple event registration form.
Building the Form
- Expand the Form section within the Sidekick.

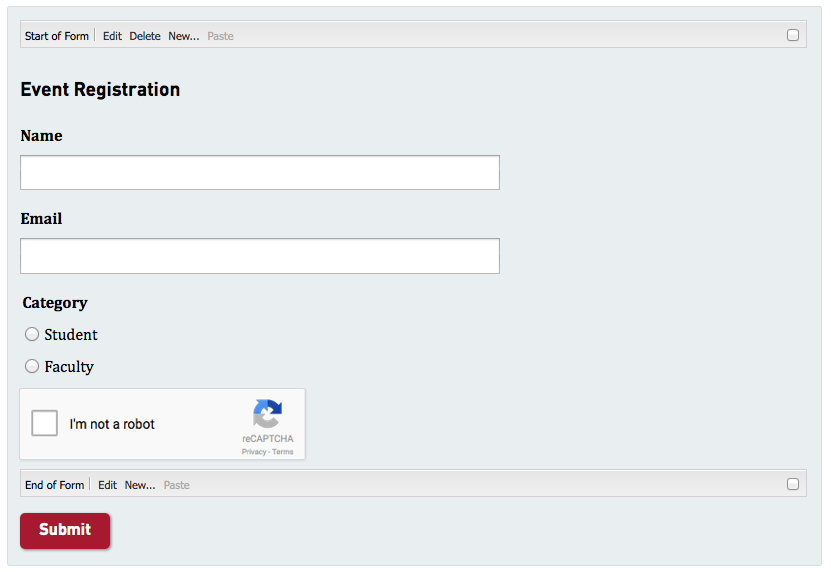
- Find the Form Container component and insert it onto the page. After the page refreshes, a Start of Form bar should appear at the top, and an End of Form bar should appear below. If either of the bars do not appear, contact your site admin.

- To give the form a title, insert a Text component in between the bars. In the Text component, type "Event Registration" and change the format to Heading 3.

- Insert two Text Field components and one Radio Group component under the Text component.

- Insert the Spam Protection component under the Radio Group component. The form now contains all the necessary elements. Continue to the next section to learn how to configure the form components.

Note: To reduce the number of spam submissions, insert the Spam Protection component into all your forms. However if the form is on a restricted page, then the Spam Protection component is not needed.
Configuring Form Components
In order for the form to work, each form component must be given a title. The title does two things:
- tells the form submitter what type of data is expected
- generates the component's name, which the form creator uses to help identify and organize the form data
Note: You can create your own name instead of using the generated one by entering it in the Name field. This is useful when the title is long, which would generate a long name.
- Double-click the first Text Field component to access its properties. In the Title field, enter "Name". Click OK to save the changes.

- Repeat the previous step for the second Text Field component, except enter "Email" in the Title field.
- To configure the Radio Group component, double-click it and enter "Category" in the Title field. Then click the Add item + button twice and enter "Student" and "Faculty" into the two fields. Save the changes.

IMPORTANT: Each form field must be given a Title. Components that do not include a Title will not be recorded when the user submits the form, resulting in lost data.
Adding a Collection Notice
All forms are required to have a Collection Notice displayed under the Submit button. Use this template and update details in [].
[Program] collects personal information on behalf of SFU under the authority of the Freedom of Information and Protection of Privacy Act (RSBC 1996, c.165), [if applicable, cite also any applicable administrative policies approved by the University's Board of Governors; other provincial or federal legislation or regulation; binding legal contracts such as collective agreements; etc.]. The personal information collected includes [list].
It is related directly to and needed by the University [describe why (i.e. the purpose) the information is needed]. The information will be used [must describe all uses and be specific]. The information may be disclosed to [list third parties, if applicable].
If you have any questions about the collection and use of this information please contact [Position Title, Business Address or Role Account Email, Role Business Phone Number].
Adding a Thank You Page (optional)
Upon clicking the Submit button, the form fields are cleared and the form will automatically re-display. It is highly recommend to make a "thank you" message so it's clear to visitors that they have successfully completed and submitted the form. If you'd like your visitors to see a "thank you" message after submitting a form, utilize the form's Thank You feature:
- In the WCM, navigate to the page containing your form and create a new child page. Any content page template can be used. Write the "thank you" message in this new page. From the page properties, hide the Thank You page from the navigation if it isn't already.
- Open the page containing the form. Click the Edit button on the Start of Form bar.
- In the Thank You Page field, navigate to your Thank You page and click OK.
- Your visitors will be redirected to the Thank You page upon clicking the Submit button.
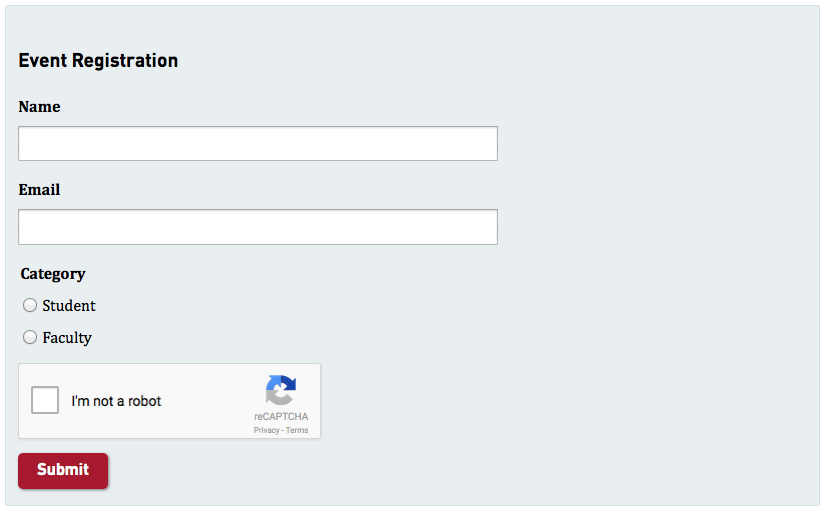
Finished Form
The final form should look similar to the one below. Before activating the page, decide on the method for handling form submissions. The options are listed in the next section.
Receiving Form Data
Data Handling Options
There are two options for handling data submitted to forms:
- Store and Mail Content - stores form data in AEM (downloadable spreadsheet) or FormView.
- Mail To - emails form data to specified person(s).
The Store and Mail Content option is useful for collecting and working with the form data as a whole, i.e. all form submissions received after a certain period. This option also allows you to send a confirmation email to the form submitter, which is not possible with the Mail To option. The Mail To option is helpful for handling form data individually, i.e. each submission as it is received.
Important note: The File Upload component will only work in forms using the Mail To option. For security reasons, the File Upload component will not work when using the Store and Mail Content option, and form data may be lost as a result.
Store and Mail Content
The Form Container component's default Action Type is set to Store and Mail Content. This setting stores all form data in a .CSV file that can be exported directly from the form. This file can be opened using any standard spreadsheet application (e.g., Microsoft Excel).
The Store and Mail Content setting has the added capability of sending an email confirmation to the submitter and notifying the form owner of a new submission.
Warning: When using the Store and Mail Content option, be sure to include a recipient email address for submissions. On occassion, some form submissions may not be captured in the .CSV file. Having a back-up in an email ensures that your record of submissions is complete.
Mail To (email)
The Mail To option emails each submission as it is completed to a specified email address, i.e. form owner or administrator. Only this option allows submitters to send files to the form owner via the File Upload component. This is not possible with the Store and Mail Content option. However if you wish to send a confirmation email to the form submitter, you must use the Store and Mail Content option.
Configuring Form's Action Type
To configure your form to:
- store form data (Store and Mail Content option), see Store the Form
- email form data (Mail To option), see Mail the Form.
Extra Feature
To send a confirmation to the submitter and a notification to the form owner, see Send Confirmation and Notification. This feature is only available with the Store and Mail Content option.