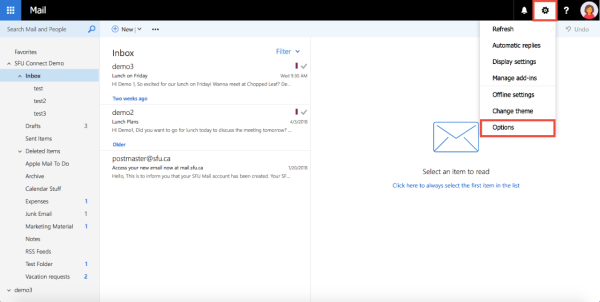
Setting Up Rules for Calendar Notifications
Outlook Web App
Learn how to create rules that will filter meeting invitations and event responses into specific folders in the Outlook Web App (OWA).
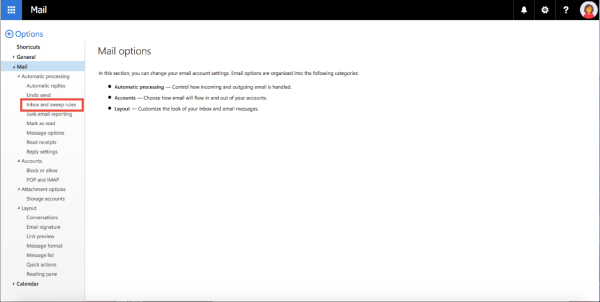
2. Under Mail > Automatic Processing, Click Inbox and sweep rules.
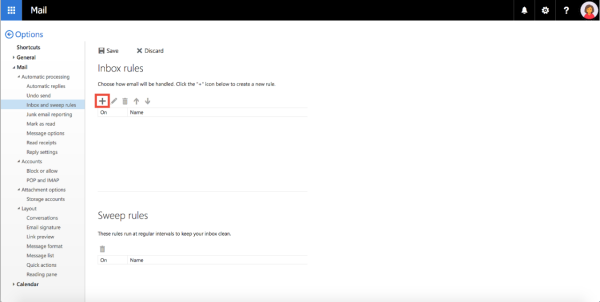
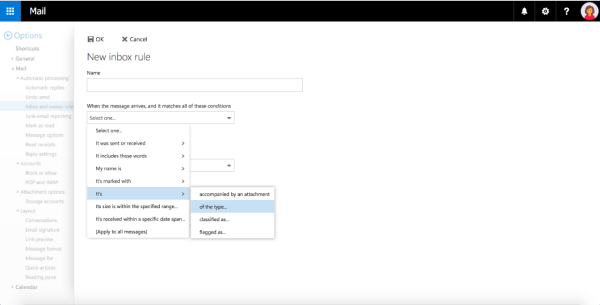
3. Click the + sign under Inbox rules to create a new rule.
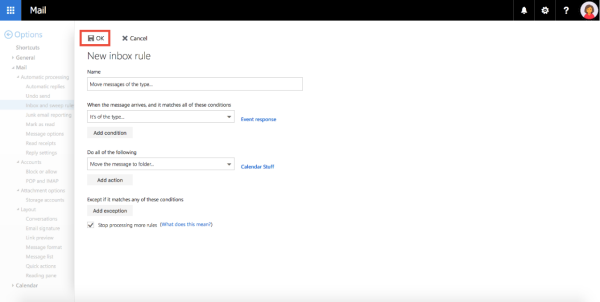
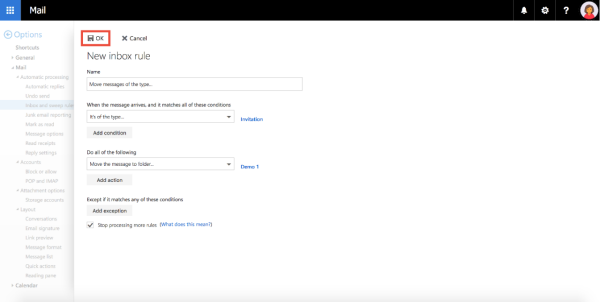
4. In the conditions drop-down, select It's > of the type...
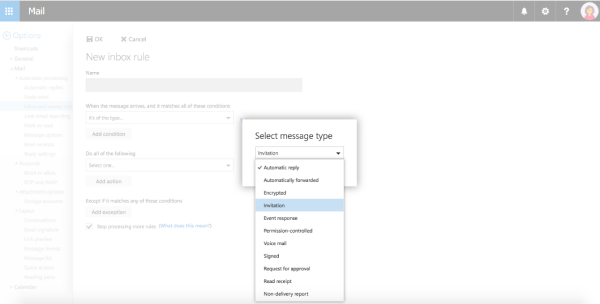
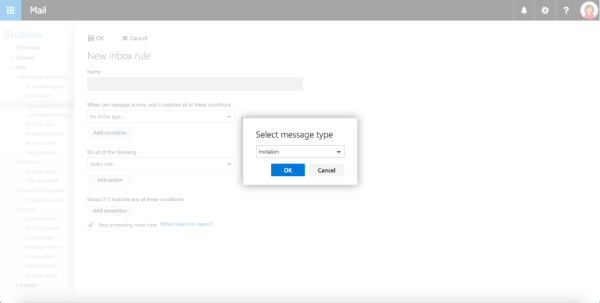
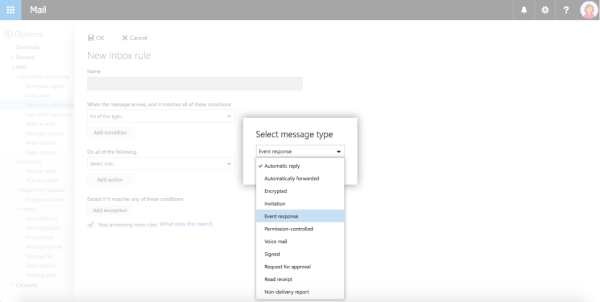
5. A window will appear asking you what message type you would like to filter using this rule. In the drop-down, select Invitation.
6. Click OK to finish adding this condition to your rule.
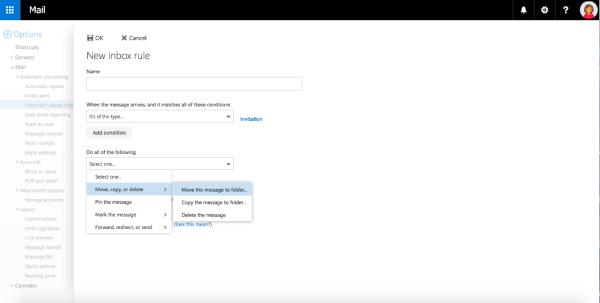
7. In the Do all of the following drop-down, select Move, copy, or delete > Move the message to folder...
8. A window will appear with your list of folders available. Select which folder you would like to filter your meeting invitations into, and click OK.

9. Give your rule a name if you wish. Click OK to save this new rule.

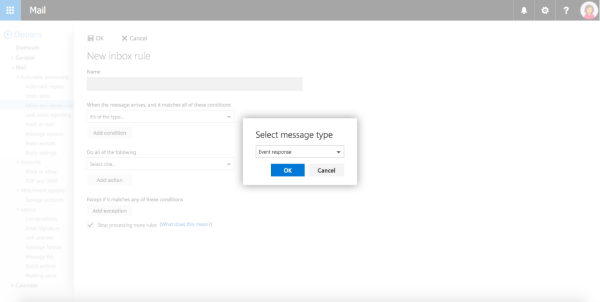
2. In the Select message type window, select Event reponse from the drop-down menu.
3. Click OK to finish adding this condition to your rule.
3. Under Do all of the following, select Move, copy, or delete > Move the message to folder...

4. In the window that appears, select which folder you would like event responses to be filtered into, then click OK.

5. Give your rule a name if you wish. Click OK to save this new rule.