Creating Appointments
Outlook for Mac
The instructions below outline the basics of creating appointments/meetings in the Outlook 2016 for Mac desktop application.
1. Click the New Meeting button in the calendar ribbon.
Note that the New Appointment button differs from the New Meeting button in that an appointment does not automatically include the Attendees field, whereas a meeting does.
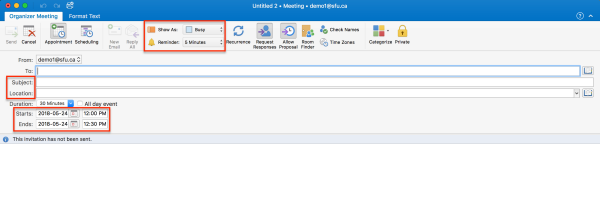
2. This will open a meeting composition window where you can set details such as the title/subject of the meeting, the location of the meeting, and the start and end time. Here you can also set what the meeting will show as (i.e., Free, Busy, Away) and what the reminder settings for that meeting will be.
2. You can use Scheduling to view your attendees free/busy information, as outlined in the next section.

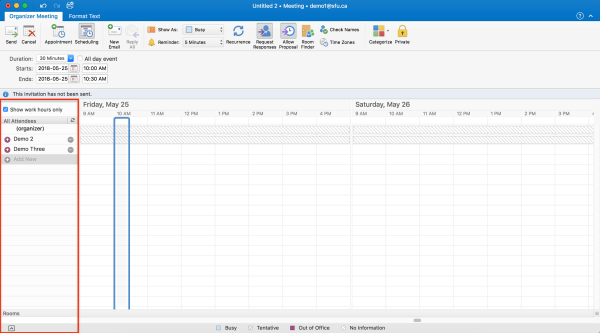
2. This will show your attendees' free/busy information all in one view, along with any rooms or resources you would like to book.
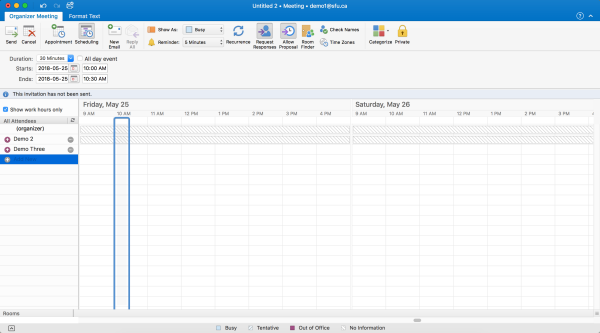
3. Your attendees will be listed on the left-hand side, along with any rooms/resources you have added, with their free/busy information listed horizontally across on the right-hand side. You can also add additionally attendees, rooms, or resources within the scheduling assistant as well as changing meeting details such as the date and time of the meeting. If the Rooms section is compressed, press the upward facing arrow to expand it.
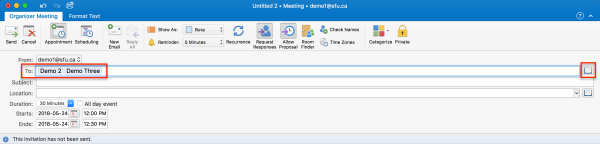
4. When you are done viewing the scheduling assistant, click the Appointment button in the ribbon to return to your meeting composition window.

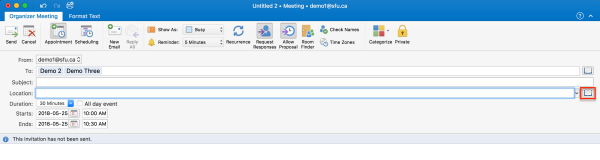
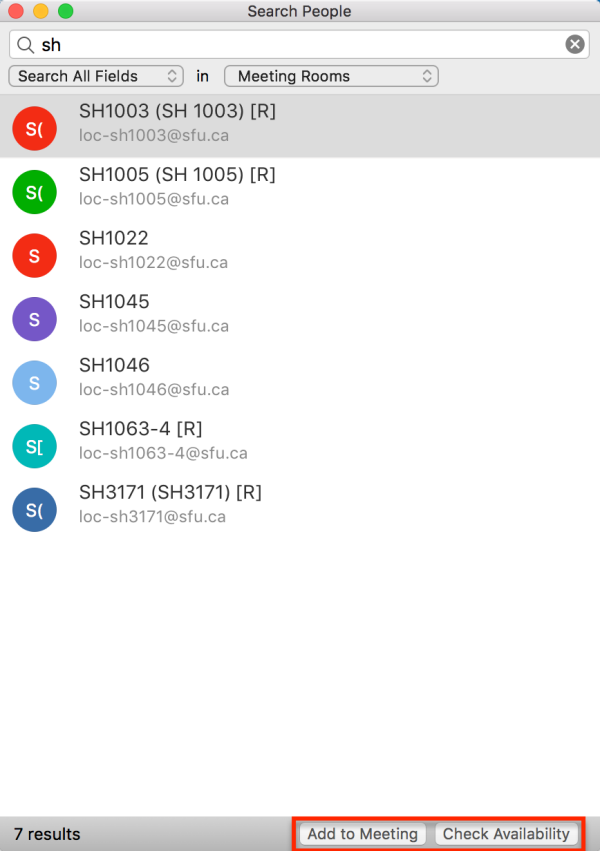
2. This will open up a directory that includes all of the meeting rooms. You can search for a room using the Search field at the top of the directory. Select the room then click Add to Meeting to add it to your meeting, then close the window when finished. You can optionally click Check Availability to see if the room is free.
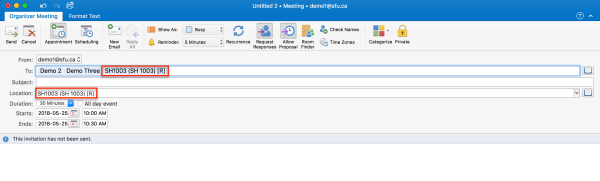
3. That room will be added to your meeting and it will be automatically populated into the Location field in your meeting details. You can then view the free/busy information of that room in Scheduling to ensure that this room is free at the time you are intending to book it.