Autocomplete
Outlook Web App
The People module allows you to save contacts and contact lists, and also keeps track of email addresses that you have sent emails to.
Find out more about how autocomplete works below. Note that these instructions are for the Outlook Web Application (OWA).
People
Contacts and Autocomplete
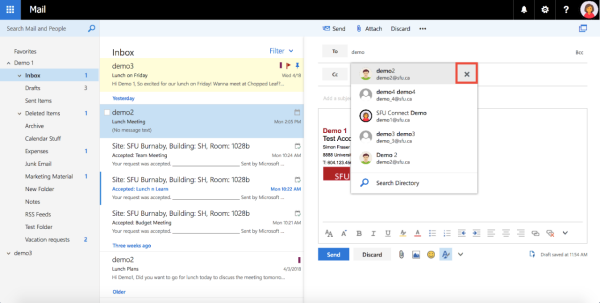
By default, when typing an email address in the To, CC, or Bcc fields, SFU Mail will automatically display a list of contacts from your personal contacts and Global Address List (GAL) entries that match what you are typing. This is referred to as 'autocomplete'. You may then select the appropriate email address from the list of results.
Autocomplete entries from your Contacts are ranked based on how often you send to them. For instance, if you often send messages to "ebronte@sfu.ca" instead of "emily_bronte@sfu.ca", then "ebronte@sfu.ca" will appear higher in the list.
Only one autocomplete result will display for a single email address. For instance, if you already have "kipling@sfu.ca" stored in your Contacts (also includes Emailed Contacts), the entry from your Contacts will appear, and the Global Address List entry will not appear.
Read more on the Global Address List (GAL).
Removing a Contact from your Autocomplete List
For personal contacts that appear in the autocomplete results, there is a small X that appears beside the contact suggestion. Clicking on this link will place this contact lower down in the autocomplete results. This will not remove the contact entry from your personal contacts.
Removing Incorrect Email Addresses from Contacts
By default, every email address you've sent an email to will be saved under "Emailed Contacts" in your personal contacts, regardless of whether it was correct or incorrrect.
To remove an incorrect email address from your "Emailed Contacts" folder (or any other Contacts folder) so that it no longer appears in autocomplete, do the following:
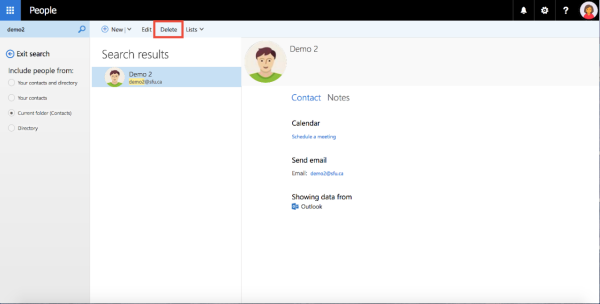
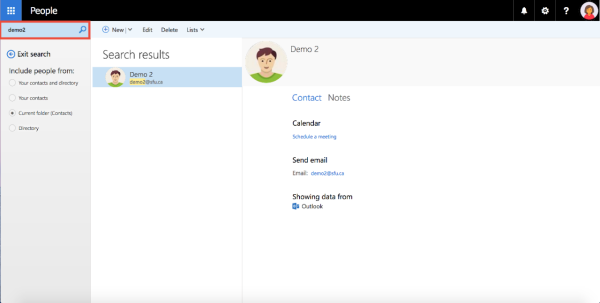
1. Go to the People module and search for the incorrect email address using the search bar in the top left.
2. Select the incorrect contact and click Delete in the ribbon at the top.