Responding to Meeting Invitations
Outlook Web App
Learn how to accept, tentatively accept, and decline meeting invitations in the Outlook Web App (OWA).
Using a desktop application?
Accepting Meeting Invitations
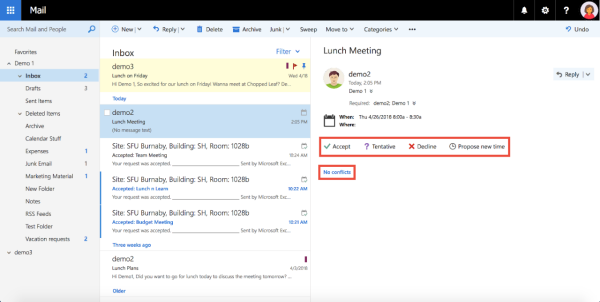
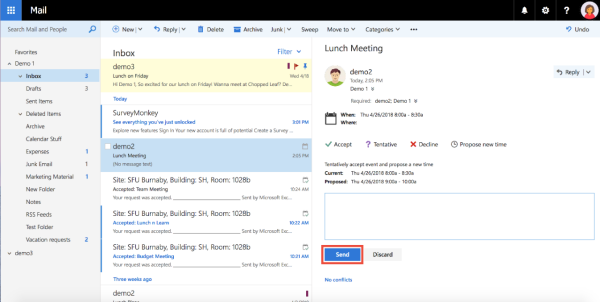
1. When you receive a meeting invitation, you will see four buttons within that meeting invite: Accept, Tentative, Decline, and Propose new time. Your calendar will automatically detect whether you have any conflicting meetings at this time or not, and will state No conflicts or This event conflicts with another event in your calendar.
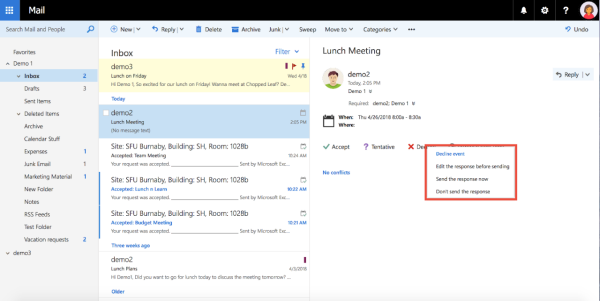
2. When you click the Accept button, you will see a drop-down menu with multiple options for responding: Edit the response before sending, Send the response now, Don't send the response.
Edit the response before sending: This allows you to add a message to your event acceptance message.
Send the response now: This sends the automatic response to the meeting organizer that says you have accepted the invitation.
Don't send the response: This will not send any response to the meeting organizer. Note that when you select this option the organizer will not be able to see any acceptance status from you.
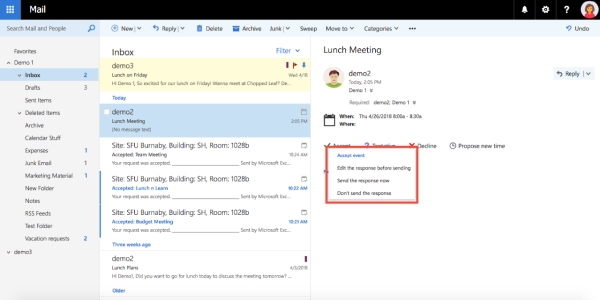
3. Select one of the three options in the drop-down menu. Your acceptance will then be sent to the organizer of the meeting and the invitation will automatically moved to the trash folder.
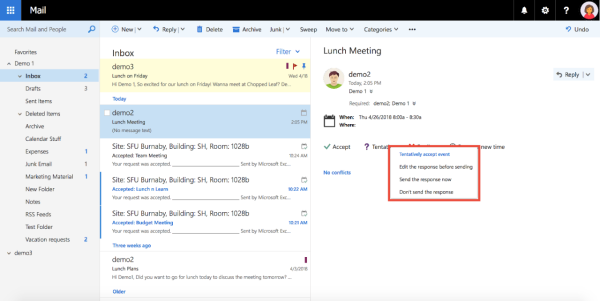
2. You will see the same drop-down with the same three options as you do when you click the Accept button:
Edit the response before sending: This allows you to add a message to your event acceptance message.
Send the response now: This sends the automatic response to the meeting organizer that says you have accepted the invitation.
Don't send the response: This will not send any response to the meeting organizer. Note that when you select this option the organizer will not be able to see any acceptance status from you.
3. Select one of the three responses to send your tentative acceptance to the meeting organizer. The invitiation will be automatically moved to your Trash.
2. Select one of the three responses from the drop-down menu. This will send your decline message to the meeting organizer and automatically move the invitation to your trash.
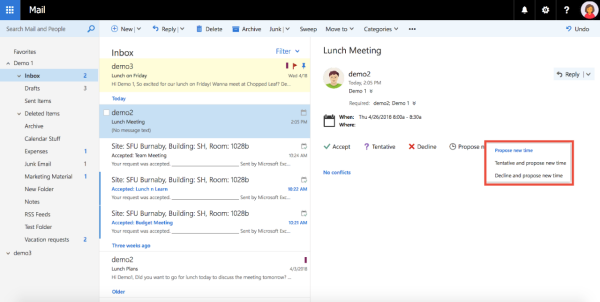
2. Once you select one of the two options, a window will open that looks similar to the Scheduling Assistant. Here, you can propose a different time and date for the meeting on the left hand side and see the attendees' free/busy information at those times.
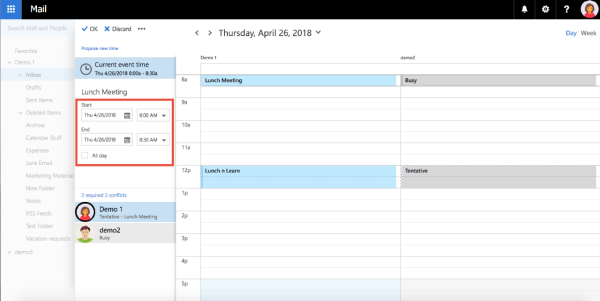
3. When you have selected a new time to propose, click OK in the top-left.
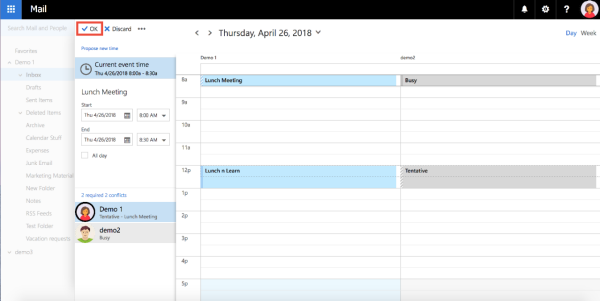
4. You will be taken back to the meeting invitation, where you will now see the current time of the meeting and the proposed time of the meeting. Below this you can type a message into the text box to go along with your proposed time, and then click Send to send the meeting organizer the proposed time and the message you have added.
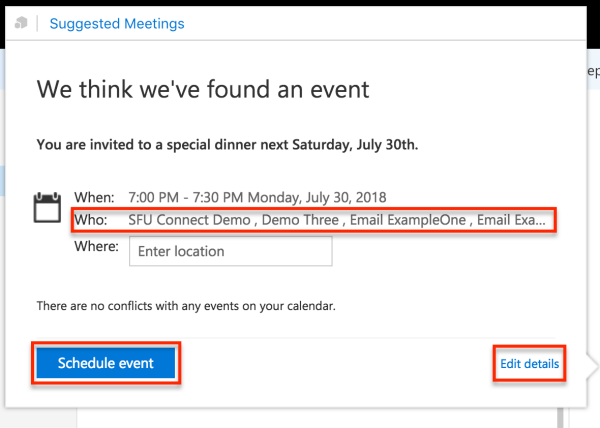
1. When an email with a possible event is sent to you, OWA will highlight a portion of the text of that email with a link to enter into your calendar.

2. If you select the link, a Suggested Meetings window will appear with the possible meeting details, including:
- the time and date,
- attendees (all recipients of the email - including maillists),
- a field where you cane enter a location, and
- whether there are any conflics with any events in your calendar.
Note that when you click 'Schedule event' when there are attendees in the Who: field, it will also send those attendees a meeting invitation for this event. If these details are correct, click Schedule event to enter it into your calendar.
3. You can remove attendees and maillists from the invitation, and make other changes changes to the event by clicking Edit details before putting the event in your calendar.
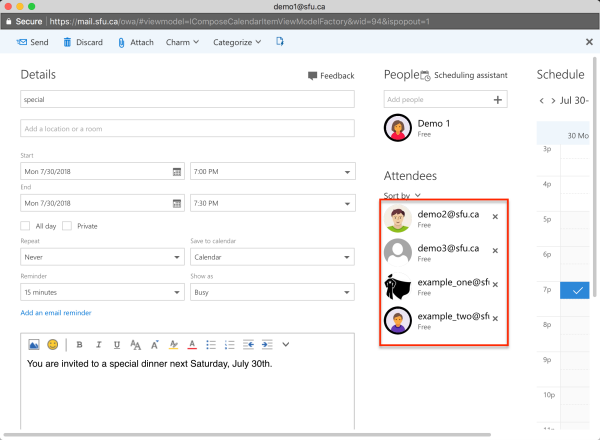
4. When finished, click Send to enter the event into your calendar.