Sharing Calendars
Outlook Web App
The links below provide instructions on how to both share your calendar and accept and view calendars shared with you in the Outlook Web Application (OWA).
Using a Desktop Application?
Sharing & Delegation
Note: Exchange may automatically send you an email from a user that had previously shared a calendar with you. The email will have the subject “I’d like to share my calendar with you”. To restablish this shared calendar, click the ‘Accept’ button in the body of the email.
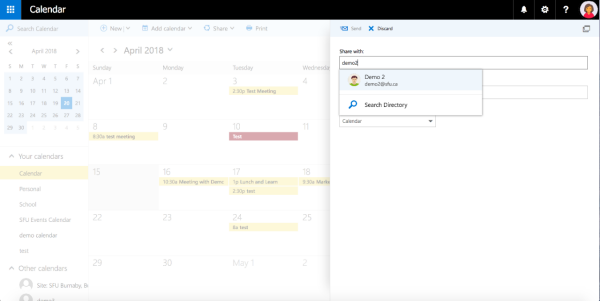
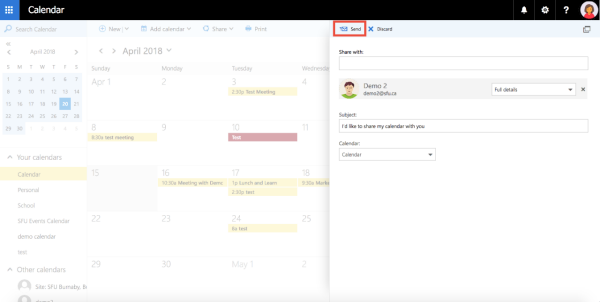
1. Right-click on the calendar that you wish to share and select Sharing permissions.

2. In the box under Share with: type in the name of the user you wish to share your calendar with. Select their name when it appears or hit Enter.
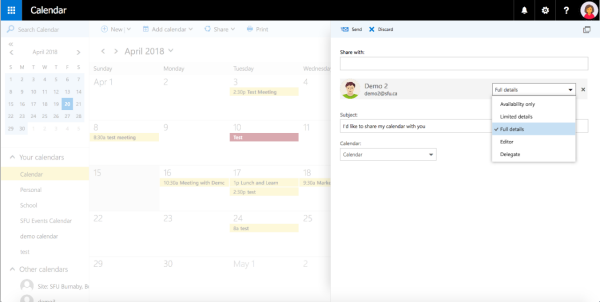
3. This will add them as a share recipient underneath the Share with: box. From the drop-down menu beside their name, select the permission level you would like to grant them. Note that if you are sharing a custom calendar that you created, there are only two permission levels available: Full Details and Editor.
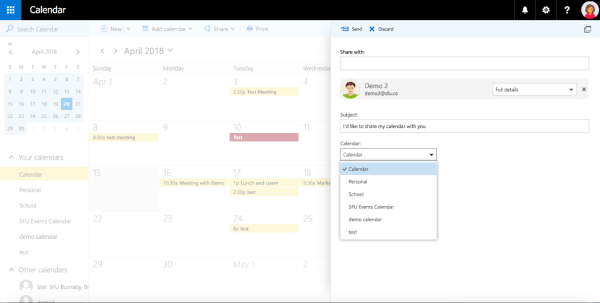
4. Using the Calendar drop-down menu at the bottom of the sharing window, ensure you are sharing the correct calendar.
5. Click Send in the top-left corner. The user you are sharing your calendar with will then receive an email notifying them that you have shared your calendar with them.
Calendar sharing permission levels:
Availability only: Free/Busy
Limited details: Ability to view meeting subject and location only.
Full details: Ability to view all meeting details.
Editor: Can make changes
Delegate: Same as owner
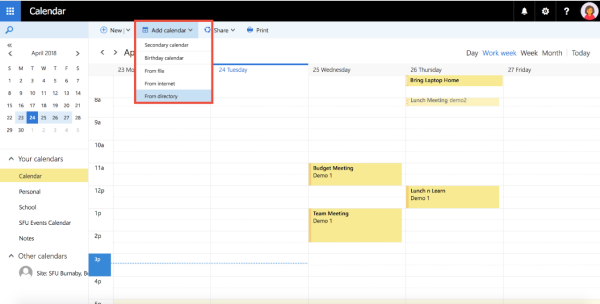
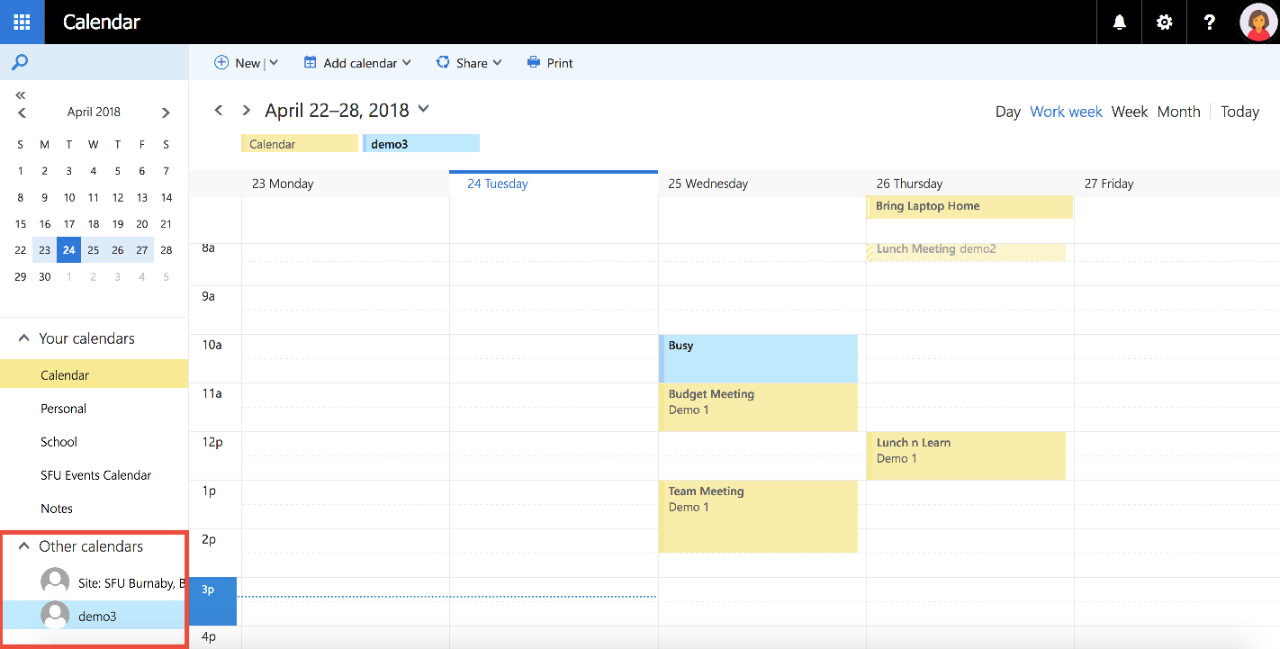
2. This will open an Open calendar window. In the From directory field, begin typing the name or email address of the user whose calendar you are trying to open. Select the user's name when it appears, then click Open.
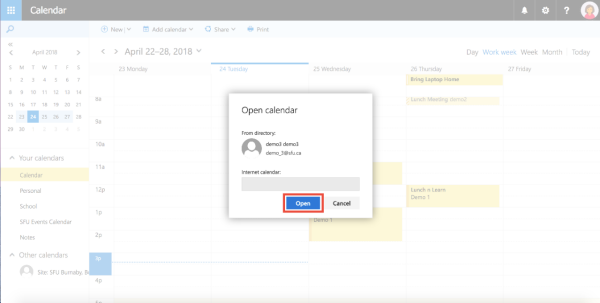
3. That user's calendar will now appear in your calendar list in the navigation pane, under Other Calendars.