
- Engage C&M
- Brand
- Campus Communications
- Media & News
- Social
- Web
- Events Calendar
Using Eventbrite
If your event requires tickets and/or assigned seating you must set up an Eventbrite registration page. If your event does not require registration, tickets or assigned seating, please use LiveWhale to promote it.
Note: You must copy the event to LiveWhale to add it to the SFU Events Calendar. Events hosted through Eventbrite will not be automatically added to the SFU Events Calendar.
Add Event Details
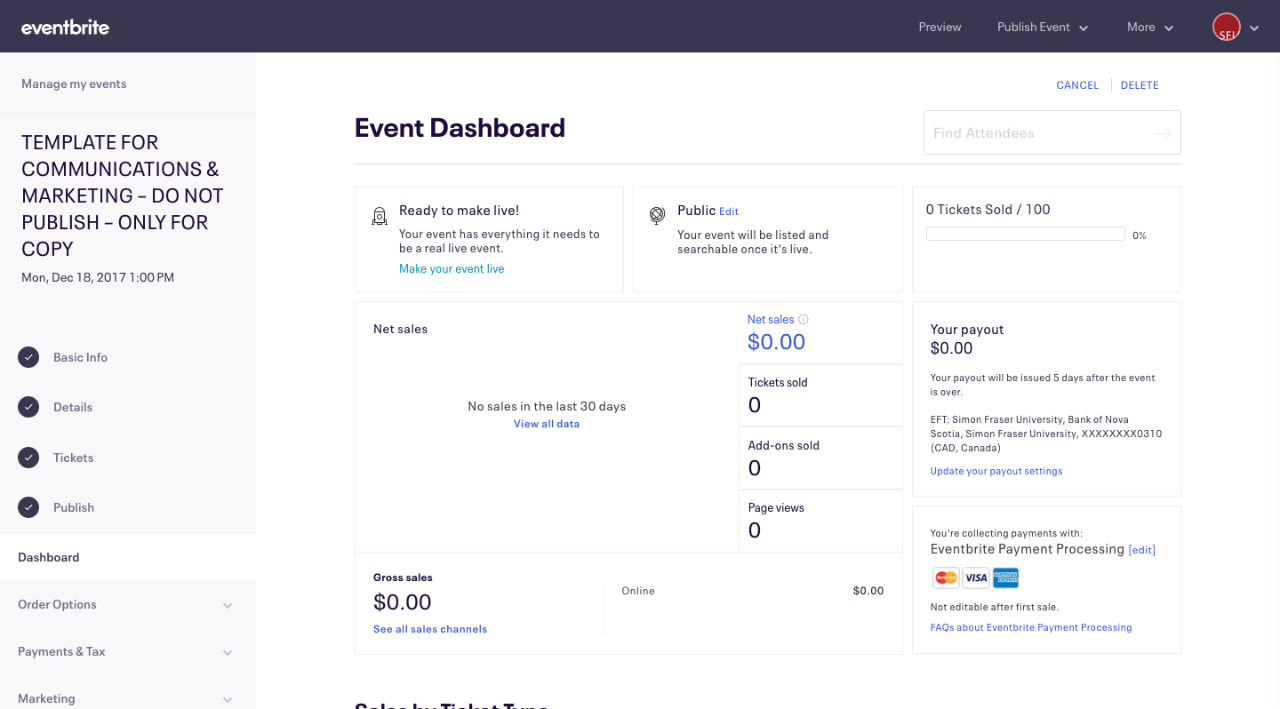
Your Event Dashboard is where you will see your event details, revenue info, page views and other data.
Basic info
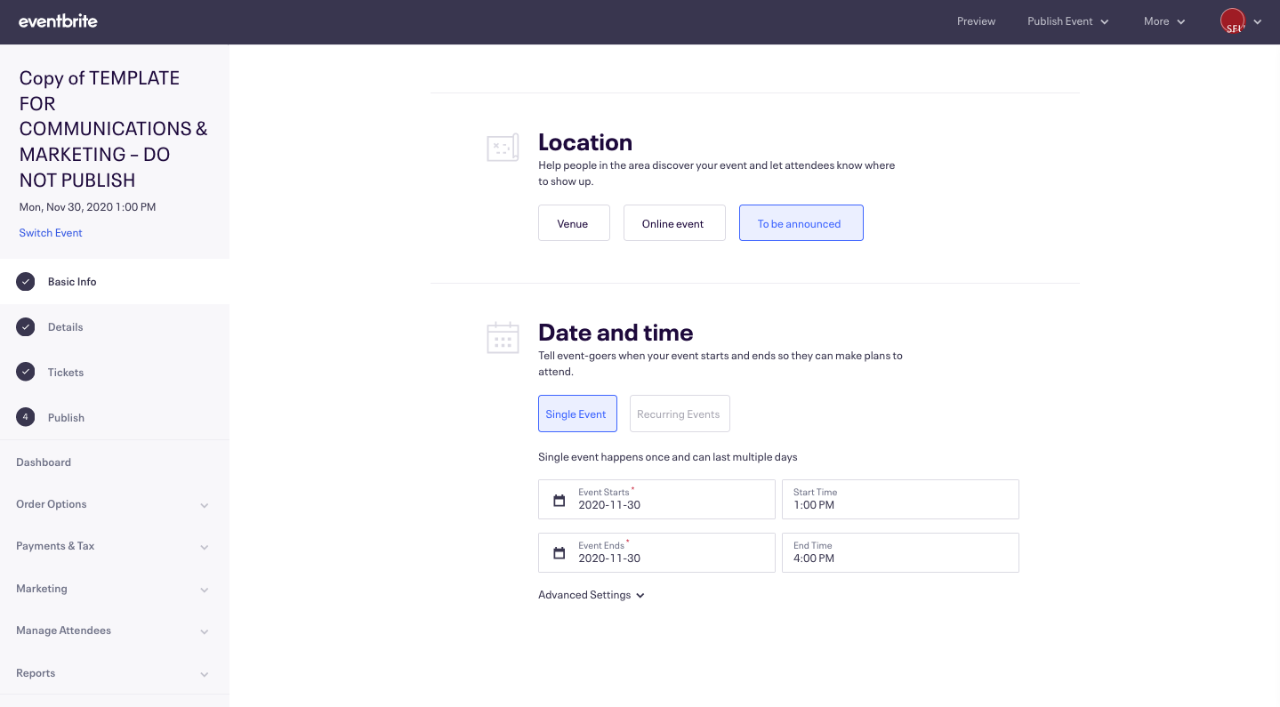
Click “Basic Info” in the left-hand column. This is where you will be able to change the “Event Title” and “Organizer,” and add any “Tags.”
You can also add the event “Category” and “Type”:
“Category” is the event topic or focus, e.g., Business & Professional or Performing & Visual Arts
“Type” is what kind of event your organization is hosting, e.g., seminar, retreat or workshop

You can also edit the “Location” and the “Date and time.”
Event details
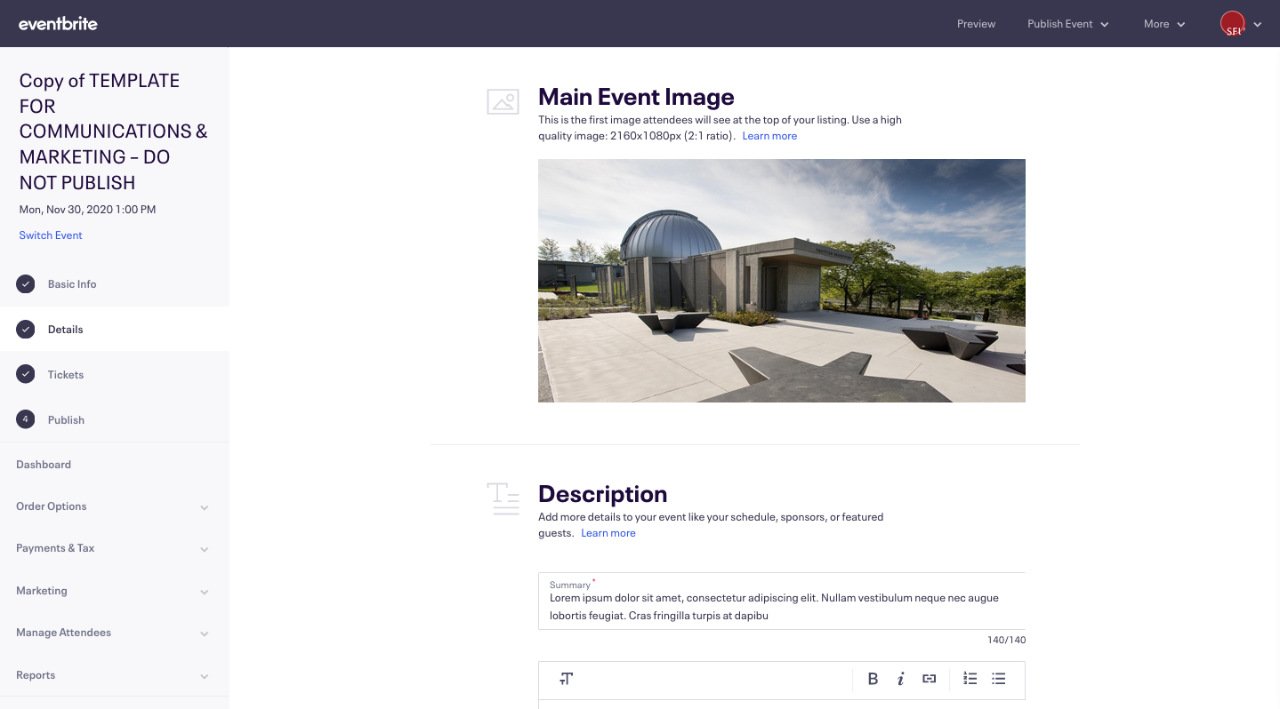
Click “Details” in the left-hand column. This is where you will be able to add and change your “Main Event Image” and “Description.”
Images
Images can help add visual appeal to your event. Please don’t use random web images. If you do not have an image for your event, use one from SFU C&M's stock library. Avoid images with text as the additional information can distract your audience.
Image specifications:
- Image dimensions: Use at least 2160 x 1080px (2:1 ratio) image. A 2:1 ratio image is a horizontal image twice as wide as it is tall.
- Accepted file types: JPEG, PNG or BMP
- Image file size: Up to 10MB
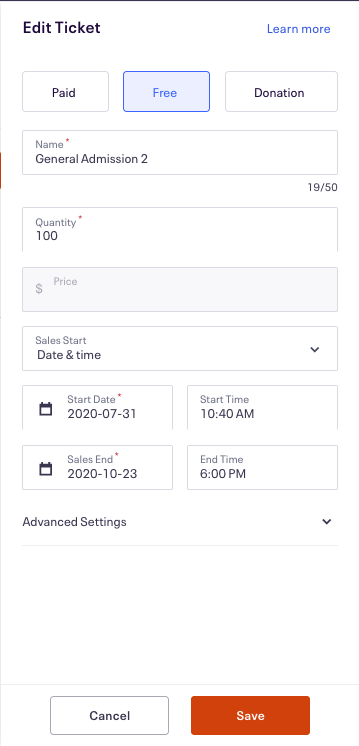
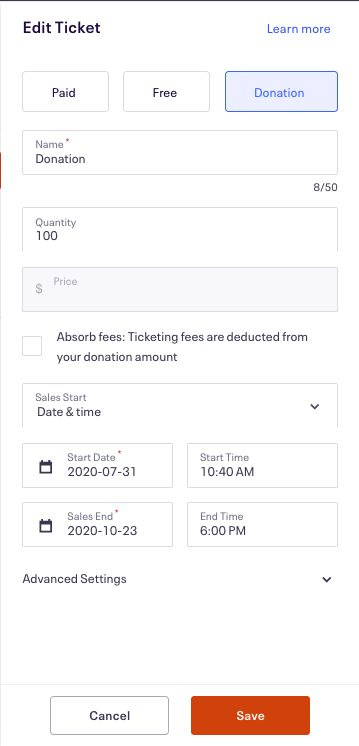
Ticketing options
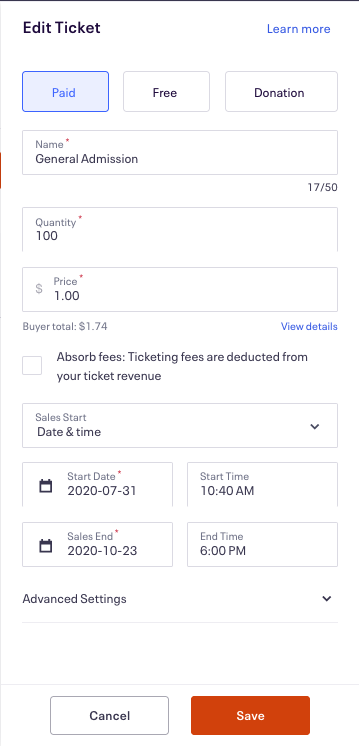
Click “Tickets” in the left-hand column. This is where you will be able to edit your ticketing options. You can change the ticket name, quantity, sales dates and price.
To change the price of your ticket, select a ticket to display all three options:
- “Paid” requires attendees to purchase a ticket
- “Free” allows them to attend for free. This should be used when there is no cost to attend the event, but assigned seating is required.
- “Donation” allows attendees to choose how much they would like to pay for the ticket
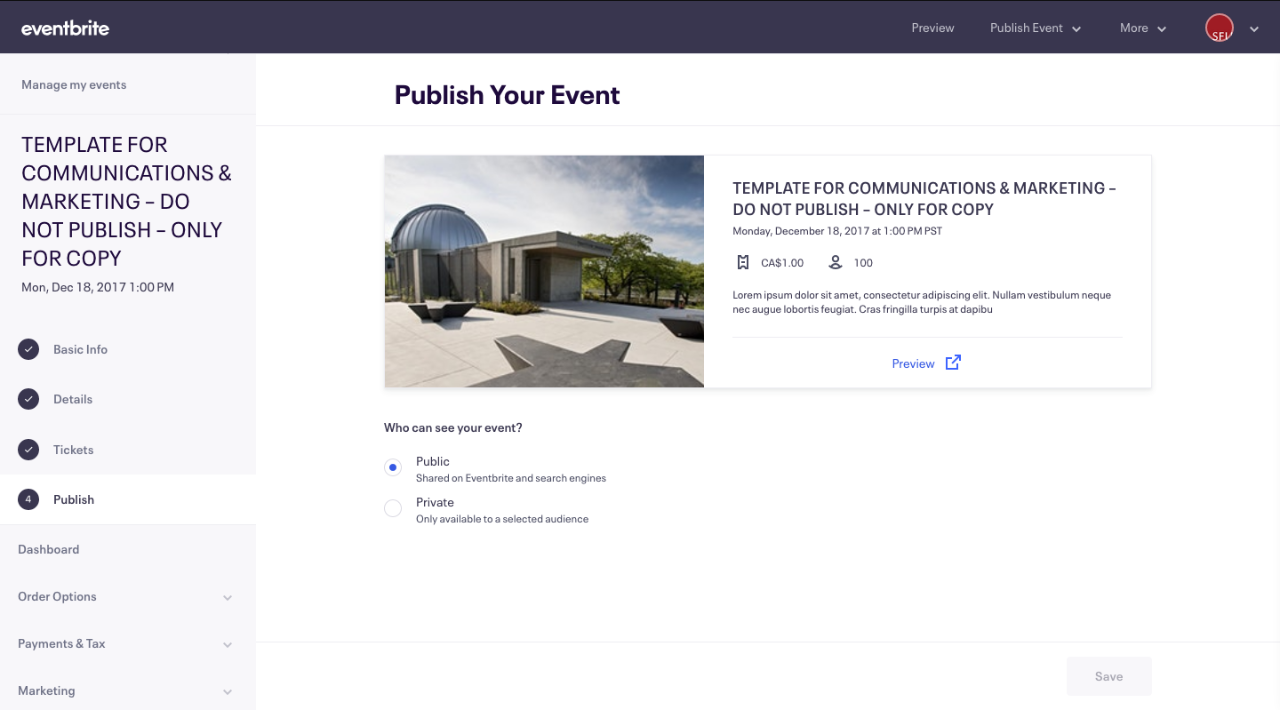
Publish / preview / edit privacy settings
Click “Publish” in the left-hand column. This is the final step before your event is live in Eventbrite. Here, you can preview how your event will look like in Eventbrite and edit the privacy settings. Events are automatically public but can be changed to private.
Public vs. private events
You can choose to make your event private or public.
When to choose a public event:
- If your event is open to all, go with a public event
- Public events are visible in Eventbrite’s public events directory and through major search engines
When to choose a private event:
- If your event requires registration but is for a specific audience, consider using a private event
- This keeps registration to a specific group and allows you to invite targeted audiences
- There are three ways of sharing your private event: link sharing, invitation-only and with a password
Once you’re ready to publish your event, click “Save” and your event will be live.
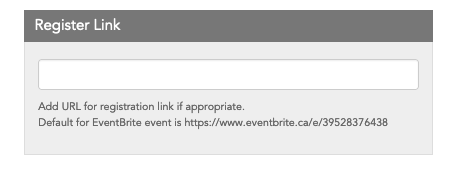
Share to SFU Calendar
If you would like to promote your event on the SFU Events Calendar, you will need to either copy your event to LiveWhale, when it will be automatically added to the SFU Events Calendar, or redirect an event in LiveWhale to your Eventbrite or SFU Websurvey page.
Copying your event to LiveWhale
1. Copy your event information from Eventbrite or SFU Websurvey to LiveWhale using these instructions
2. Insert the registration under “Register Link”
3. When you're ready to publish your event, click “Save”
Redirecting your event from LiveWhale
To redirect a LiveWhale event listing to your Eventbrite or SFU Websurvey page, follow the steps below. For more information, visit Using LiveWhale > Create a new event [link].
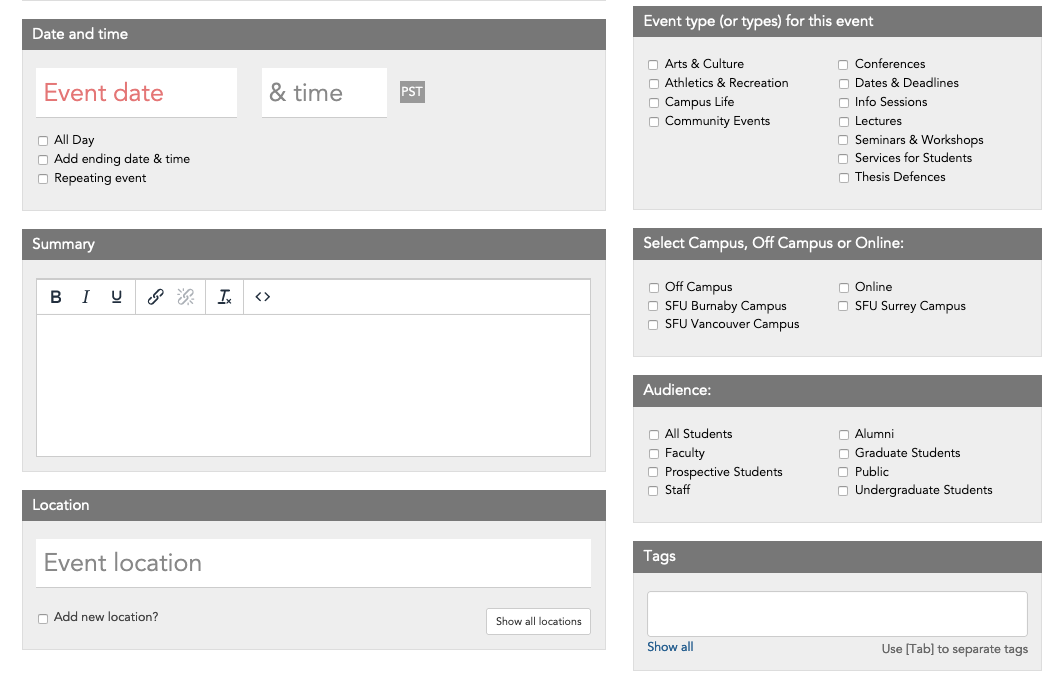
1. Add a new event

2. Add a title and an image

3. Fill out the date and time, event type, location, audience and tags as required
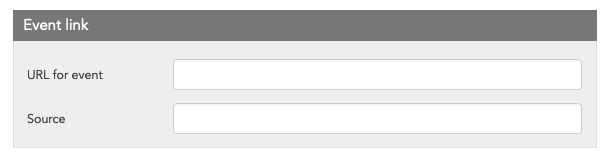
4. Click on “Link to another site for event information,” located beside Add event details

5. Add your Eventbrite event link
6. Click “Save” to publish your event