
- Engage C&M
- Brand
- Campus Communications
- Media & News
- Social
- Web
- Events Calendar
Using Campaigner
Campaigner is a full-featured email marketing tool for creating, scheduling and monitoring your email campaigns. It will help you build and implement a robust evaluation strategy for your email communication plan.
Editing in HTML
If you're not already using the drag and drop editor, we recommend you build the newsletter in HTML mode, rather than design mode, to ensure your email renders properly for recipients.
One wrong character in the code can cause major errors. Be very careful not to delete or add extra things by accident when formatting the code. Please follow this guide for the best results.
Learn more about HTML basics, and get some practice, with this free course.
HTML basics
HTML tagging basics
- HTML tags normally come in pairs, e.g., <p> and </p> (paragraph tags)
- The first tag in a pair is the start tag, and the second tag is the end tag
- The end tag is written like the start tag, but with a forward slash inserted before the tag name
For example:
- <b>These tags bold text. </b> displays as These tags bold text.
- <i>These tags italicize text. </i> displays as These tags italicize text.
HTML COMMENT TAGS
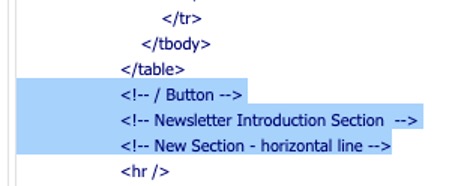
HTML comment tags are used to leave comments in the code without them showing up when the code is rendered. An HTML comment begins with <!-- and ends with -->. Text within these brackets will not be visible when the code is rendered.
There are several comment tags in the code to keep you organized. A "/" symbol is used in the second tag to indicate the end of a section.
For example:
<!-- Simple Article -->
<!-- Button -->
<!-- New Section - Horizontal Line -->
Visualizing HTML
Below is a visual guide to HTML code. On the left is the raw code. On the right is how it will appear on your browser or mobile device. Look at the highlighted sections to understand the structure of the code and how it renders in the newsletter the recipient will see in their inbox.

Editing articles
Adding a new article section
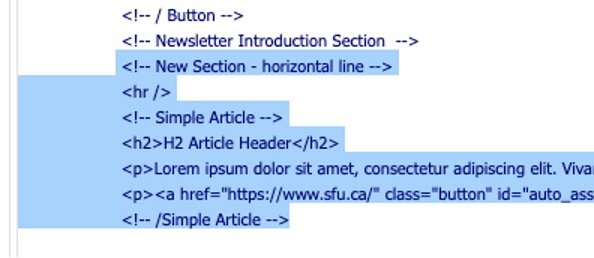
Each article begins with the comment tag <!-- Simple Article --> and ends with <!-- /Simple Article -->. Including the HTML comment tags will help you stay organized.
To add additional articles, copy the entire highlighted section. Then paste after the comment tag <!-- /Simple Article -->. To remove, make the same selection and delete.
Here is the code for you to copy and paste:
<!-- NEW SECTION - HORIZONTIAL LINE -->
<HR>
<!-- SIMPLE ARTICLE -->
<H2>H2 ARTICLE HEADER</H2>
<P>YOUR PARAGRAPH TEXT GOES HERE. </P>
<!-- /SIMPLE ARTICLE -->
Using the horizontal rule tag
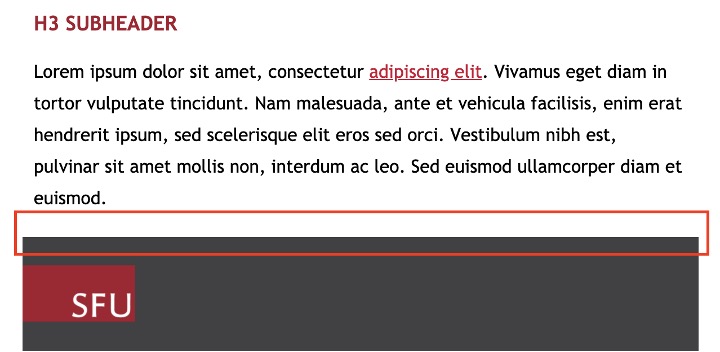
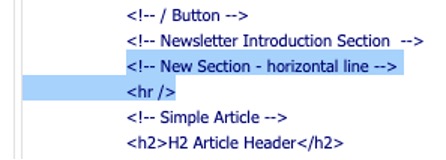
Each article should be followed by a horizontal rule <hr> tag (see the above code for an example).
Do not add a horizontal line after the last article. Instead, the grey footer block follows the last article.
The <hr> tag (among other tags), may include inline CSS that Campaigner auto-generated when the template was uploaded. CSS stands for Cascading Style Sheets. It is the coding language used to add styles, such as font styles, to HTML. It describes how HTML elements should be displayed to the email recipient.
For example, the <hr> tag may look like this: <hr style="-ms-text-size-adjust: 100%;border-top: 1px solid #dddddd;margin-top: 40px;margin-bottom: 25px;"/>.
Using LINE BREAKS for NEW PARAGRAPHS
Whenever you press ENTER on your keyboard to start a new paragraph (for example in MS Word), you create a line break.
In HTML code, you create line breaks by using the <p></p> (paragraph) tags.
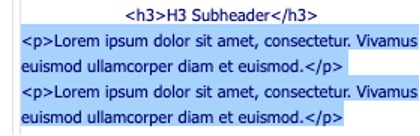
Using HEADING tags
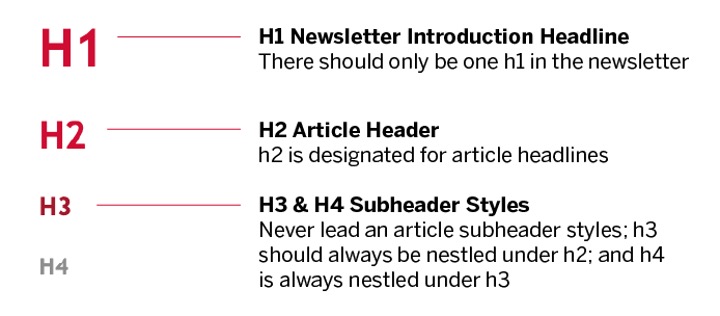
Using consistent heading styles creates visual appeal and helps readers browse your email. Just as in MS Word or other word processing software, you have a hierarchy of heading styles to choose from, each with their own tag.
using BANNER IMAGEs & FOOTER
BANNER IMAGE size requirements
- 600 pixels wide – imp5ortant
- 250 pixels high – recommended
- 72 DPI – minimum
To update the banner image:
In HTML mode go to <!-- header div --> and update the URL within the image source tag <img src> (see below)
In design mode select the image and right click to replace image
If the newsletter does not need the banner, delete <!-- Header section --> through <!-- /header div -->

EDITING SOCIAL ICONS
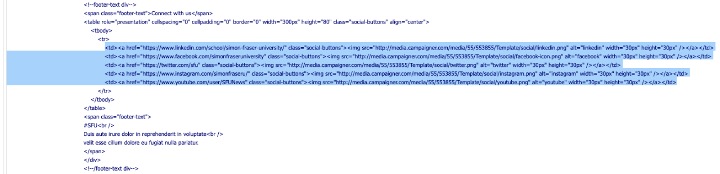
The footer section contains the SFU logo, social icons and unsubscribe text. There are three main parts to the footer code in the image below.
- The social icon, which is nestled inside the <td></td> tags
- The link to the social channel in the first set of quotation marks
- The text inside alt=" " describes which social channel this is for visually impaired people using screen readers
The code below contains five social channel buttons:
- YouTube
To remove an icon that is not needed, remove the icon in the HTML view. Select and delete the relevant image’s <td></td> tags and everything within them.
TEXT FORMATTING
In the design view [link to Editing in design mode] there are a few format options in the toolbar that may be used, but others will break the look and feel. For example, applying header and paragraph styles from the toolbar will override the CSS style formatting in HTML and affect how the email looks. CSS is the code that formats the HTML, maintaining the look and feel, for example defining that the H1 text must be red and larger than H2.
However, applying italics, bold and links from the toolbar will not override the CSS.
ADDING LISTS
Bullet and numbered lists need to be added in HTML to maintain the look and feel. Lists either go before or after closed paragraph </p> tags.
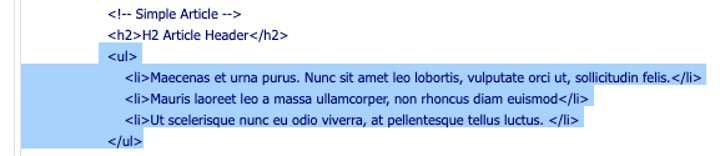
Unordered list (bullets): An unordered list starts with the <ul> tag. Each list item starts with the <li> tag, e.g., the code in this image shows an unordered list with three items.
To create an unordered list, copy and paste this code:
<UL>
<LI>ITEM 1</LI>
<LI>ITEM 2</LI>
</UL>
Ordered list (numbers): Ordered list (numbers): An ordered list starts with the <ol> tag. Each list item starts with the <li> tag.
To create an ordered list, copy and paste this code:
<OL>
<LI>ITEM 1</LI>
<LI>ITEM 2</LI>
</OL>
EDITING BUTTONS
ADDING OR REMOVING BUTTONS
Buttons are nestled between the <!-- Button --> <!-- /Button --> tags. To add a button, select the button’s comment tag <!-- Button --> and everything in between and paste into the desired article after a closed paragraph tag </p>.
To remove a button, select the button's comment tag and everything in between and remove it.

To add a button, copy and paste this code:
<!-- BUTTON -->
<TABLE ROLE="PRESENTATION" CELLSPACING="0" CELLPADDING="0" BORDER="0" CLASS="BUTTON" STYLE="MARGIN-LEFT: 10PX;">
<TR>
<TD STYLE="BACKGROUND: #CC0633; PADDING:10PX"><A HREF="HTTPS://WWW.SFU.CA/" CLASS="BUTTON" STYLE="PADDING:10PX 40PX;">BUTTON TEXT</A>
</TD>
</TR>
</TABLE>
<!-- / BUTTON -->
CHANGING THE BUTTON TEXT AND URL
Replace the highlighted section in the image below to change the button text:

Replace the highlighted section in the image below with your link of choice:
