- Engage C&M
- Brand
- Campus Communications
- Media & News
- Social
- Web
- Events Calendar
Images
Adding images can help bring life to the page and break up text-heavy pages, when done properly. Well-crafted photos also play an important role in bringing our brand DNA to life.
Below are examples of how to use and display images for different purposes.
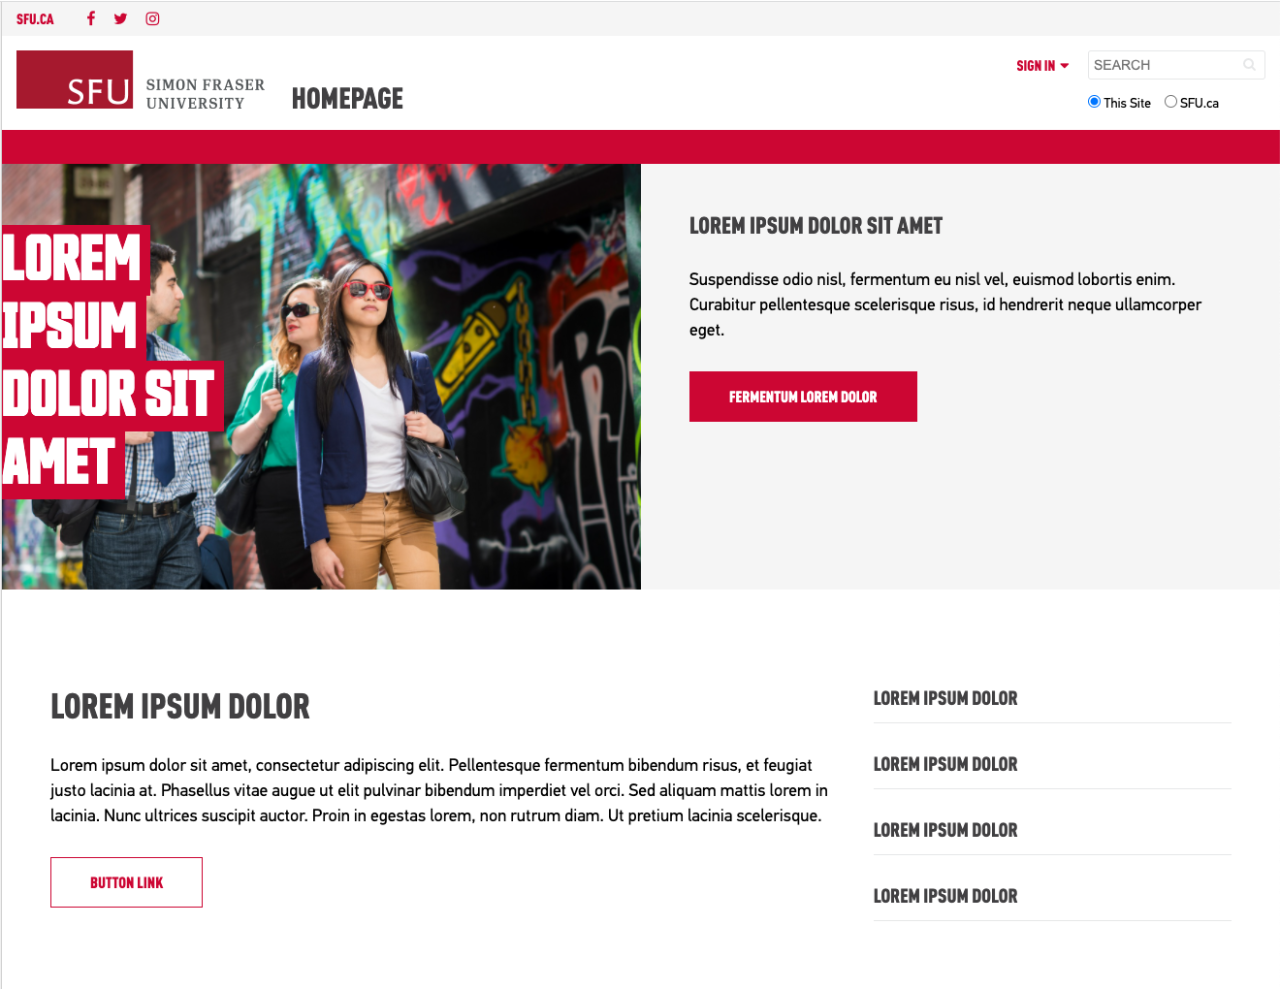
Banner Images
Banner images allow for a text overlay styled to align with SFU’s branding. These banners can also include a description and a call-to-action button.
Best Practices
Keep titles brief, without punctuation and use question marks sparingly
Make sure to include alt tag for the images uploaded in the banner

overlay-banner style includes white text with red background over the image with an optional paragraph and button text. On mobile the text area moves below the image in a red box.
Design Guidelines
overlay-banner on Homepage
overlay-banners can be used as the main image banner at the top of the page
Image should use 3:1 banner image crop
Text should be a “headline” statement, not the title of the page
Never use H1 as a heading style in the banner on a homepage

overlay-banner in two columns
The overlay banner can replace the carousel and include a paragraph and a button.
- Place the overlay-banner in one of the columns in a two-column component on your page. Set the component to full-width and no spacing, with a class name "grey block" to set the background color.
- Add a text component with class of "pad-all" to set padding around the text and button.
To add a link, it is best to include it as a red button (“button alt” style)
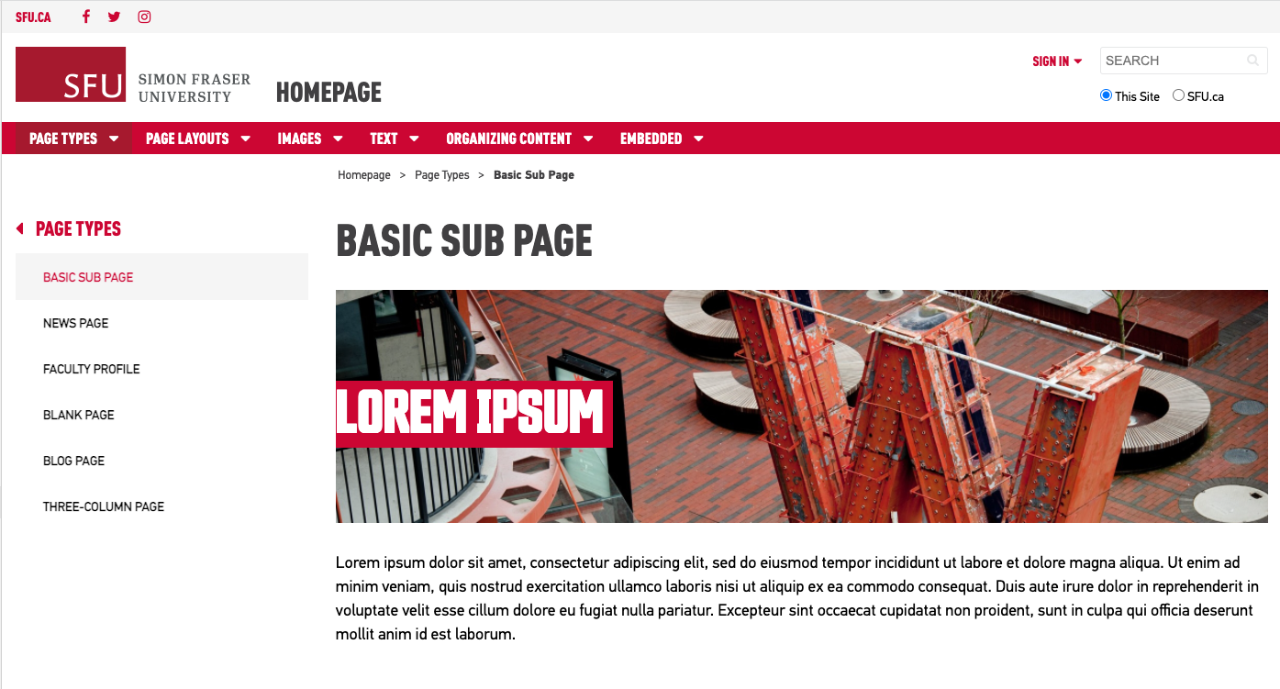
overlay-banner on Subpages
On subpages, the title of the page should appear above in H1 and the banner below with a brand statement in paragraph or H2 heading
Image should use 4:1 banner narrow image crop
- The page title should not be used but a brand expression headline

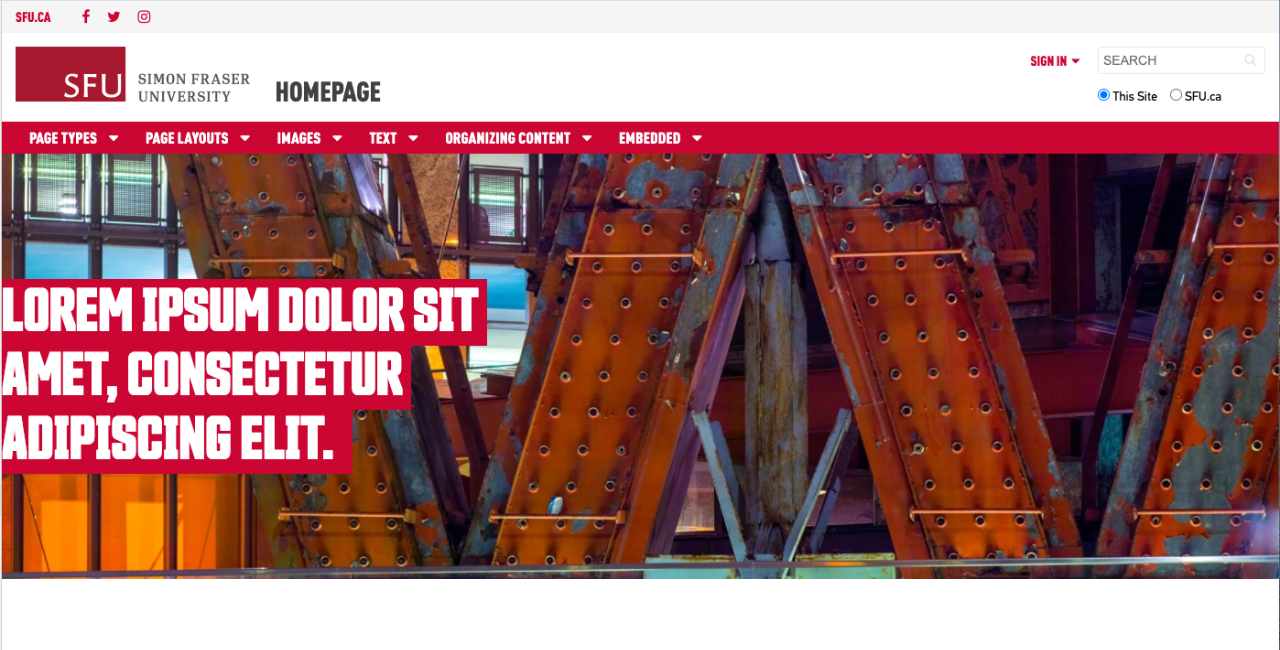
overlay-full places white text on top of an image. This style is the same as an overlay-banner, without a red background and is best for brand expression statements on a black and white image.
Design Guidelines
overlay-full banner on Homepage
overlay-full banners can be used for main image banner at the top of the page, in the same way and overlay-banner is used
This banner is reserved for black and white brand images only
Image should use 3:1 banner image crop
Text should be a “headline” statement, not the title of the page
Never use H1 as heading style in the banner on a homepage


overlay style includes a white box on the bottom left of image. Can be used to for a secondary level highlighted content. On mobile, the text moves below the image with an outline.
Design Guidelines
overlay as secondary content
- The overlay can be used as a button display.
- To add a link, create an HTML link on paragraph text. The link will convert to a read more style with an arrow.
- Place the overlay-banner in one of the columns in a two or three column component on your page.

Aliquam eu quam id elit consequat

Etiam elementum rhoncus

Lorem ipsum dolor sit amet
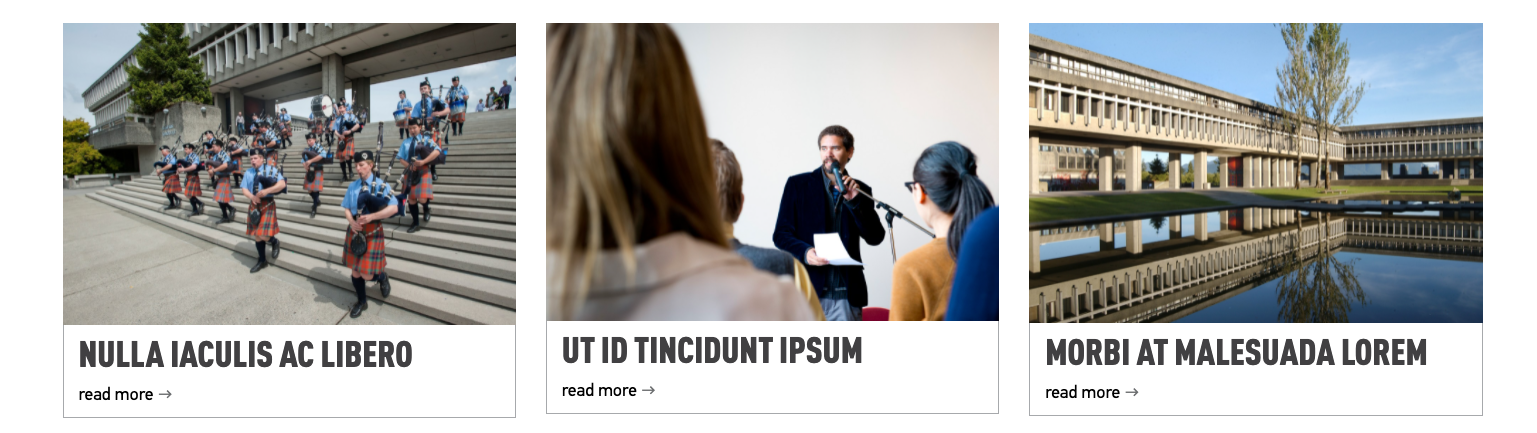
overlay-bottom displays a red bar beneath the photo with white text. This style is used as a set of image buttons in a three- or four-column layout.
Design Guidelines
overlay-bottom as buttons
The overlay-bottom style can be used for adding images to buttons
This style is reserved for use with images placed in three columns (33%) or four columns (25%)
Links can be added to the text and the image of an overlay-bottom banner
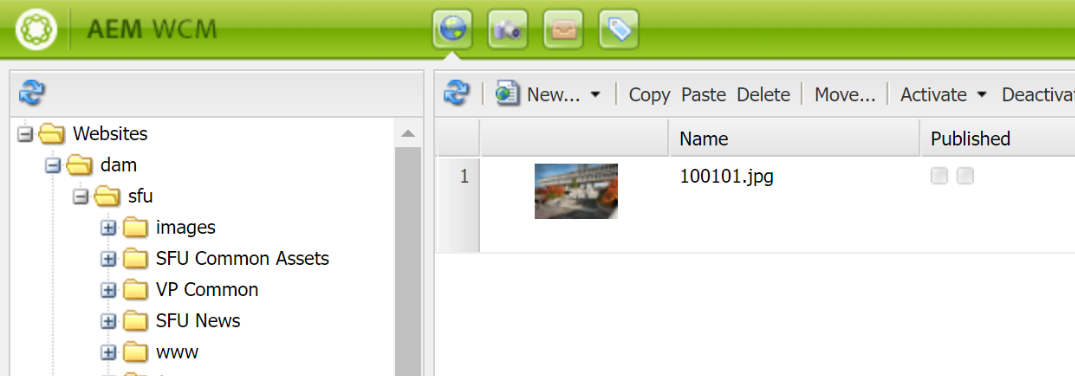
1. Upload an image to the DAM
See guidelines on adding an image (Link to Image uploading)
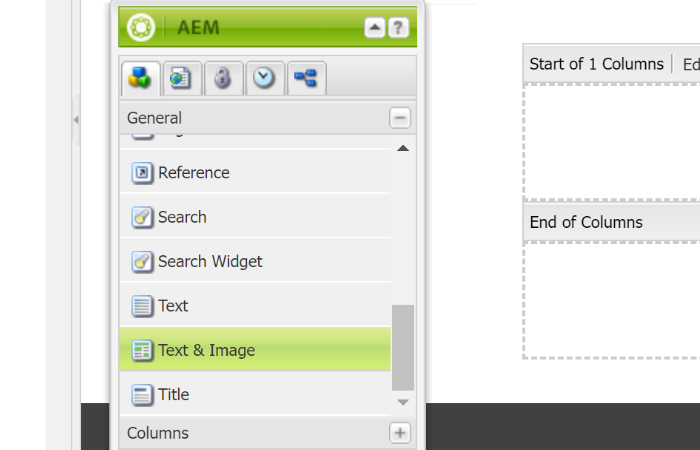
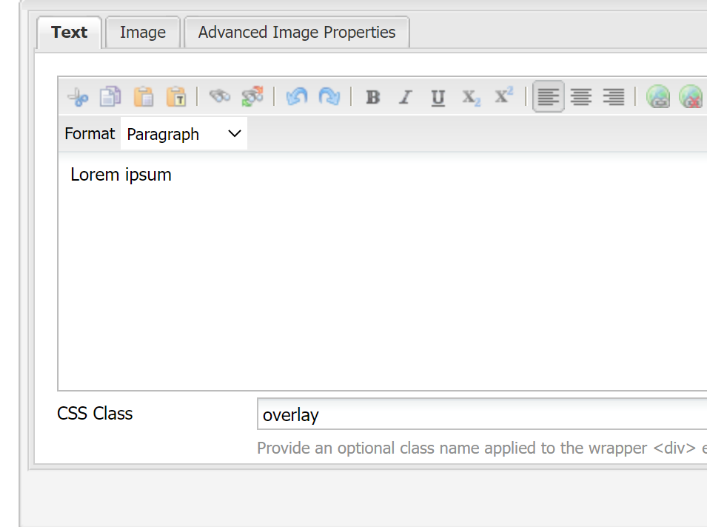
2. Add Text and image component
a. Navigate to the page you want to place a banner
b. Add the text and image component onto the page from the sidekick (components > general)
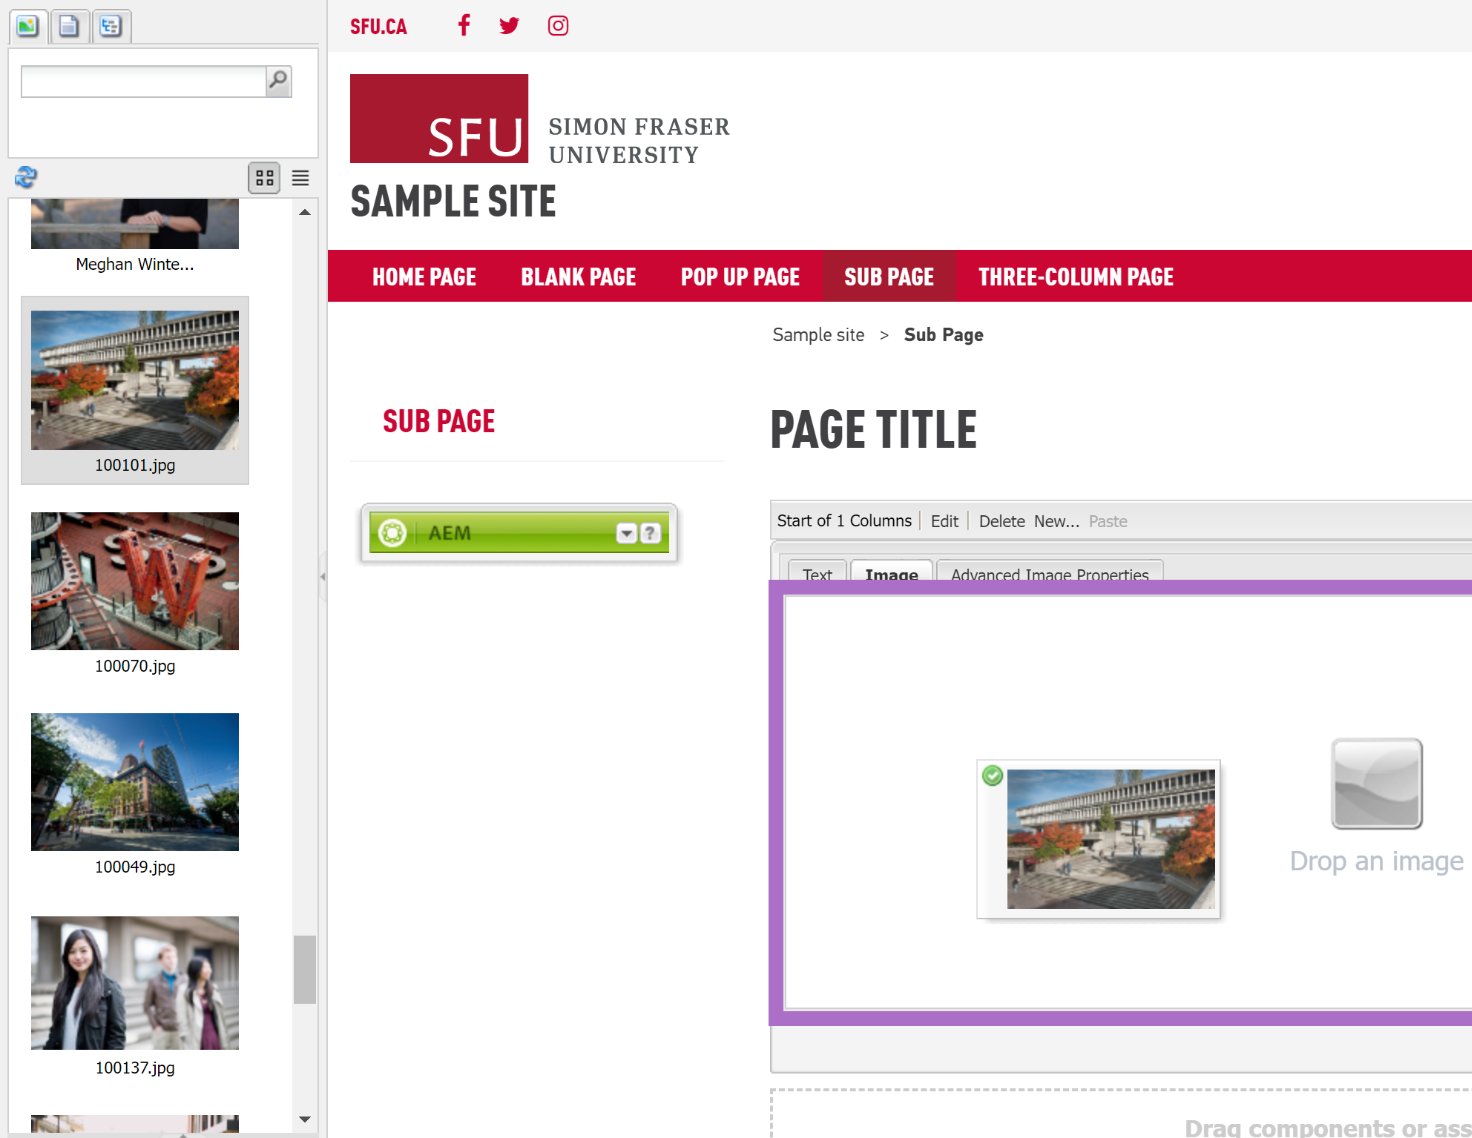
3. Add Image to Text and image component
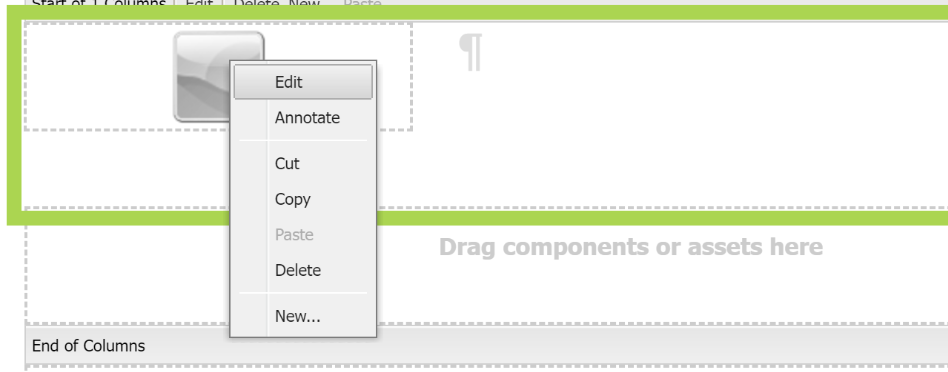
a. Right click on the text and image component then select Edit / or double click on the component
b. Find the photo you uploaded in the DAM by navigating to the Images tab on the left and drag it into the image section of the component
c. You can crop the image by selecting crop (see cropping instructions from image component)
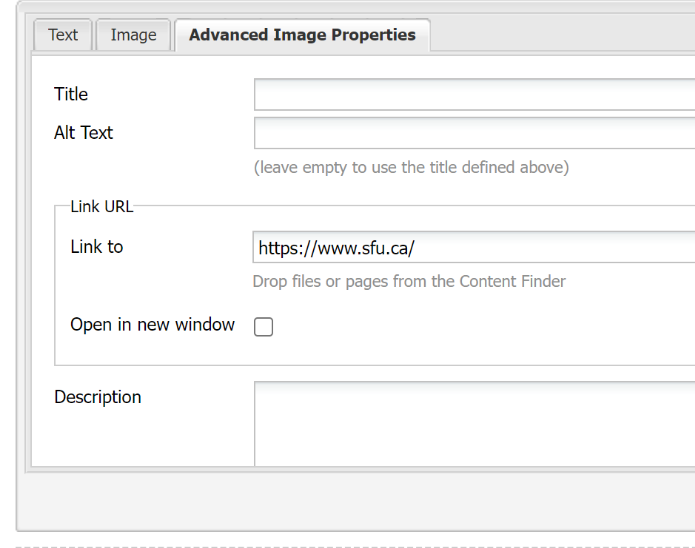
d. Add in an Alt tag under the Advanced Image Properties tab under Alt Text field
Important:
Please make sure to add an alt tag for the image. Alt tags will display when the image cannot be displayed for technical reasons. It is also used for visually impaired people who cannot view the image. In this case it is best to put a description of the image for an alt tag, (ex. Students smiling and sitting outside on a sunny day)
4. Apply overlay style to component
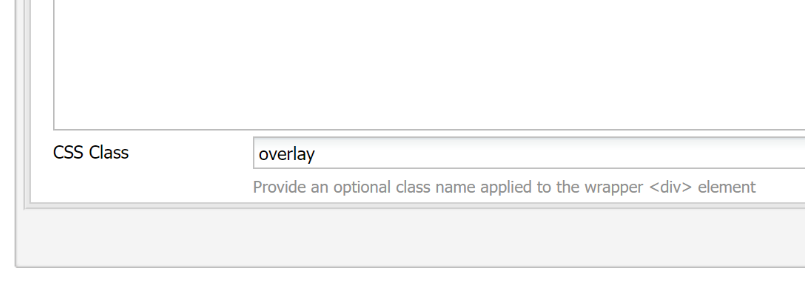
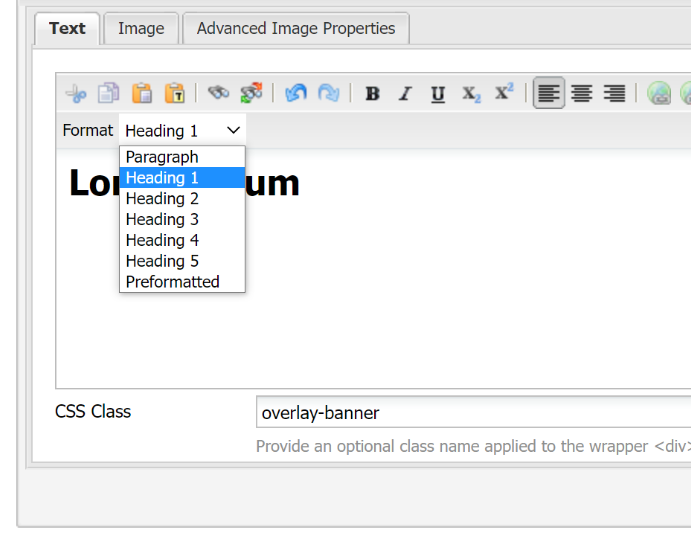
Add an overlay style from list below by adding the style name into the CSS Class section, of the Text Tab
Styles:
- overlay - Sets the image to occupy 100% of the container width and overlays the text with a semi-transparent black background on the image. You can use Heading 2-Heading 5 or Paragraph to format the text.
- overlay-banner - Creates a text overlay with a red background and white heading font.
- overlay-banner text-right - Creates a text overlay with a red background which is aligned to the right of the image.
- overlay-banner-white - Creates a text overlay with a white background and red heading font.
- overlay-full - Displays text on the left of the image in white font and no background. You can use Headings 1-H5 or Paragraph to format the text.
- overlay-bottom - Adds a full-width, bottom-aligned red background with text over it. You can use Headings 1-5 or Paragraph to format the text.
5. Add text to overlay on top of the image
See specific details for the different overlay styles
6. To add link
add in URL under the Advance Properties Tab > Link to field
7. Select Ok to save your settings
Overlay-banner
How to:
Follow steps one to five on how to set up overlay banners
- Set text as a Heading 1, 2, 3, 4, or 5 from the format dropdown list
Requires text to be heading
Has optional paragraph text (Note: only one paragraph will be displayed)
Has optional button
To align text to the right side of the image add “text-right” to CSS Class field
To include a button (call-to-action), add hyperlinked text in the second paragraph and use button alt in the CSS class field
On Homepage templates
- To create larger text for a banner on the homepage, add image and text component to column control component and set column control to full width.
- To reduce the brand title font size, add CSS Class “small”
- Paragraph and buttons cannot be added.
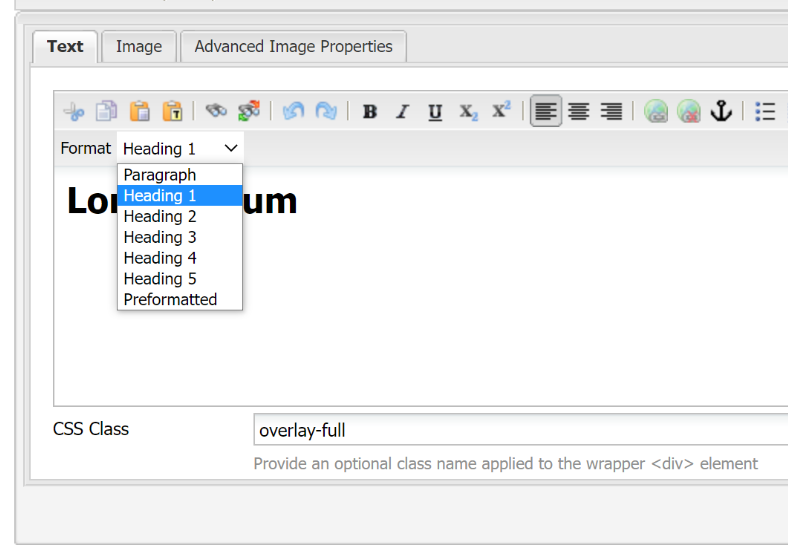
Overlay-full
Follow steps 1 to 5 on how to set up overlay banners
Set text as a Heading 1, 2, 3, 4, or 5 from the format dropdown list
- Requires text to be heading
Note: there is no paragraph option for this style, and text can only align to the left side
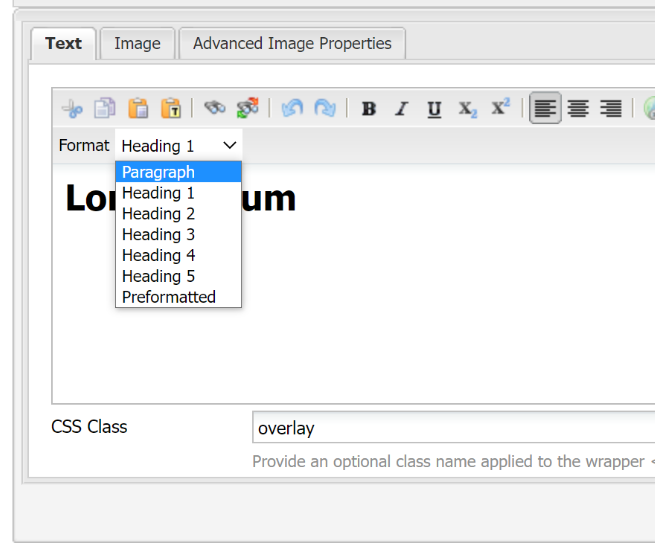
Overlay
Follow steps one to five on how to set up overlay banners
Set text as a Heading 1, 2, 3, 4, or 5 from the format dropdown list
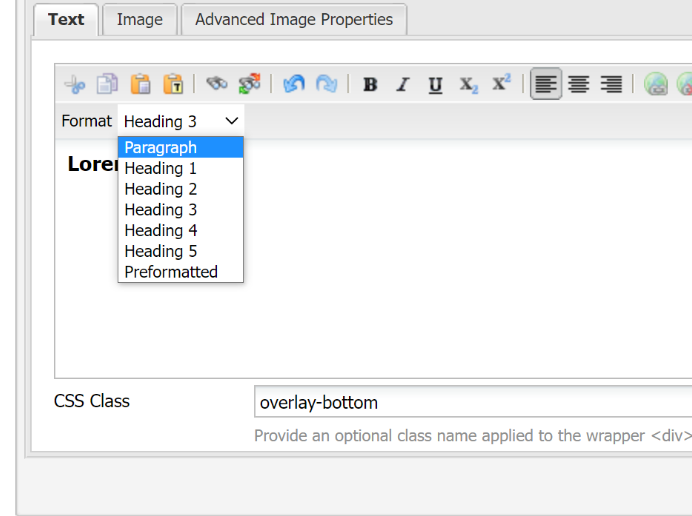
Overlay-bottom
Follow steps 1 to 5 on how to set up overlay banners
Set text as a Heading 1, 2, 3, 4, or 5 from the format dropdown list
All text added in this style will be converted.
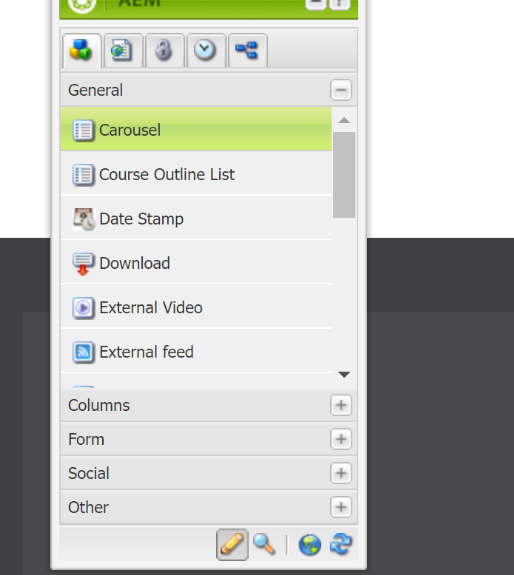
Carousel Banner
Carousels are not recommended due to accessibility and usability issues. We recommend using the text and image overlay banner with paragraph text instead.