- Engage C&M
- Brand
- Campus Communications
- Media & News
- Social
- Web
- Events Calendar
Images
Adding images can help bring life to the page and break up text-heavy pages, when done properly. Well-crafted photos also play an important role in bringing our brand DNA to life.
Below are examples of how to use and display images for different purposes.
Image Component
A basic image can be added to a page with an image component. For banner images that require accompanying text, see Text and Image component.
If you require a different image to display on mobile, consider hiding the image on the desktop version and displaying a mobile version of the image on mobile only. See hiding components on specific screen sizes.

How to
Upload an image to the DAM
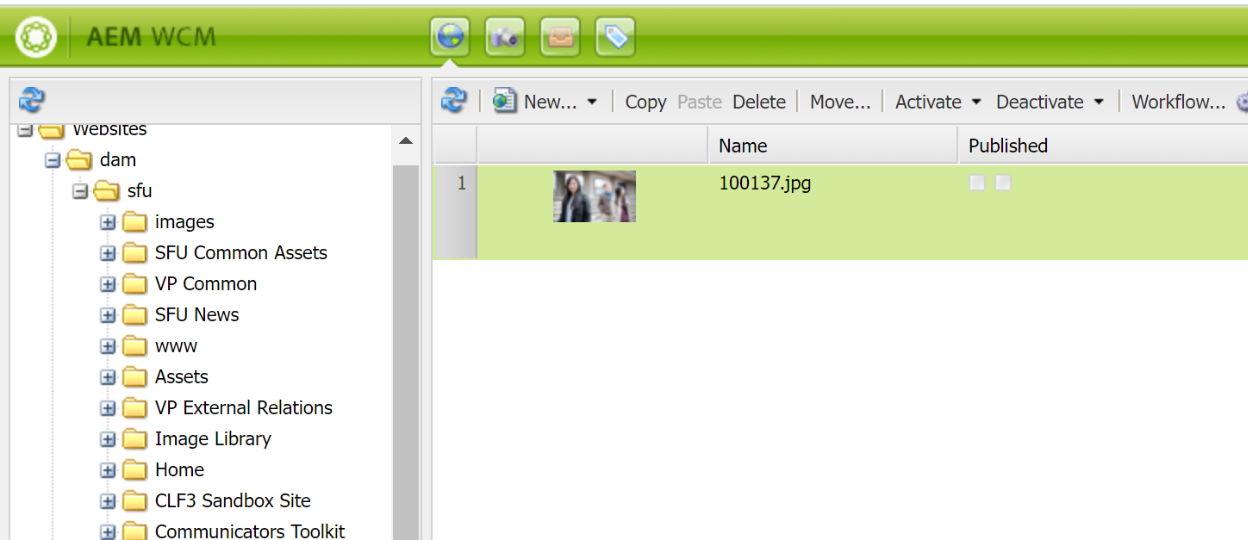
1. Navigate to the Digital Asset Manager (DAM) tab
- a. Each website will have a corresponding folder in the DAM for files and images.
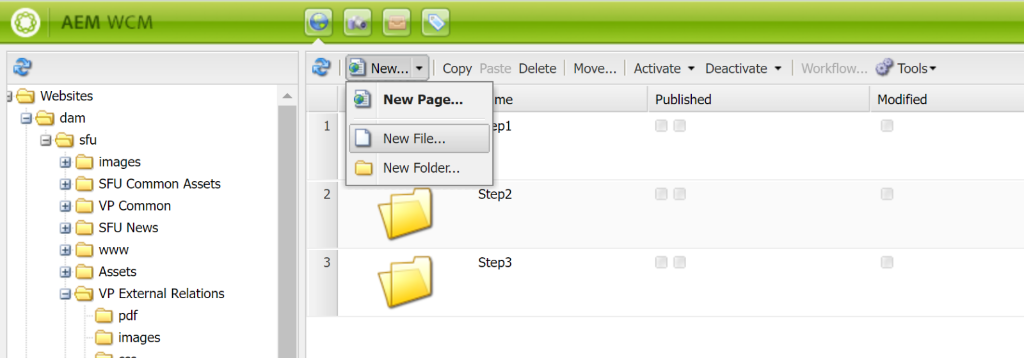

- b. Create a new folder or navigate to the folder you wish to upload your files to.
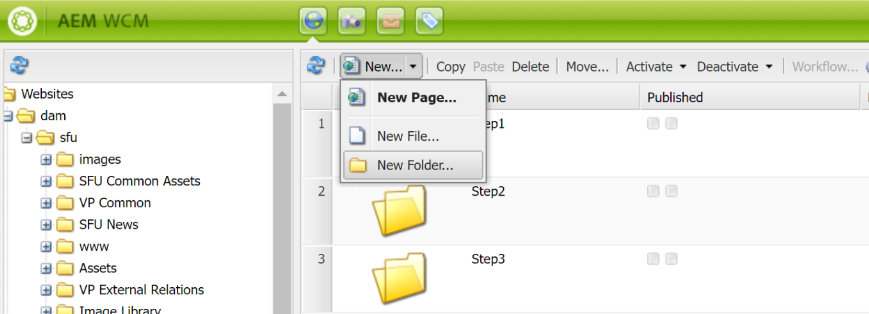
- c. Select New > New file and browse to the files you wish to upload or drag files from your computer into the folder. Your image file should appear in the folder.
- d. More information about the DAM see Adding Files
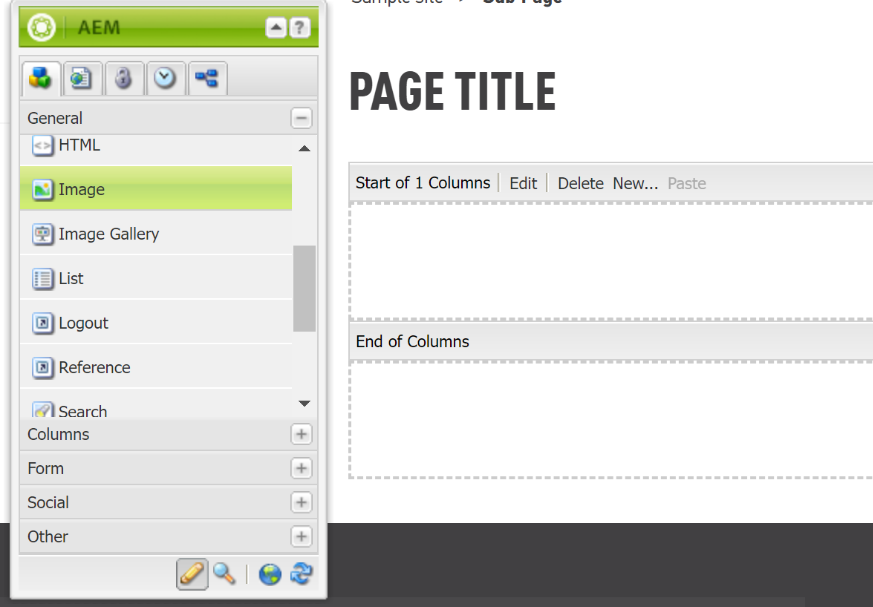
2. Add image component to page
- a. Navigate to the page you want to place an image and add the image component to the page from the sidekick menu
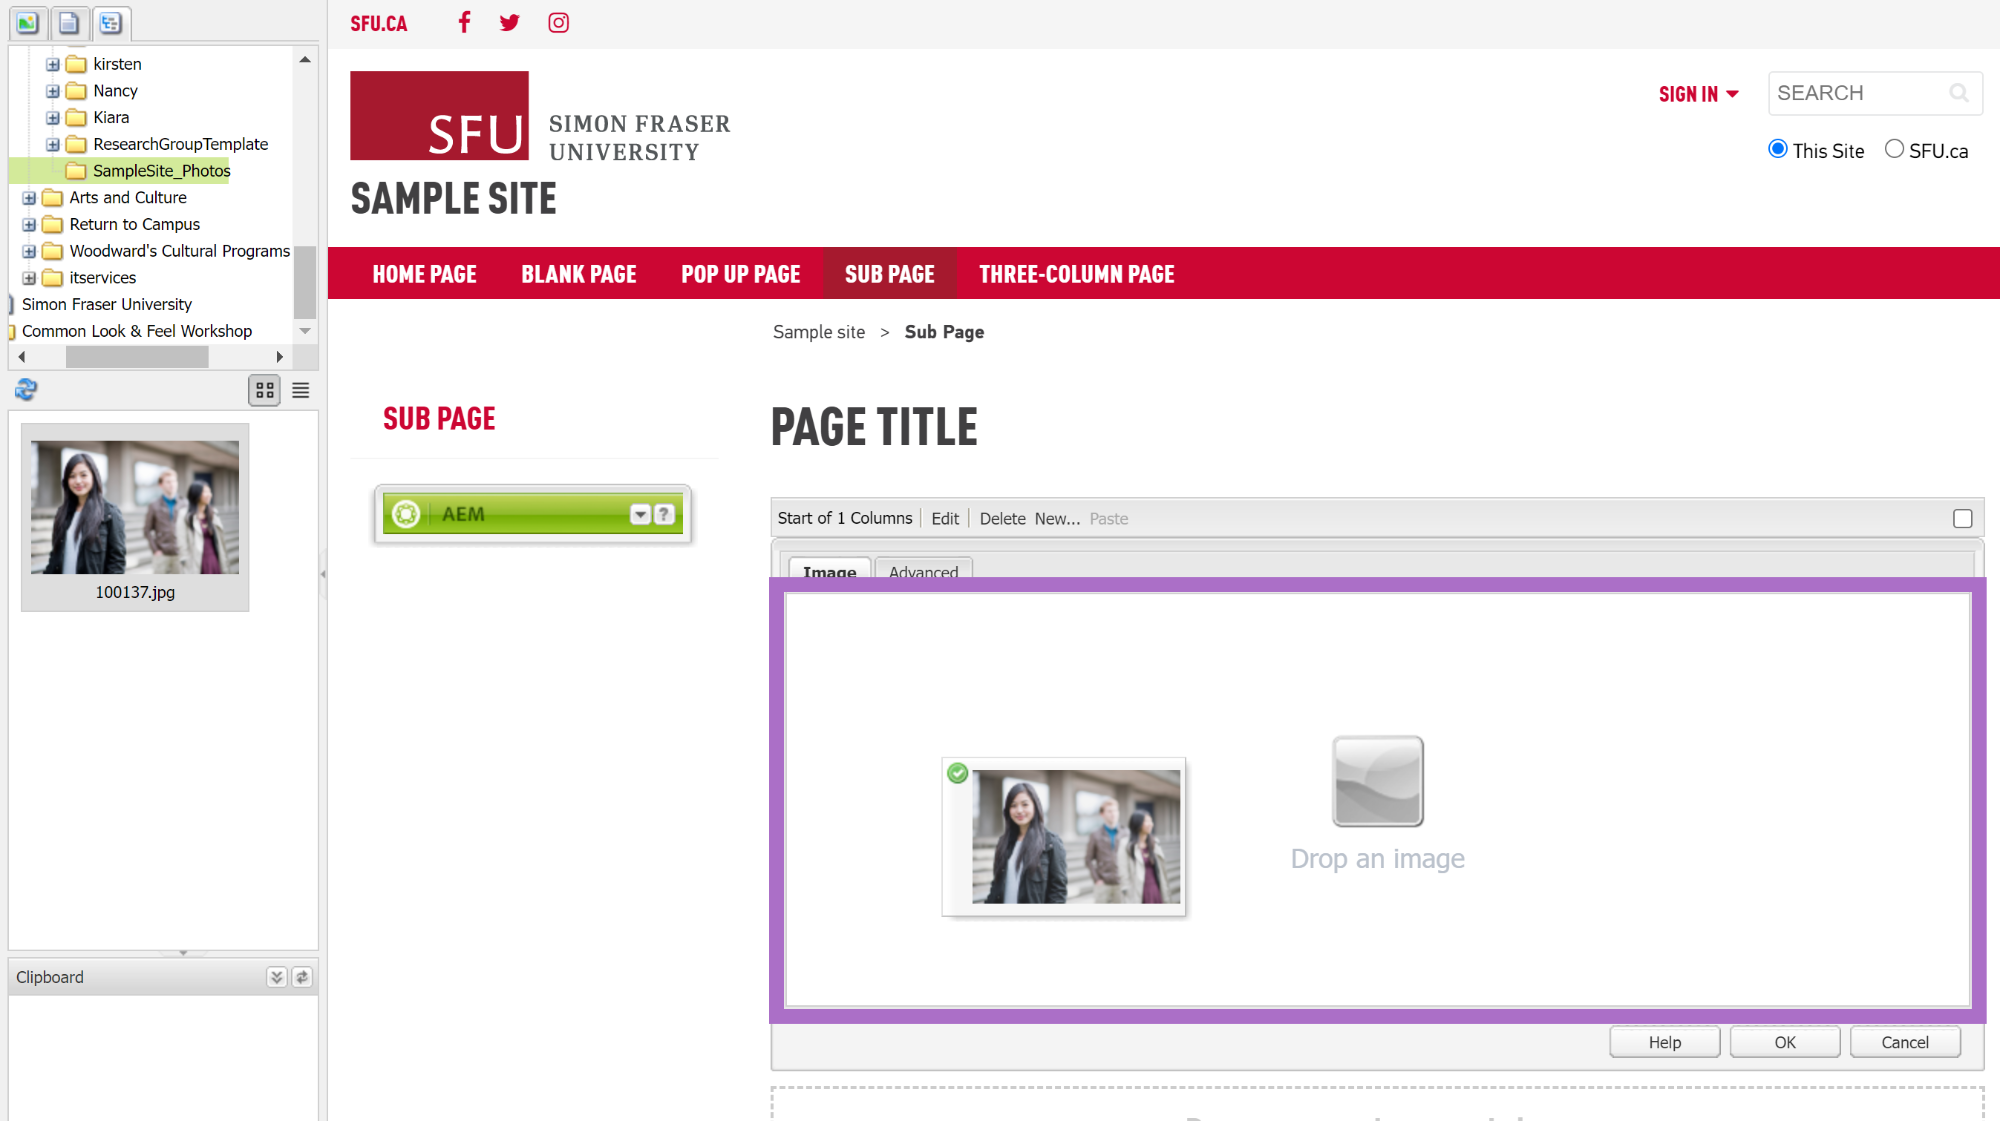
3. Add image from DAM to image component
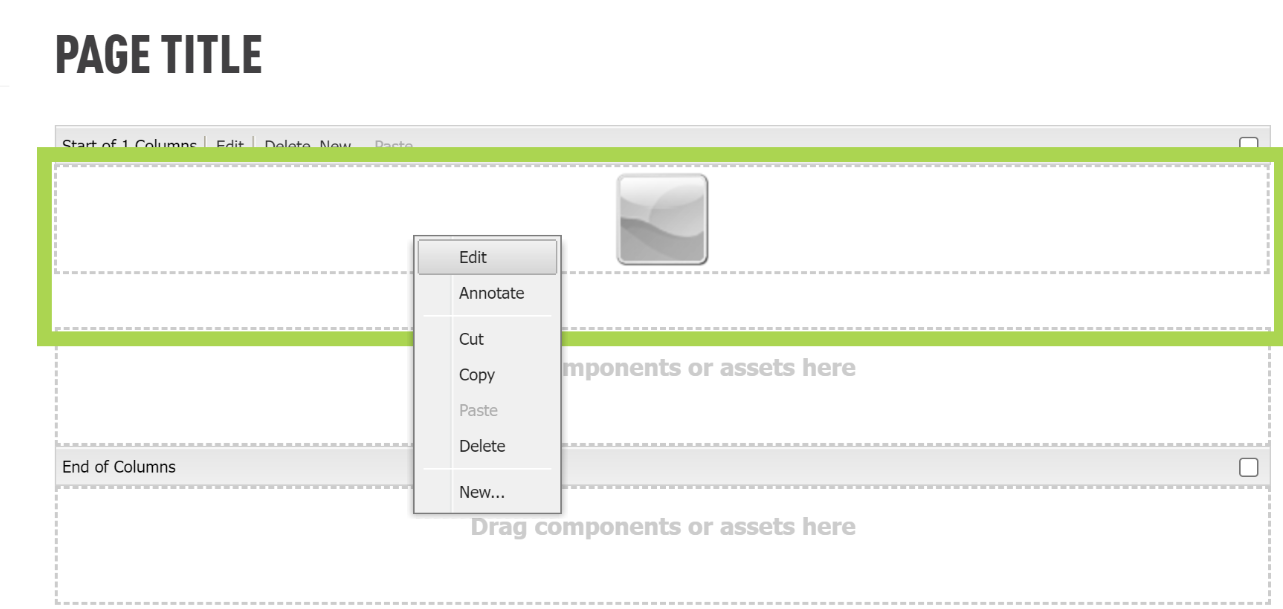
- a. Edit the component
- b. Find the photo you uploaded from the DAM. Navigate to your image folder from the browse tab. When you have located the image drag it into the image area. The image area will turn purple when dragged over the correct area.
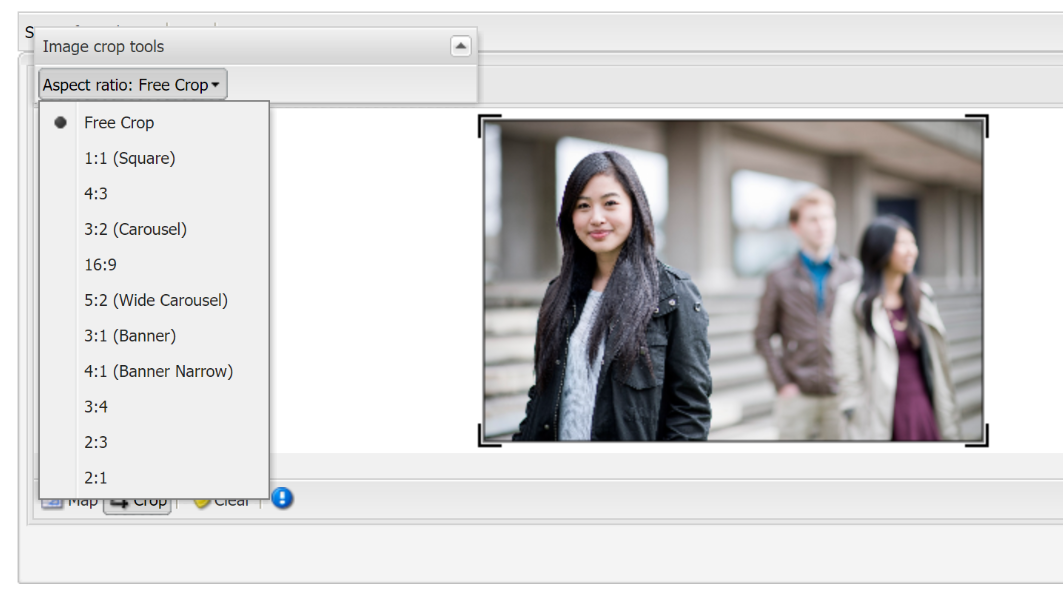
- c. You can crop the image by selecting the crop tool. The cropping tool provides a few sizing options. Select each size to see a preview of the crop. The crop size can also be modified by dragging on the corner of the crop marks.
- Free crop
- 1:1 square
- 4:3
- 3:2
- 16:9
- 5:2
- 3:1
- 4:1
- 3:4
- 2:3
- 2:1
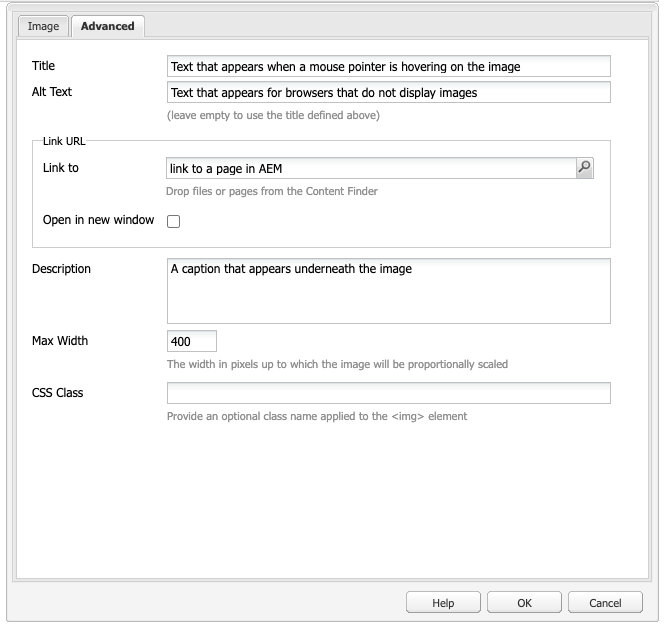
4. Add in image details, under Advanced tab
Title - Text that appears when a mouse pointer is hovering on the image
- Alt Text - Text that appears for browsers that do not display images. If left blank, it will use any text that is entered in the Title field.
Alt tag will display when the image cannot load. It’s best to include a description of the image for accessibility.
Link to - Add a link to a file or page in AEM
Description - A caption that appears underneath the image
Size - Sets a maximum width or height for images. Important note: do not put a size value in both of the size fields as it will distort your image on the published website. Instead, set either a maximum width (first field) or maximum height (second field).