Mailing List Subscription Form
The Form Container component can be utilized to create a mailing list subscription form. Visitors can simply enter their email address to subscribe to a pre-defined mailing list.
Please familiarize yourself with creating a form and sending a confirmation and notification before continuing.
Note: Please consider the SFU Maillist Policies and Etiquette and subscription options when creating a new mailing list. Subscribers with non-SFU email addresses will not be able to unsubscribe without contacting the maillist owner.
Modify the maillist_subscription.txt
Open the text file, find "listname" and replace it with the name of the mailing list the form submitter will be subscribed to.
Note: Do not modify the From and Subject fields. Formatting for the To field needs to follow listname-request@sfu.ca where listname is the name of the mailing list.
From: <${email}>
To: listname-request@sfu.ca
Subject: Subscribe
The original maillist_subscription.txt file.
From: <${email}>
To: sfu-news-request@sfu.ca
Subject: Subscribe
The modified maillist_subscription.txt file, which subscribes you to the "sfu-news" mailing list.
Save the maillist_subscription.txt as a plain text document after making the changes.
2. Uploading the email template to the DAM
Upload the modified email template to the DAM and activate it.
Create a form and insert a Text Field component into it. Ensure the Text Field component's Title is "Email", otherwise the email address data will not be passed to the email template.
For more information on how forms pass data to email templates, visit How the Email Template Works.
4. Configuring the form
Complete the following steps to configure your form and email template:
- Click the Edit button located at the top of the Form Container component next to the Start of Form marker.

- Ensure the Store and Mail Content option is selected from the Action Type drop-down.
- Click the Add item + button in the Email Template Path field.

- In the new field, click the magnifying glass icon to navigate to the email template you uploaded to the DAM. Click OK.
5. Testing and activating the page
Preview the form to check it's been created correctly by filling out and submitting it. Enter your own email address into the text field and see if you receive a confirmation email. If you don't receive a confirmation email, double-check the email template was modified correctly and that it is attached to the Form Container component.
After testing, activate the email template and page containing the form to make it live.
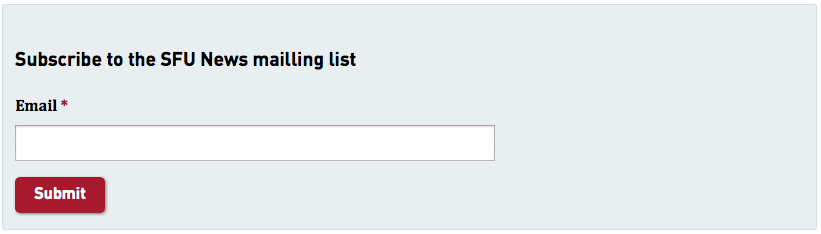
Example of a Finished Form