Mailing the Form
The following instructions are specific to the Form Container component using the Mail To option.
The Mail To option emails each submission as it is completed to a specified email address, and is useful for handling form data individually, i.e. each submission as it is received. Also it allows files to be attached to a form submission using the File Upload component.
Complete the following steps to configure your form to email its data:

Click the Action Type drop-down menu and select the Mail To option.
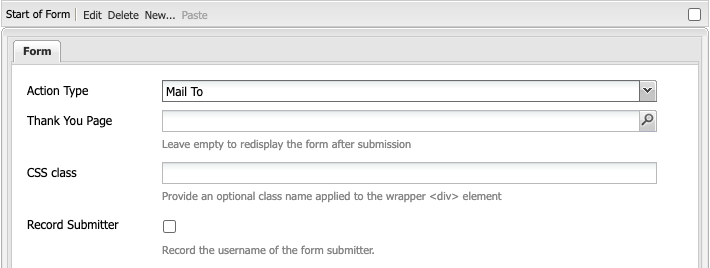
2. Configuring "Mail To" form
- Thank You Page - point the form to a page confirming a successful submission. On form completion, the user will be taken to this page. Find out more >
- CSS class (optional) - in CLF4, you can add a background colour to your form using the predefined block classes.
- Record Submitter - captures the SFU ID of the user completing the form. This data is only captured when the form is placed on a page with restricted access. The “Submitter” value will be automatically included in the submission email.
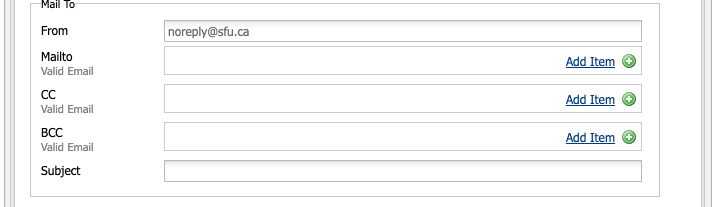
When setting up the Mail To properties, only the From and Mailto fields are necessary to send the form data.
Form Sender
In the From field, enter the email address that the email should come from, e.g., cq-form@sfu.ca.
Form Receiver(s)
In the Mailto field, enter the email address(es) to receive the form submissions, e.g., your email. Enter additional email addresses in the CC and BCC fields as necessary.
Note: Click on the plus [+] and minus [-] symbols to add or delete fields to the Mailto, CC, and/or BCC sections.
Form Identifier
In the Subject field, enter a descriptive subject to enable the person receiving the form submissions to easily identify the form. This is particularly helpful when working with multiple forms simultaneously.
Before clicking OK, check that you have entered valid email addresses in the From, Mailto, CC and BCC fields. The form will not work if any of these fields contain invalid email addresses.
3. Testing the Form
Go into Preview mode, fill out and submit the form to make sure the form data is successfully received. If the form data isn't received, check and ensure the email address(es) in the Form Container component's properties are valid.
Warning: you will not be able to retrieve submitted forms if an invalid email address is entered in the Form Container component's properties.
4. Activating the Page
Lastly, activate the page to make it accessible online. There is the option to Schedule Activation and Deactivation for pages, which is useful for making a form only available within a specified time frame.