Sending a Confirmation and Notification
The instructions below are specific to the Form Container component using the Store and Mail Content option.
The Send Confirmation and Notification feature requires two email text templates: one for sending a confirmation email to the form submitter, and the second for sending a notification email to the form owner.
Upon submitting a form, three actions occur:
- the submission is stored within AEM's Bulk Editor for future reference
- the submitter is notified via email that their submission has been received and is provided with a copy
- the form owner is notified via email of a new submission
How to setup the Send Confirmation and Notification feature
2. Creating two email templates
The email templates will be attached to the form and will direct the action of the submitted form content. You will create two email templates which will:
- thank the submitter and provide a copy of their submission as confirmation
- notify the form owner of a new submission.
How Email Templates Works
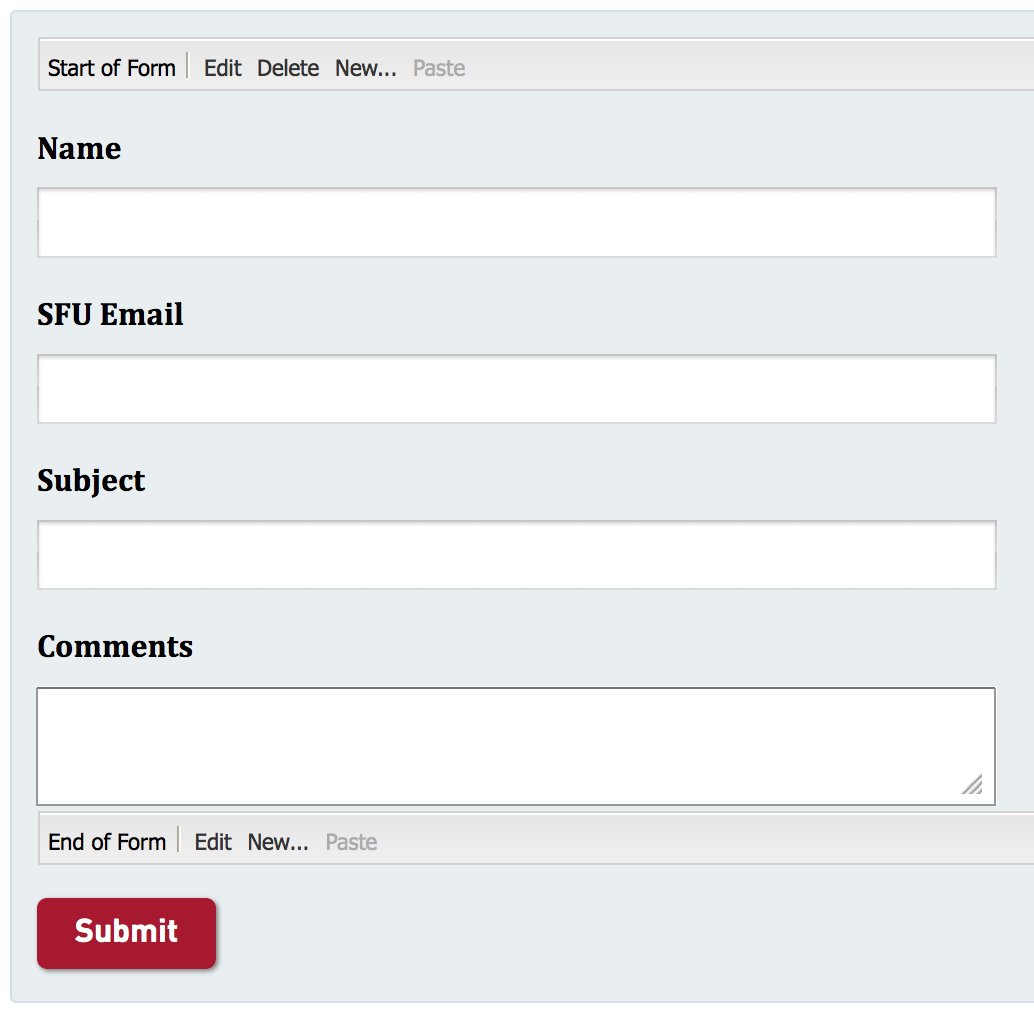
Every time a form is submitted, AEM takes the data from the form submission, inserts it into the template, and generates the email. To insert the form data into the email template, variables are used. Each variable corresponds to a form component. For instance, a form submission with "John Doe" entered into the Name field (which is a Text Field component) would replace every instance of "${name}" with "John Doe" in the email template.
From: kipling@sfu.ca
To: "${name}" <${sfu-email}>
Subject: Thank you for your comments!

${name},

You have submitted the following comments:
"${raw comments}"

Regards,
Rudyard Kipling
This email template contains four variables, which are highlighted in blue. The ${name} variable is repeated twice.
Variables work by using the form component's Name property. Specifically, each variable is constructed from a form component's Name wrapped in curly braces, with a $ symbol at the front. For example, the SFU Email field (created using a Text Field component) has the Name "sfu-email", so the corresponding variable would be "${sfu-email}".
When "raw" is included within a variable, it retains line breaks in multi-lined paragraphs. This is useful for variables corresponding to Text Area components. In the submitter confirmation email template, only one variable, "${raw comments}", uses this feature.
A form component's Name can be viewed in the component's properties. The Name is automatically generated by the Title property. Every time the Title changes, the Name will also change to match it.
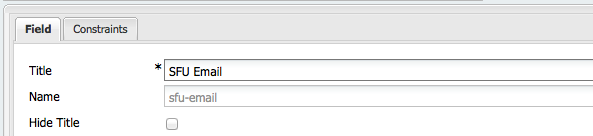
The Title, and Name properties of the SFU Email field.
Note: If your form has the "Record submitter” option selected, use the ${submitter} variable to display the captured value in an email.
a. Create a Submitter Confirmation Email
Download the submitter email template by right-clicking the link below and selecting Save Target As... or Save Link As...

Open the email template with a text editor like Notepad for Windows or TextEdit for Mac. Inside you will find the following:
From: [form owner's email]
To: "${name}" <${sfu-email}>
Subject: Thank you for your comments!

${name},

You have submitted the following comments:
"${raw comments}"

Regards,
[form owner's name]
Replace "[form owner's email]" and "[form owner's name]" with your email address and name respectively. Save the email template. The final email template should look similar to the example below:
From: kipling@sfu.ca
To: "${name}" <${sfu-email}>
Subject: Thank you for your comments!

${name},

You have submitted the following comments:
"${raw comments}"

Regards,
Rudyard Kipling
b. Create an Owner Notification Email
Download the owner notify email template by right-clicking the link and selecting Save Target As... or Save Link As...
Open the file and replace "[form owner's email]" with your email address. Save the email template. The final email template should look similar to the example below:
From: "${name}" <${email}>
To: kipling@sfu.ca
Subject: Event Feedback

comments: ${raw comments}
3. Uploading both email templates to the DAM
Upload the two email templates to the DAM and activate them. See here for instructions for uploading files to the DAM.
4. Configuring the form
Complete the following steps to configure your form with both email templates:
- Click the Edit button located at the top of the Form Container component next to the Start of the From marker.

- Click the Add Item + button in the Email Template Path field.

- In the new field, click the magnifying glass icon to navigate to the submitter confirm email template in the DAM. Click OK.
- Repeat steps 2-3 for the owner notify email template.

- Save the changes by clicking OK.
5. Testing the Form
Go into Preview mode, fill out and submit the form to make sure the form submitter and creator receive the confirmation email. If the confirmation emails aren't received, ensure the email template text files are written correctly. See Troubleshooting, below, for more information.
6. Activating the page
Lastly, activate the email templates and the page containing the form to make it live. There is the option to Schedule Activation and Deactivation for pages, which is useful for making a form only available within a specified time frame.
Upon submission of my form, I'm not receiving confirmation and/or notification emails. What can I do?
Check that you've entered a valid SFU emails in the "To:" field of your email template. If you've entered an invalid email, you will not receive an error notification.
I have set up my form to email a mailing list. Upon submission of my form, members of the mailing list are not receiving notification emails. How do I make it so that members do receive notification emails?
In order to send notification emails to members of the mailing list, you must change the sender restriction setting. To do this, complete the following steps:
- Sign into maillist.sfu.ca.
- Go to your mailing list.
- Click the Maillist members tab and ensure the Deliver to User option is enabled for all members. Members who don't have this option enabled will not receive emails sent to the mailing list.
- Click the Sender restrictions tab.
- In the Sender Policy for SFU Users section, uncheck Restricted Sender. Now when the mailing list receives a notification email from a SFU email address, it will be forwarded to the members.
- If your form is also sending notification emails from non-SFU email addresses, you will need to uncheck Restricted Sender in the Sender Policy for Non-SFU Users section. Be aware that anyone can send an email to the mailing list now.
- Save the changes by clicking the Save Changes button at the bottom.