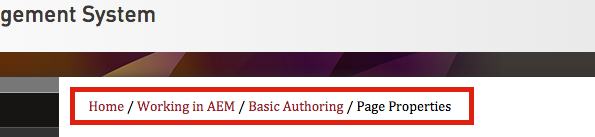
Page Properties
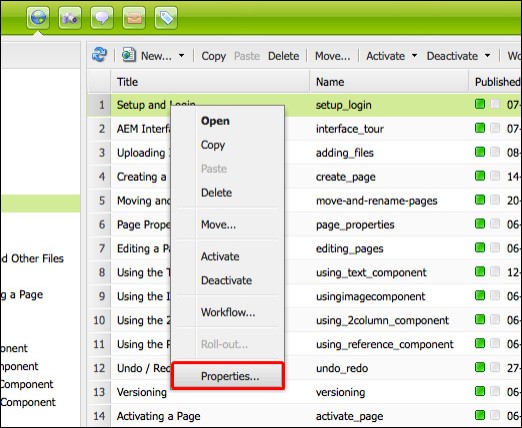
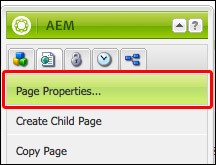
Page Properties... can also be accessed via the button on the page tab of the sidekick in the Editing Window.
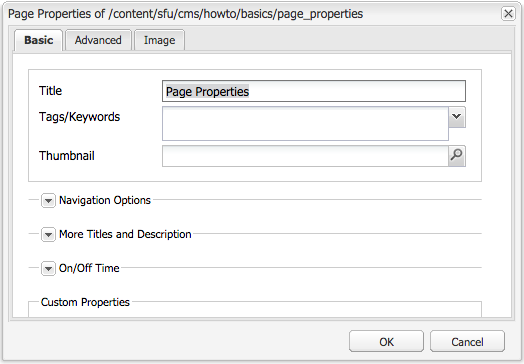
After accessing the page properties there are options for changing the Title, assigning Tags/Keywords, and adding a Thumbnail.
Note: It is possible to change the name (URL) of the page by selecting it in the WCM right panel and clicking the Move button. Go to renaming a page for more details.
Editing the Title
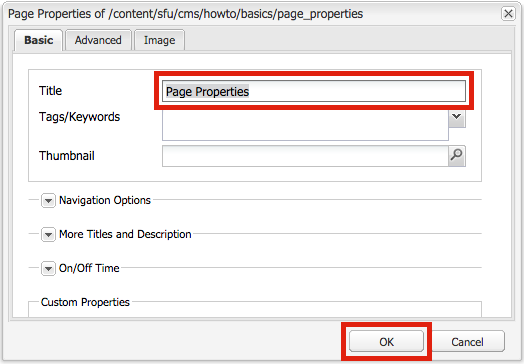
The title should reflect the content on the page. It is the text that will show if you use the Title component.
Note: Changing the title does not change the URL. To change the URL you must rename the page.
Open the page properties. In the Title text field, enter the title then click OK. The title of your page will change immediately.
Navigation Options
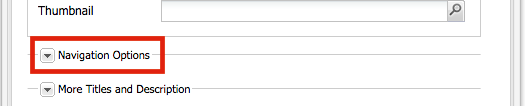
The way links are displayed in the navigation bar can also be changed. Click the arrow beside Navigation Options to access more options.
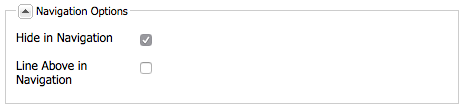
Hide in Navigation
By checking this box, the page will no longer appear in the navigation bar.
Line Above in Navigation
By checking this box, a thicker line will appear above the page in the navigation bar. Use this option when you have many top-level pages in your site that should be grouped.
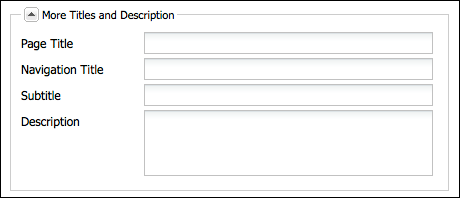
Page title
The Page Title field can override the Title that appears in the in the Title Component.
Note: To change the title at the top of the browser's window/tab, modify the Title field. Go to editing the title for more details.
Navigation Title
The Navigation Title field overrides the link title that appears in the navigation bar.
Desctiption
The Description content can be displayed in a List and Carousel components and acts as meta description in search results.
In CLF4, content added to the Page Title and Description fields will be used in link previews on social media.
If these fields are left empty, title of the page and text from the first paragraph will be use in social media link previews.

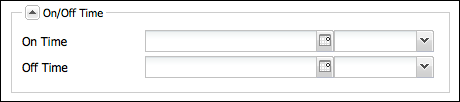
On Time
On Time schedules the date and time at which the page will be published. Once the On Time date and time have been added, activate the page. The page will only be published at the scheduled time. If you page was previously active, it will be deactivated until it's scheduled On Time. Leave these fields empty for pages you want to publish immediately (the normal scenario).
Off Time
Off Time schedules date and time at which the published page will be deactivated.
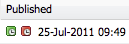
Below is an image of the Published column in the WCM for a page that has a set on/off Time. Clock icons over the green and red squares indicate that the page has a scheduled publication/activation time.

Using the Redirect Field to Link to External Site in the Left Navigation
To link to an external site in your left navigation menu, first create a dummy page in the WCM with a Title and Name. This page has no content.
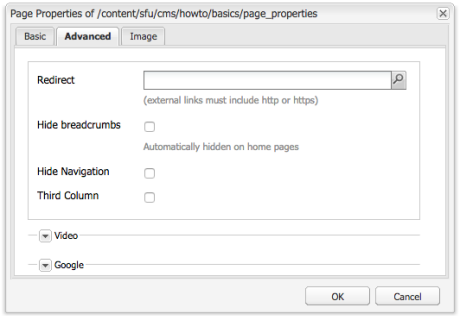
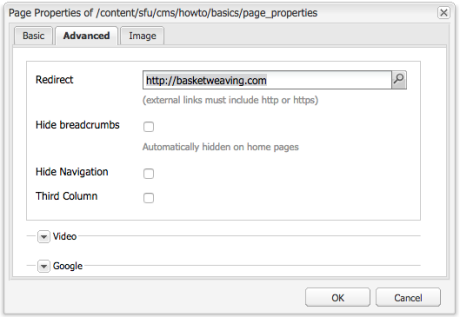
Once the dummy page has been created, go to the dummy Page Properties and find the Advanced tab.
In the Redirect field, type in the URL that the page will link to. Be sure to include http:// or https:// at the beginning, then click OK.
Using the redirect field to create a short URL for a page within your site
To create a short link for one of your webpages, first create a dummy page in the WCM with a Title and Name. Ensure that the page is created at the top level and its Title matches the URL you're trying to create. This page has no content.
Once the dummy page has been created, go to its Page Properties and find the Advanced tab. In the Redirect field, use the magnifying glass to navigate to the page you want to redirect to.
Next, go to the Basic tab, expand the Navigation Options section, tick the Hide in Navigation option, then click OK.
Activate the page to publish the short URL with its redirect.
OPTIONAL - you can choose to change the dummy page's Title to "Redirect to x page" to clarify what this page does. This will not affect your previosuly specified short URL.
More options
Hide Breadcrumbs
This option hides the breadcrumbs on the page. Breadcrumbs are located at the top of the page.
Hide Navigation
This option hides the navigation bar.
Third Column
This option creates a third column on the right side of the page. By checking this button, the page becomes a Three Column Template page. For more information on the AEM templates, please visit the Template Gallery.
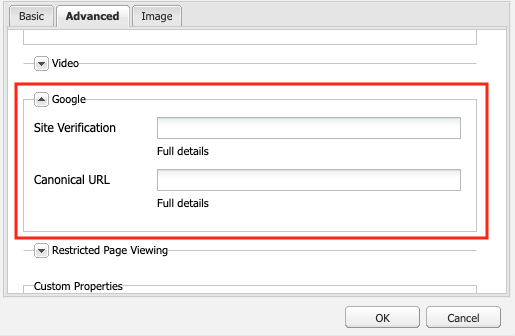
Click on the arrow next to Google to expand the section.
Here, you can verify your site or add a canonical URL.
Website statistics are tracked centrally by the Communications & Marketing team. To request a Google Analytics 4 Dashboard for your site, complete the Google Analytics Support form in the ServiceHub.
For meta description, use the "Description" field in the "More Titles and Description" section on the "Basic" tab.
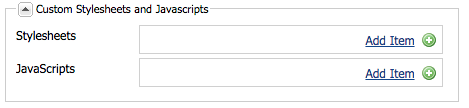
Custom Stylesheets and Javascripts
Click on the arrow next to Custom Stylesheets and Javascripts to add your custom stylesheets and scripts. Note that these will only be applied to this single page. To add site-wide CSS or JS files, see Site Configuration.
Click on Add Item to upload your css/js file from the DAM.
Horizontal template
This option is not available in the horizontal template to ensure consistent user experience across all SFU websites. Please contact Communications & Marketing to discuss other options.
Restricted Page Viewing
At the bottom of the Advanced Section is the Restricted Page Viewing section, where authors can set a page to be restricted to a subset of SFU Computing IDs. Contact your Site Admin before setting up Restricted Page Viewing.

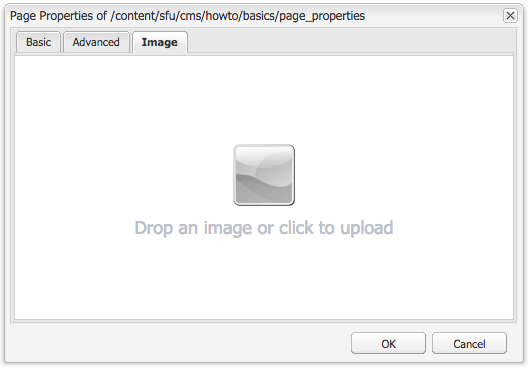
In CLF4, the image added to the Image tab will be used in link previews on social media.