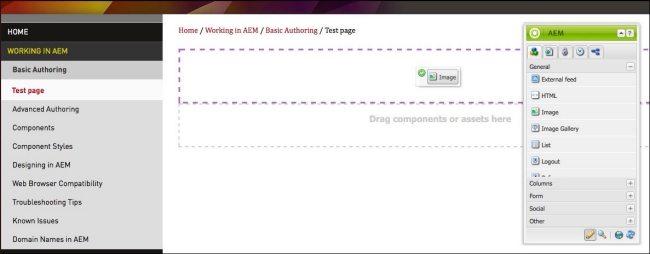
Using the Image Component
From the Sidekick, drag and drop the Image component onto your page.
Search for the image you wish you add to your page in the Content Finder.
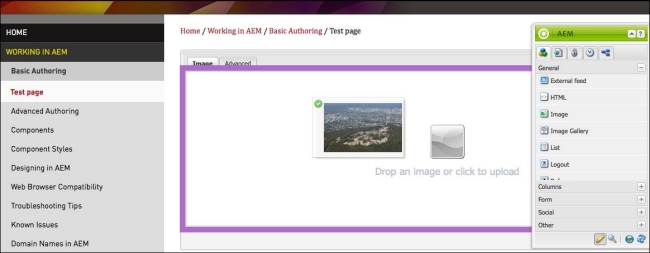
Double-click on the Image component to open the menu for adding images. You can also skip this step and drag the image directly from the Content Finder onto the component, without the need to double-click. This will also trigger the in-component editing.
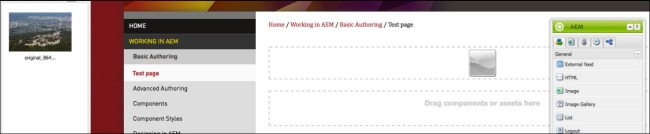
Drag and drop the image from the Content Finder into the Image component.
Note: Uploading images from within the Image component is not recommended unless you wish to restrict viewer access. Files uploaded this way are only attached to the page, and cannot be found or reused using the Content Finder or the Digital Asset Manager.
After dropping the image into the component, you may use the editing options on the bottom to crop, or create an image map. You can remove or change the image by clicking Clear.
To map an image, click Map. Then select how you want to create the image map (rectangle, polygon, and so on) and specify where the different areas of the image should link to.
The image can be cropped by clicking the Crop button and adjusting the corners of the crop area. If you need to crop the image to a specific aspect ratio, such as 4:3, use one of the predefined options in the Aspect ratio drop-down. This drop-down is located within the Image crop toolbar, which appears when the Crop button is clicked. The predefined options are useful for ensuring a group of images have the same height and width.

Image crop toolbar with predefined aspect ratios.
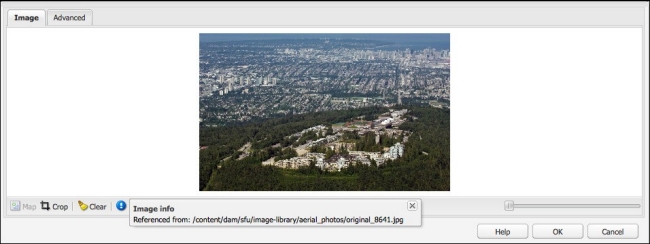
The Info button (the exclamation point) tells you where the image is referenced from.
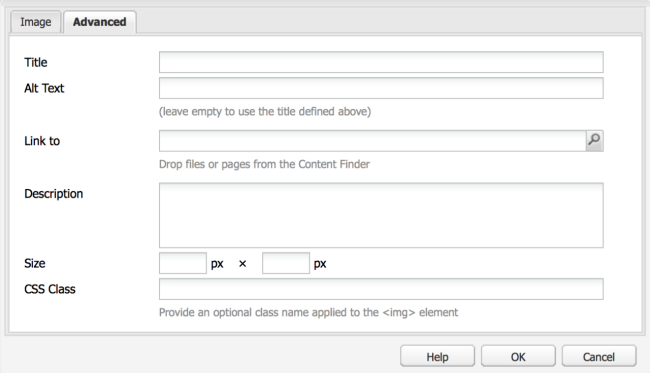
The Advanced editing tab can be used to give the picture a title and alt text which adds information and accessibility. If the alt text is left blank, AEM references the text entered in the Title field and use it for alt text.
You can also use the Advanced editing tab to add a link, only to other pages in AEM. If you wish to display a caption with the image, type it in the description field.
The size option can be used to define a maximum width or height of an image. This feature is particularly useful if an image container is too large and the image is occupying too much space.
Note: Only enter either a width or height value to prevent the image from being stretched.
Other details and tweaks can be made using the CSS class field, which you can read more about in the Component Styles section.
If you are satisfied with the image as it is, click OK. The image has now been added to your page.
