Calendar Component
The calendar component allows you to display public events on your AEM website using a feed from an SFU Exchange Online calendar. Note that your Exchange calendar must be set to 'Public' in order to display it using the AEM Calendar component.
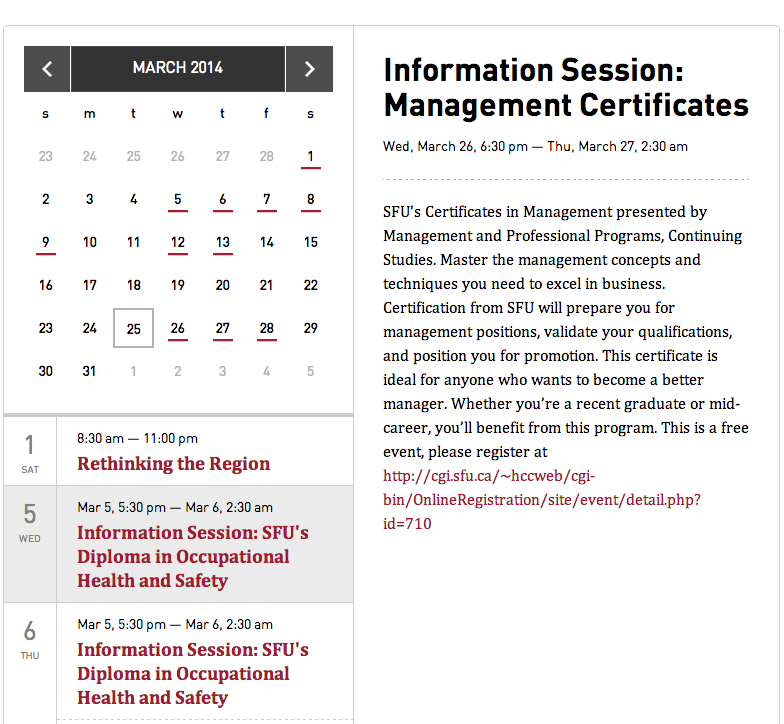
On the left hand side of the interface, the Calendar component displays the monthly grid at the top and the event list for that month at the bottom. The right hand side displays the upcoming event or any user-selected event from the event list.
Clicking on any day with an event on the calendar grid filters the event list below to show only the events within the selected day.
Using the Calendar Component
To use the Calendar Component, you will first have to get the feed URL of the SFU Exchange Online calendar. This is the address where you can view the public events of the calendar.
Following the migration from SFU Mail (mail.sfu.ca) to SFU Exhange Online, you will need to configure your calendar and generate a new URL for the AEM Calendar Component.
Making the calendar public
In order for your calendar to be displayed on a public webpage, follow the instructions on how to publish your calendar: https://support.microsoft.com/en-us/office/share-your-calendar-in-outlook-on-the-web-7ecef8ae-139c-40d9-bae2-a23977ee58d5
Adding events to your calendar
The next step is to create events in the shared calendar. A sample entry is displayed below.
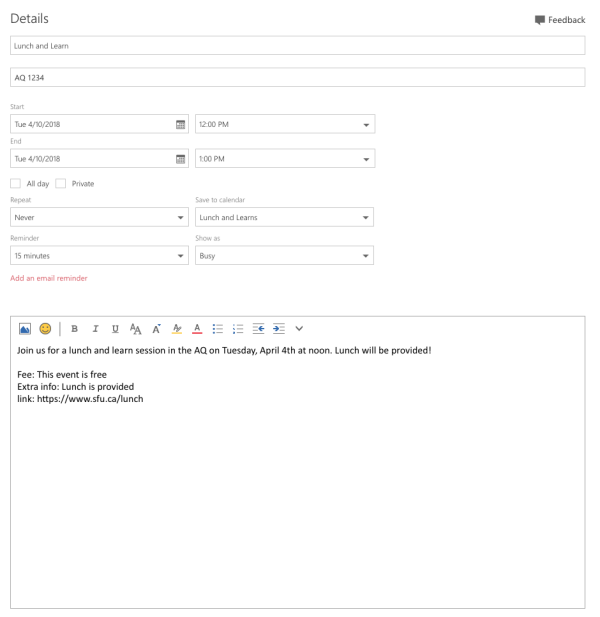
By default, an SFU Exchange Online calendar event should include a subject, date, and location. Additional details from your event can be formatted to stand out, such as fees, dress code, and presenters. Each event will include:
- The description – usually a small paragraph explaining the event; and
- Details you would like to highlight. There are two steps for creating details in an event. First, you must press the return key on your keyboard three times after the description. Second, each detail must be entered on its own line and be formatted in the following way:
detail: value
Note: Using "Location" as one of the details will override the entry in the Location field in SFU Exchange Online.
- If you have an event page, you can create a link to it by using the "link" keyword for the
detail, and the event page URL for thevalue. Make sure to include "http://" or "https://" in the URL. For example, use https://www.sfu.ca instead of www.sfu.ca. This URL will be hyperlinked in the event title and will be shown as a More Info button the user can click to visit the event page.
Example of a details section.
Fee: This event is free
Extra info: Lunch will be provided
link: https://www.sfu.ca/lunch
- Open the page in the Editing Window.
- Under the Social tab in the Sidekick, drag and drop the Calendar component onto the page.
- Right-click the Calendar component and select Edit.
- In the URLs field, paste the URL you copied to your clipboard. If you need to add more calendars, click the Add Item button and enter its View URL in the newly created field.
- Click the OK button to save the changes. The page will refresh and the calendar events will appear.
Troubleshooting Tips
If you are having trouble displaying events, the SFU Exchange Online calendar is probably not publicly shared. Please contact the calendar owner and have them change the sharing settings.